
DIY Ghost in the Mirror Trick-Video
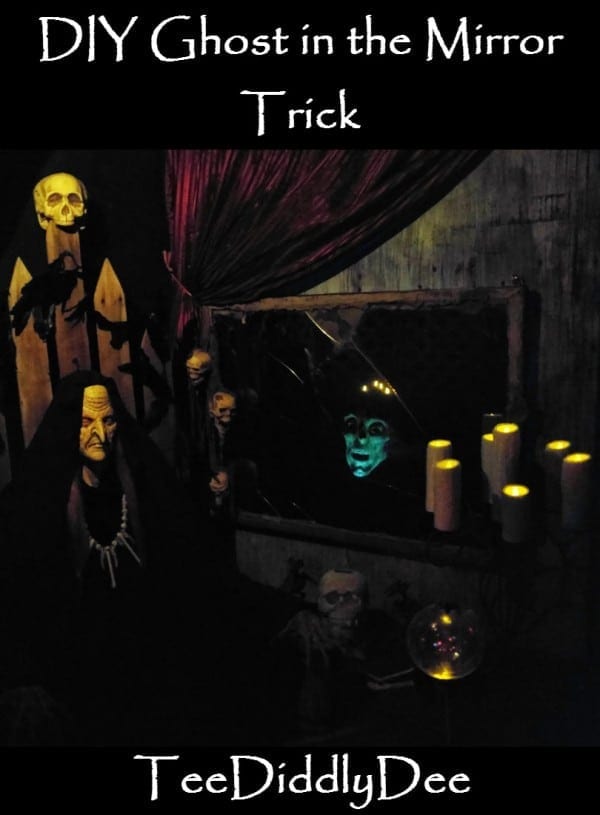
DIY Ghost in the Mirror Trick
You may recognize this awesome trick if you’ve been through the famous Disneyland Haunted Mansion. Aside from being one of my most favorite tricks to include in my Halloween home haunts, the ghost in the mirror (also known as the transparent mirror) trick has also been one of my longest running effects at my haunts, going on 2o years now.
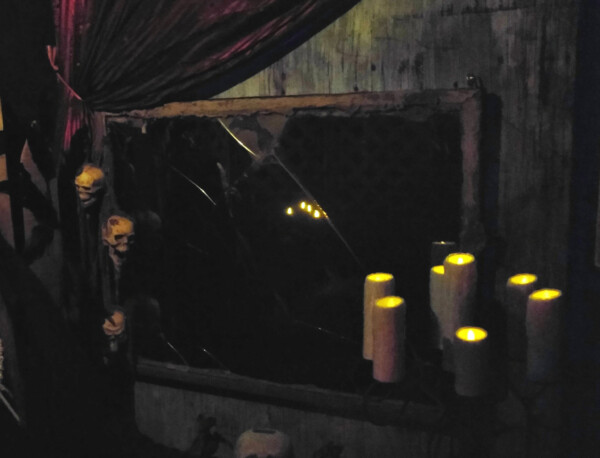
My transparent mirror actually has a lot more character now than it did all those years ago when I first made it. Since then, a lot of the decorative, goopy-looking monster mud that I smeared along the edges of the frame for a more ‘icky’ appearance has chipped and cracked off, giving it even a more dilapidated look. Also one year, the glass was accidentally broken and I was planning on replacing the glass…but then decided that the cracks actually made it look scarier, so I left it alone. That’s the beauty of Halloween, the older and more weathered-looking it is, the better the effect!
My Haunt
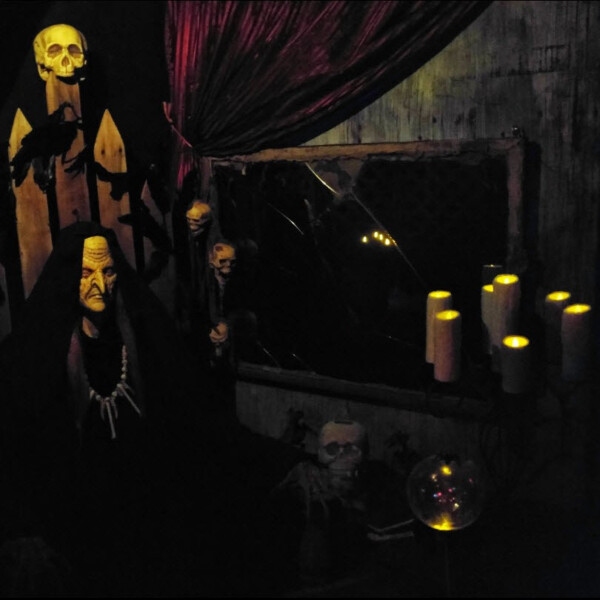
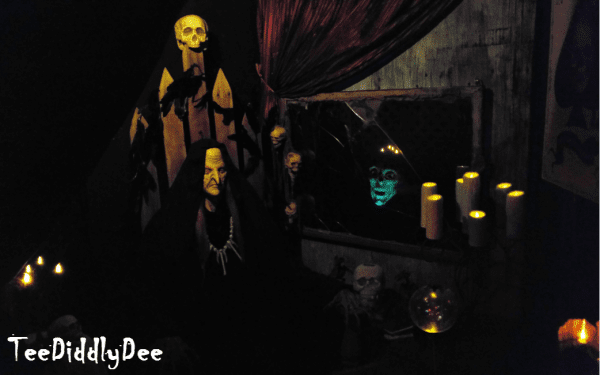
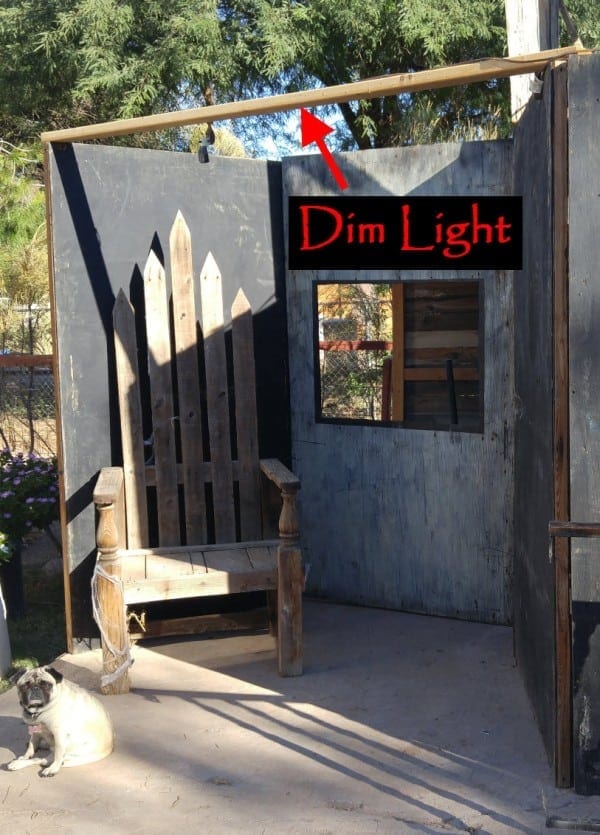
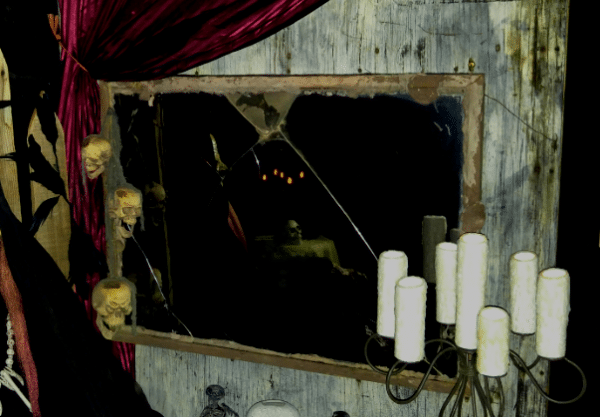
As you can see in the pic below, my trick-or-treaters would walk up to a séance room with a creepy-looking witch waiting for the next brave soul to come along to have their fortunes told. An old, cracked mirror hangs next to her on the wall…
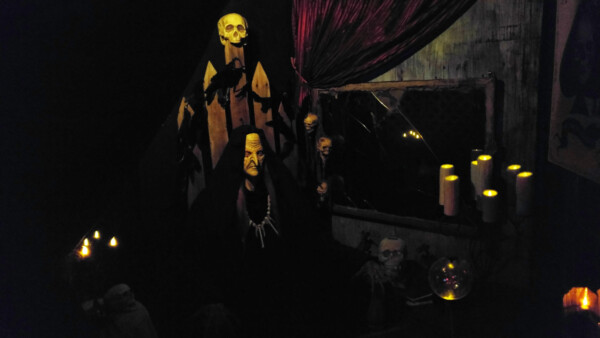
After a moment or two, the lights in the front room are dimmed and an eerie apparition of a ghost begins to appear in the mirror…
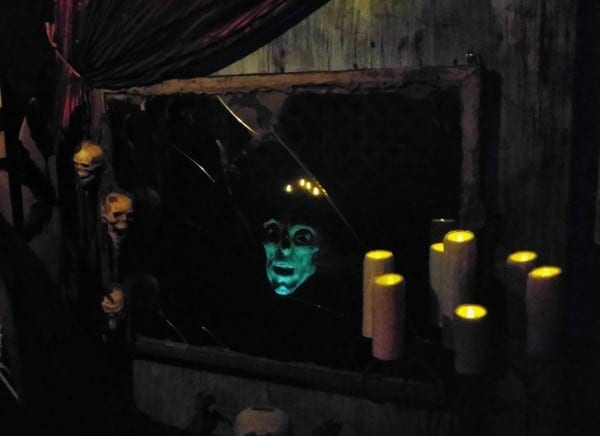
This trick never gets old!
How it works:
Basically as the light fades, and there is a black light shining on a mask behind the mirror that shows through.
DIY Ghost in the Mirror Trick Tutorial
Tools:
- Chop saw (For cutting 2x3s)
- Skill Saw or jigsaw (For cutting plywood)
- Hand drill with bits
- Paint brushes (for painting walls)
Supplies:
Mirror Wall
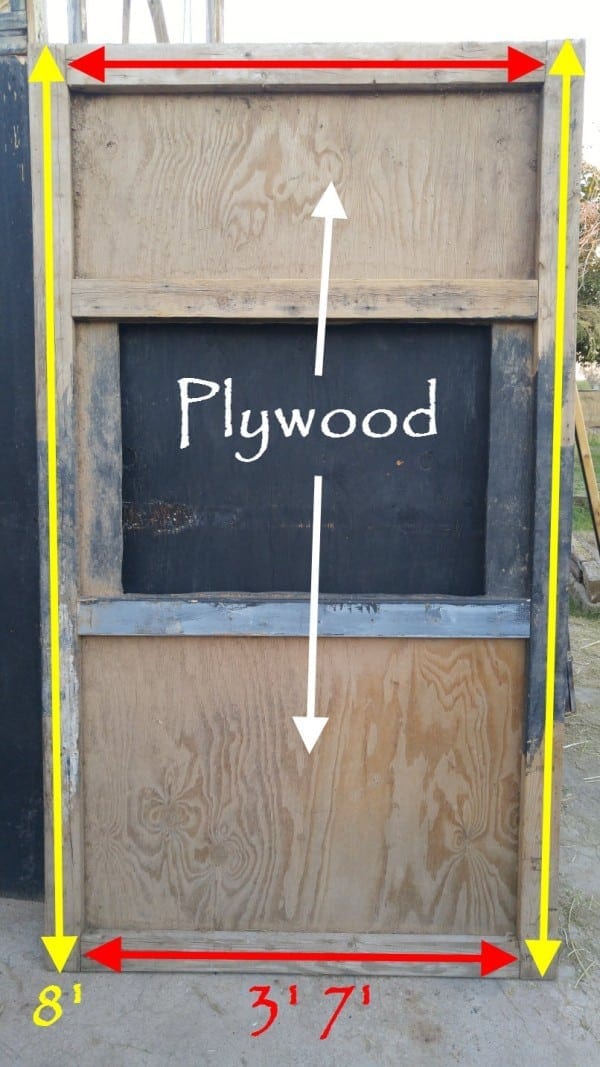
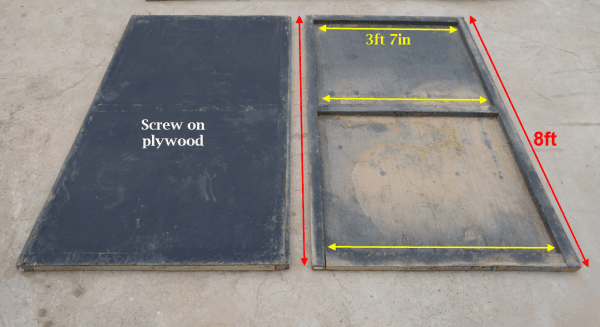
- Two 2x3s at 8ft long (Frame of wall)
- Four 2x3s at 3ft 7in long (Frame of wall)
- One sheet of 1/4in thick plywood at 4ft x 8ft
- Box of 3in wood screws
- Box of 1-1/4in wood screws
- One can black outdoor paint (for painting wall)
- One can white outdoor paint (dry brushing wall after it’s painted black to give wood an old look)
Mirror
- One picture frame with glass
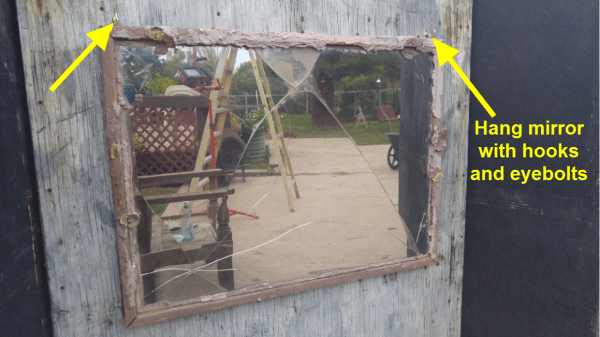
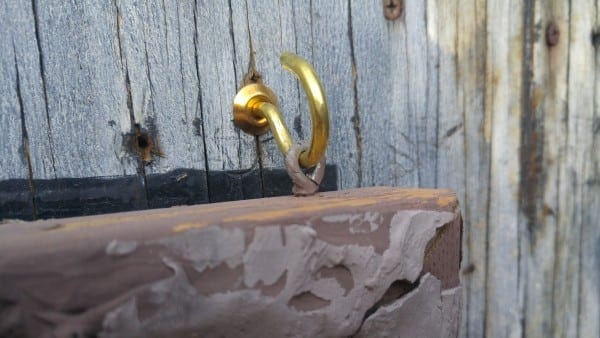
- Picture frame hanging hardware (to hang mirror)-I used 2 small hooks and 2 tiny eyebolts
- Mirror Window Tint kit (found at Home Depot or Lowes)
Note: I have made a new mirror for my Ghost in the Mirror. You can check it out HERE
Lighting
- One Black Light (to illuminate glowing mask behind mirror)
- One Light Dimmer with light (to illuminate the front room that the mirror is hung)-Since I don’t have time to stand by the room and dim the light every time a trick-or-treater passes by, I use a plug in nightlight from the dollar store (painted black) that doesn’t dim. It lights up the room just enough to see the mirror, but not too much so that the mask won’t show through the front of the mirror.
Mask Prop
- Glowing mask –to place behind the mirror and be illuminated by a black light (if you can’t find a glowing mask you can spray paint a regular mask with glowing spray paint, or blue or green fluorescent paint)
- Styrofoam wig head (to hold mask onto stand)-Wig head must be black if mask does not completely cover wig head, to prevent black light from illuminating it.
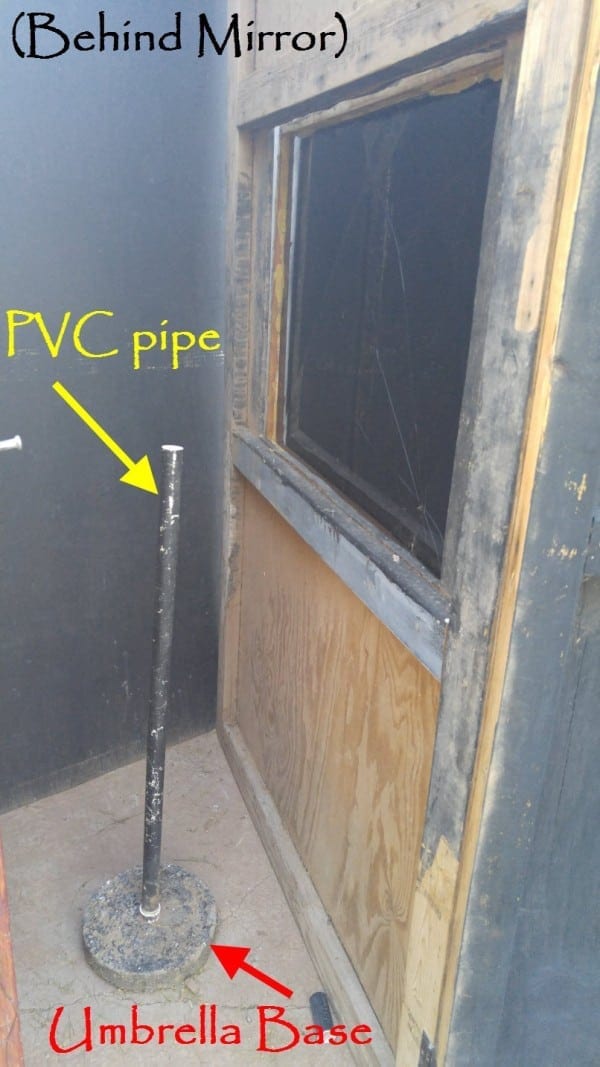
- One umbrella base to use as a stand for the mask (you can make a cheap DIY stand HERE)-if you use a live actor to wear the mask behind the mirror, you won’t need the stand
- One 3/4in diameter PVC pipe at approx. 4ft-5ft long (to stick into umbrella base to hold mask up)-if you use a live actor to wear the mask you won’t need this.
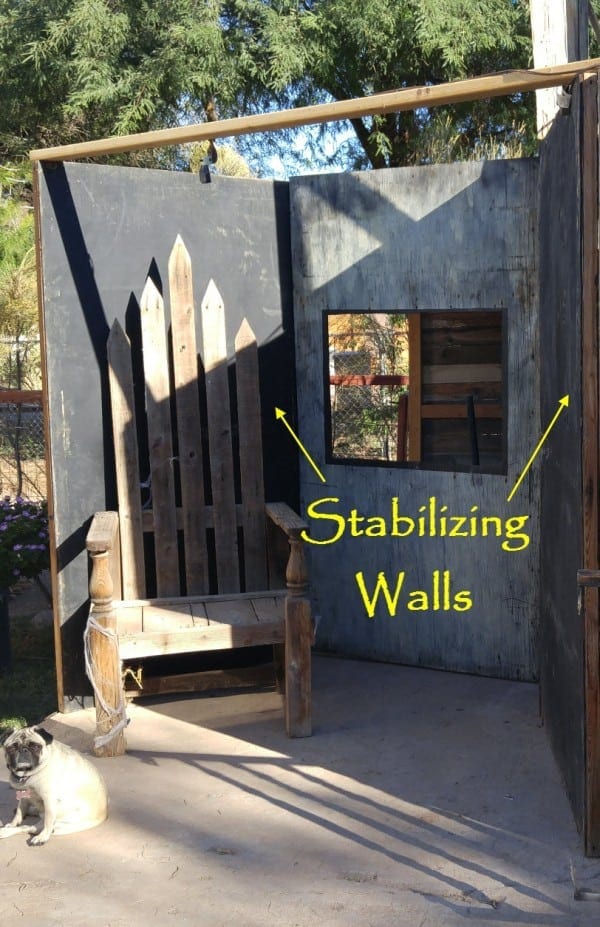
Adjoining Walls for Stability
- Four 2x3s at 8ft long (frame of wall)
- Six 2x3s at 3ft 7in long (frame of wall)
- Two sheets of 1/4in thick plywood at 4ft x 8ft
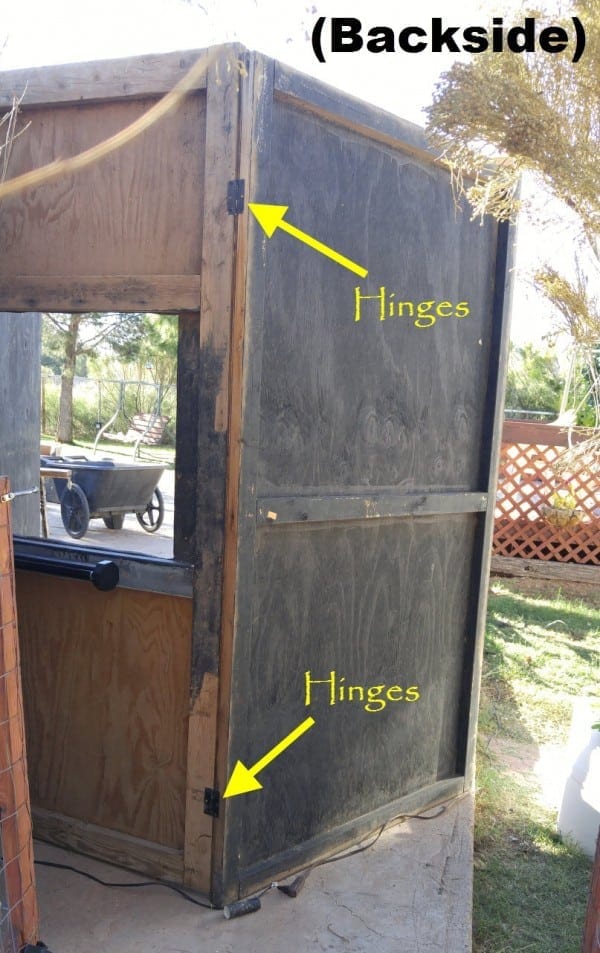
- Four door hinges (for attaching stabilizing walls to mirror wall)
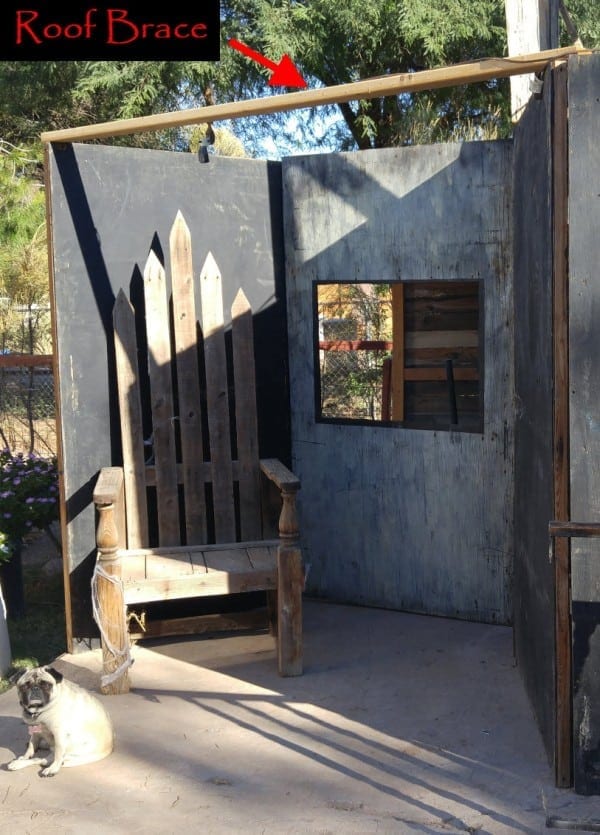
- One 2×4 at 10ft long (roof brace)
I made 3 walls in all for this project…
(One Mirror Wall)
(Two Stabilizing Walls)
Directions:
Making the Mirror:
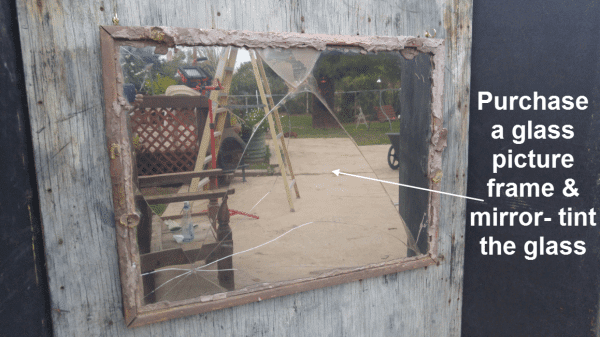
First, find yourself an ordinary glass picture frame (Mine was a large cheap one that I’d found at a garage sale for about $5).
Next, tint the glass with privacy mirror tint. This gives the illusion that the glass is actually a mirror. (You can buy mirror-tinting kits at Home Depot or Lowes and do it yourself, or you can do what I did and have an auto-window tinting service do it for about $25).
Decorating the Mirror:
Note: I have since made another mirror for my “Ghost In the Mirror Trick”. You’ll have to check it out and see my new tutorial on how to make it! You can find my DIY Haunted Skeleton Mirror Here
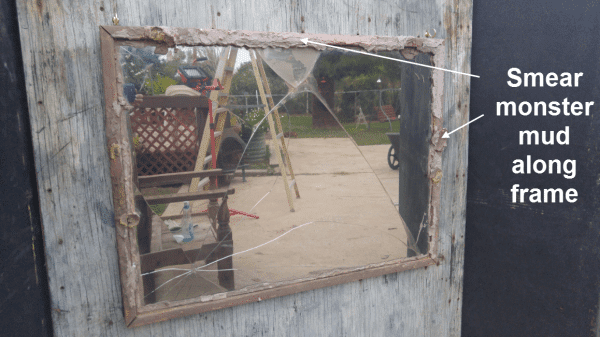
Old, antique-looking frames look great in haunted houses, but mine was just a plain, modern-looking one. To fix this I mixed up a quick batch of monster mud and smeared it all over the frame which gave it an icky, dilapidated look. Monster mud is basically a 5:1 mixture of joint compound mixed with your choice color of exterior paint (I used brown).
Here’s a great video on how to make monster mud by MadCity Haunt:
Now, smear monster much along the frame to make it look old and decrepit.
Or…you can decorate it as a skull mirror, like the new one I made to replace this one. You can find my DIY Haunted Skeleton Mirror, which I am now using for my Ghost in the Mirror Trick HERE.
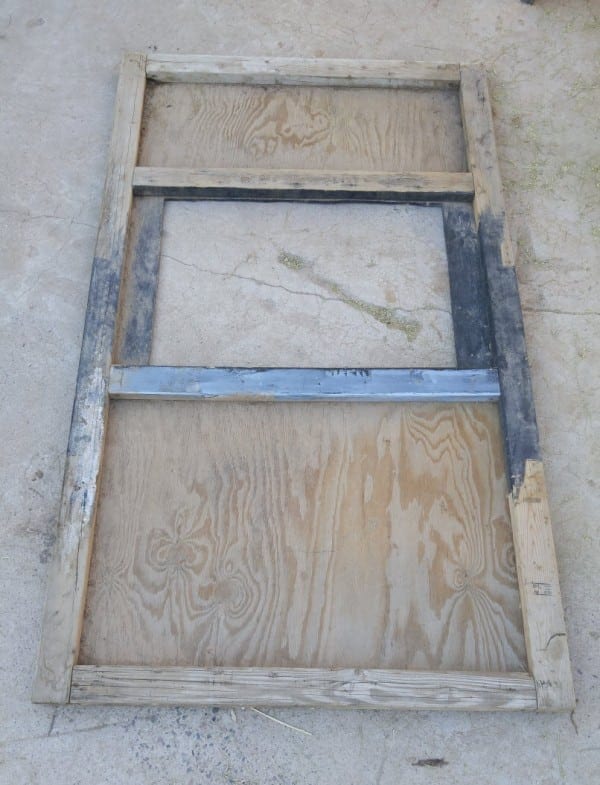
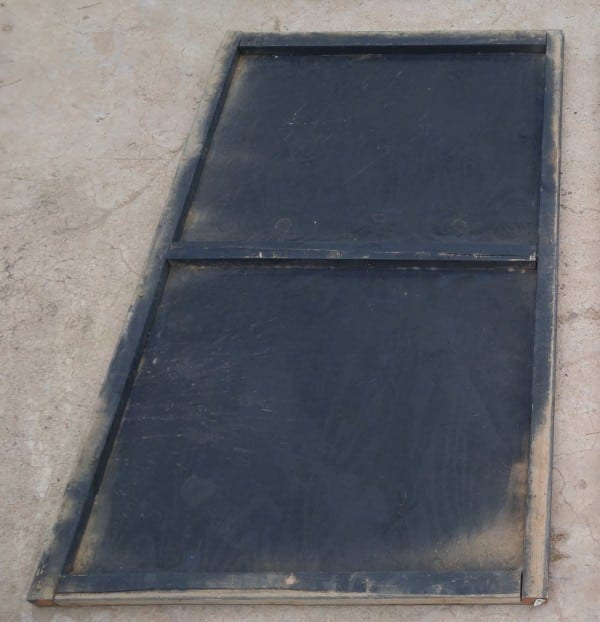
Building the Mirror Wall:
Find the measurements on the INSIDE of the frame.
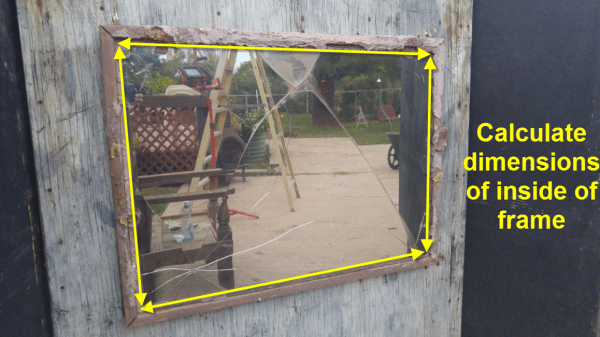
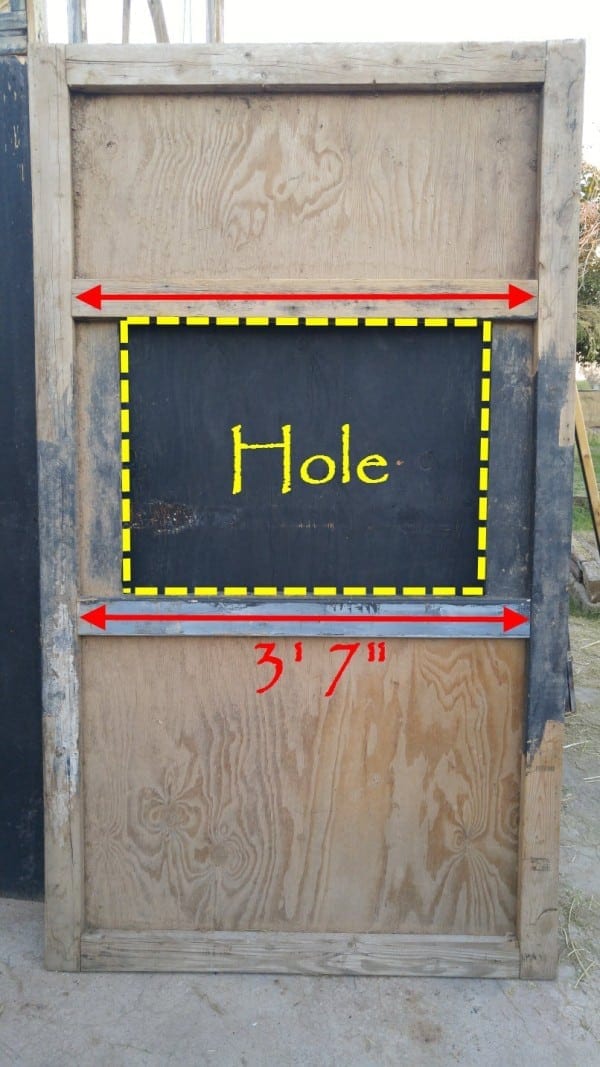
Using those same measurements, cut a hole into your plywood where you will want your mirror to hang. Because you measured the inside of the frame, your hole should be just a tad bit smaller than your mirror.
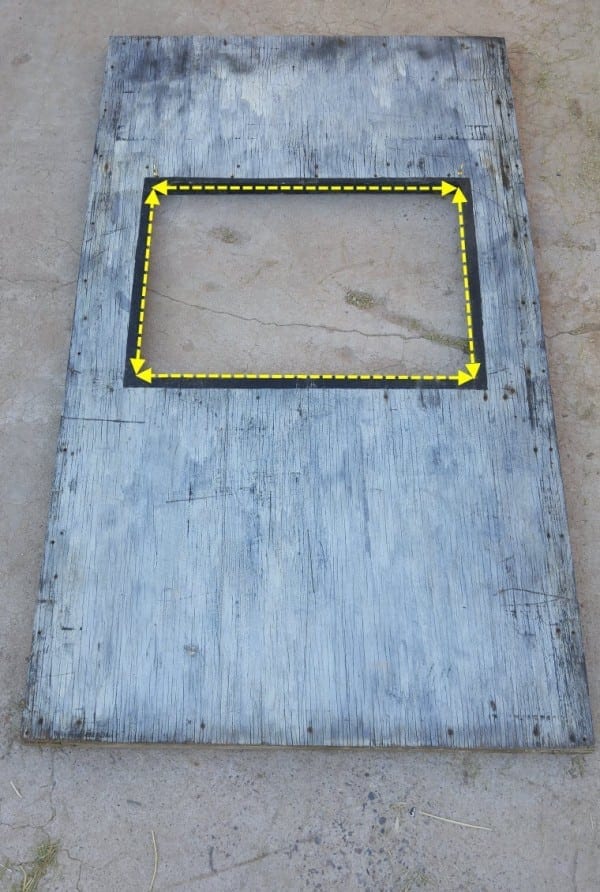
Screw together the frame braces with the 3in screws , then screw the frame (from the front) to the back of the plywood that you just cut your hole in, with your 1 -1/4in screws.
Now, line the middle frame braces flush along top and bottom edge of hole you just cut into the plywood, and screw together. Then, screw from the front to the back, into these middle braces to make the plywood stable along the middle.
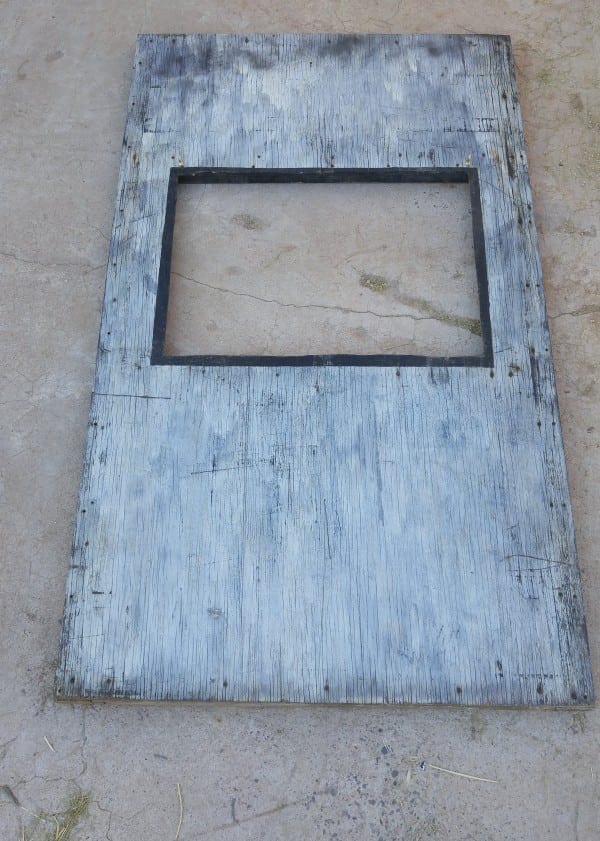
Painting walls:
I painted my mirror wall black and then dry brushed some white over it which gave it an old grey-ish look.
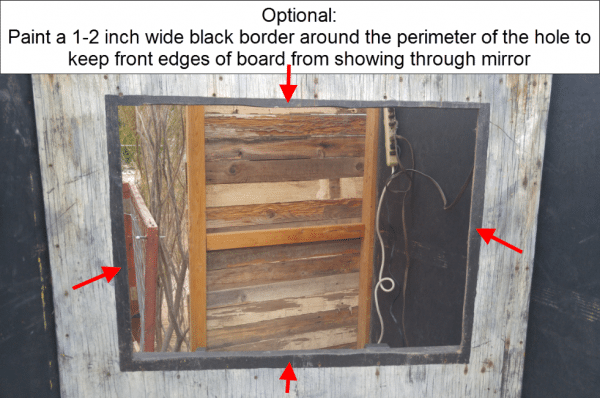
When I first made my mirror wall I was afraid that the edges of the plywood surrounding the hole would show through the mirror where the frame overlapped them, so I painted a black border around the perimeter to hide the edges. This is only optional as you may not have this problem…set everything up first and test it all out with the lighting to see if you’ll even need to do this or not.
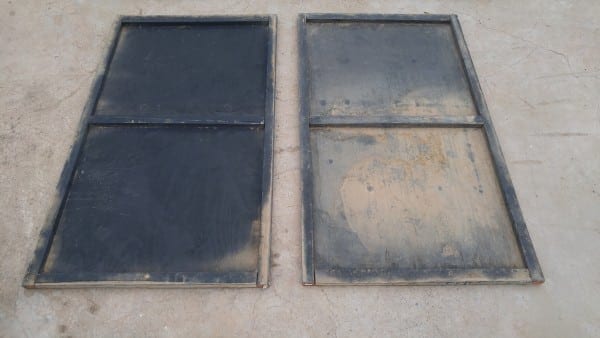
Stabilizing Walls:
Now you need to build the stabilizing walls that enable the mirror wall to stand up on it’s own.
Screw the two stabilizing wall frames together, then add the two sheets of 4ft x 8ft plywood
Paint your stabilizing walls. My two stabilizing walls were made a few years after I built my mirror wall. At the time I didn’t have any white paint to dry brush over them to match the mirror wall, so they’ve just stayed black through the years.
Now connect the stabilizing walls to the mirror wall with the hinges. The nice thing about the hinges is that you can connect the walls together either from the front or the back. In this pic I screwed mine to the mirror wall on the back.
Screw in the roof brace to keep walls secure.
Hanging the mirror:
Hang mirror with the picture frame hanging hardware (I hung mine with hooks and eye-bolts to make sure it was sturdy and wouldn’t fall) The black border that I painted around the perimeter of the hole is covered by the frame of mirror
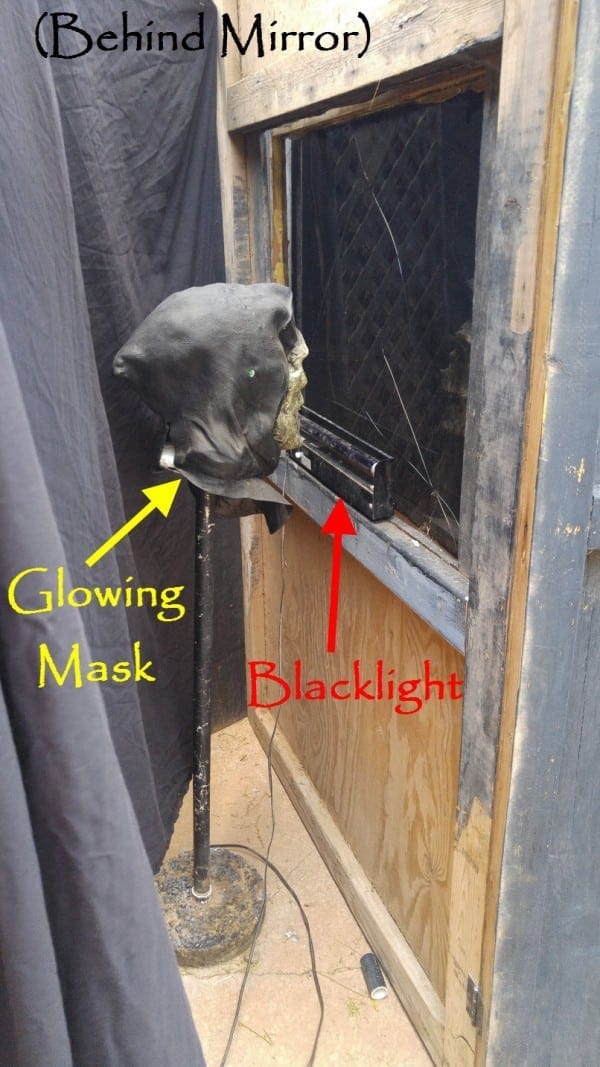
Setting up the Ghost Prop and the black light:
Time to get the spooky ghost in the mirror ready!!! You can either have an actor sit behind the mirror while wearing the glowing mask, or you can do like I did and set the mask on a stand behind the mirror. To do this, simply stick the PVC pipe into the umbrella base…
Mount Styrofoam wig head onto PVC pipe, then place mask over the Styrofoam head. Mount a black light right in front of the mask on the lower ledge of the mirror…the black light will illuminate the mask and show through the front of the mirror.
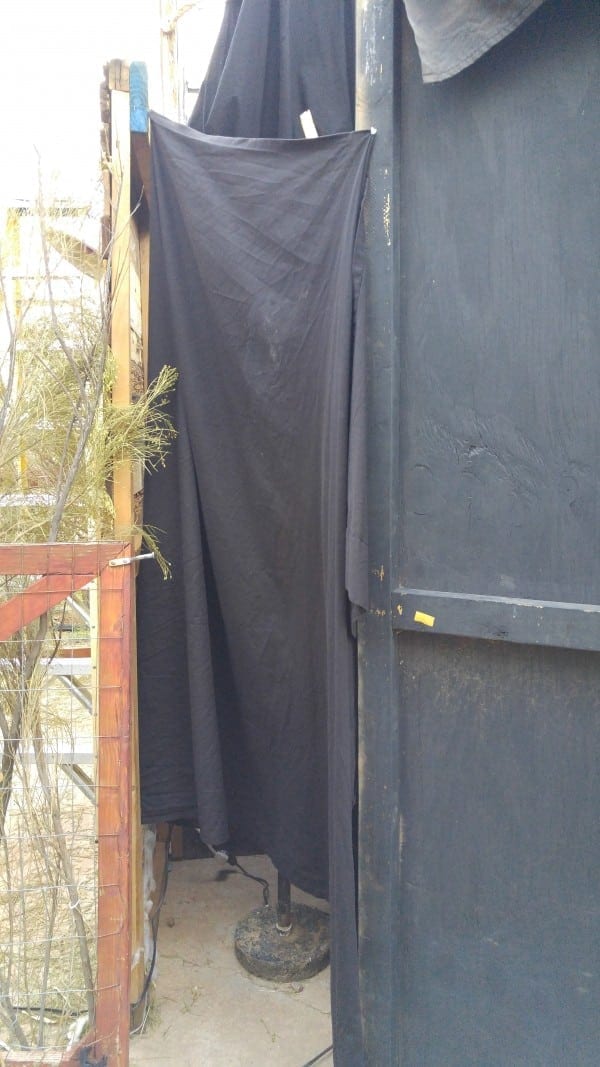
For this trick to work, the area behind the mirror needs to be completely dark so that only the black light is illuminating the mask. I completely enclose backside of the mirror with a black backdrop, to prevent any light from coming in.
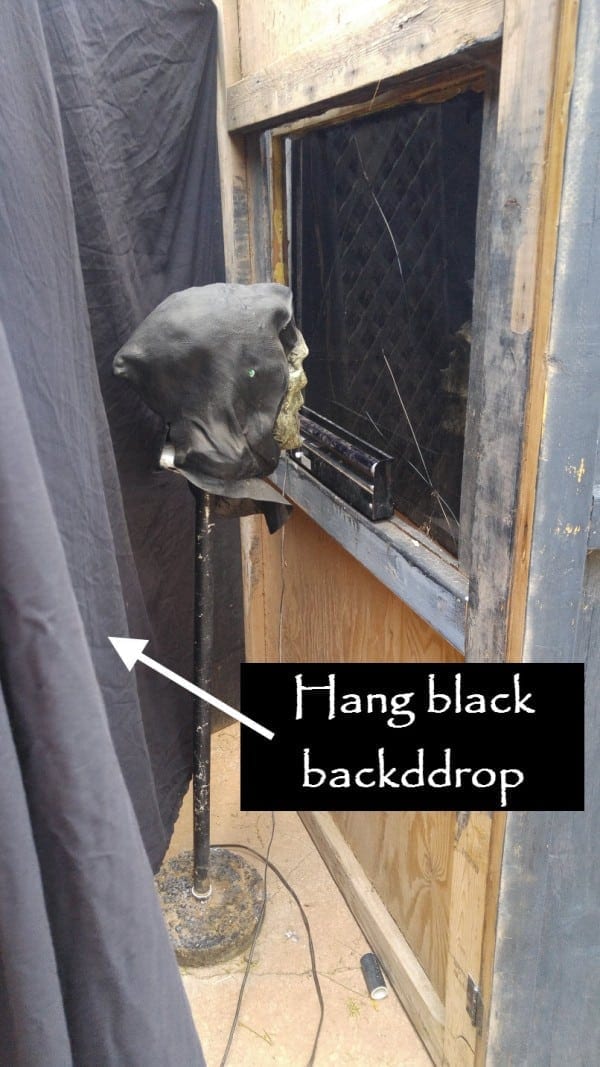
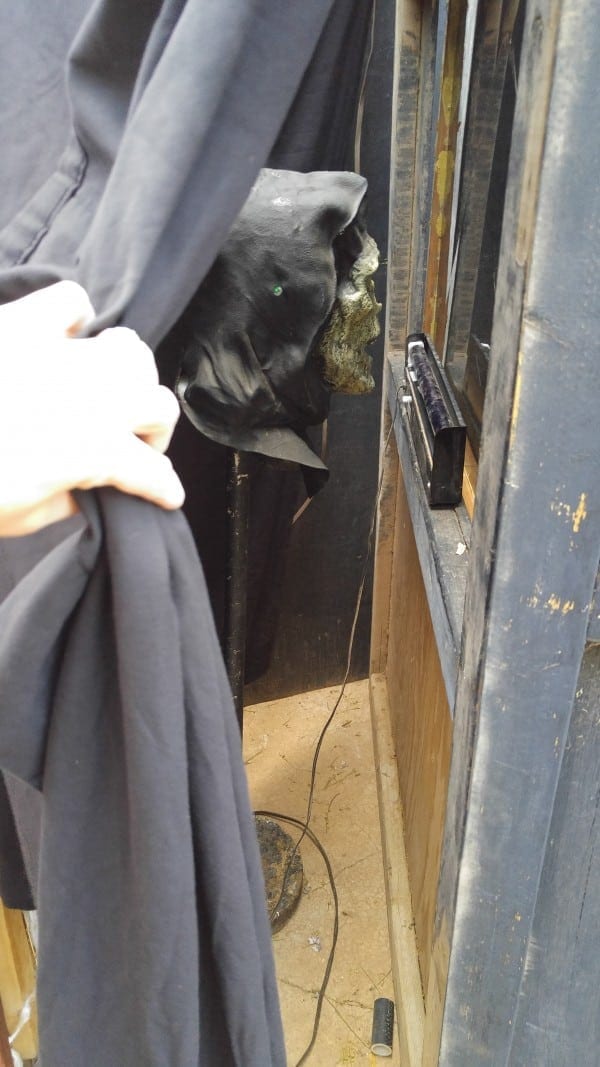
The glowing mask and black light are completely enclosed and hidden by the black backdrop. When nightfall hits, this little area is completely dark which enables the black light to illuminate the glowing mask.
Dim lighting:
Mount the dim light in the front room (I use the roof brace to mount my light on).
Wait till it’s dark, turn on the dim light in the front room, and also the black light behind the mirror, and test it all out!
Since I don’t have time to stand by the room and turn the lights low with a dimming light every time a trick-or-treater passes by, I use a nightlight that doesn’t dim. It lights up the room just enough to see the mirror, but not too much so that the mask won’t show through the front of the mirror. You can decide what type of light works best for you!
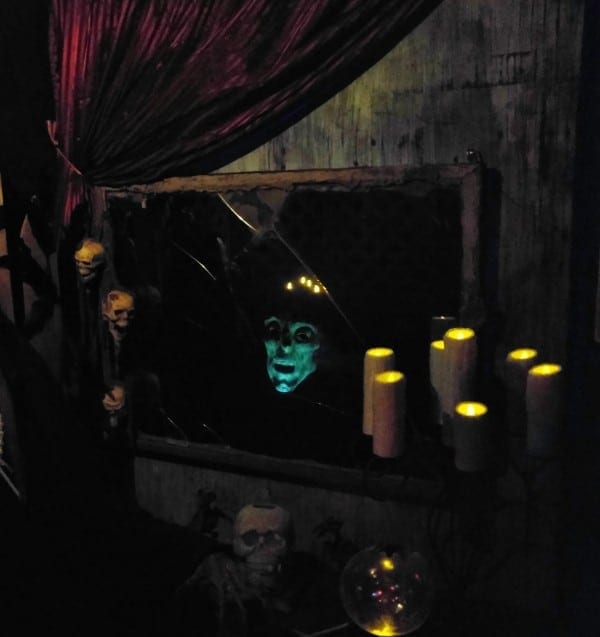
Doesn’t he look great! Everyone loves this prop!
DIY Ghost in the Mirror Trick
Note: I have since made another mirror for my “Ghost In the Mirror Trick”. You’ll have to check it out and see my new tutorial on how to make it! You can find my DIY Haunted Skeleton Mirror Here
Nikki pearson
Your website is amazing!!!! I love halloween. It’s my favorite holiday.
Tee
Thanks Nikki! I love it too!!!
Debbie Blood
I have looked at your site and think it is great. I am going to use the low lying fog cooler. Do you have any other diy projects for we are doing a swamp theme this Halloween in sept. Thank you Debbie
Tee
Hi Debbie,
Awesome! My burlap net hung overhead might also do well with your swamp theme. Check it out HERE
CARL HIRD-RUTTER
I love this, Several years ago my friends hosted a party and we did this in the washroom with a motion sensor. We used a picture of Linda Blair from the exorcist. As you stepped up to the mirror a motion sensor triggered the with a short burst of light. Your reflection would disappear and her face popped in for just a second then your reflection came back. Quite ghoulish and lots of fun.
This year I am going to make your fog chiller for my yard. I cant wait!
Tee
Hi Carl,
Wow that sounds awesome, I’m sure you got a lot of scares from that one! Hmm, maybe I’ll set mine up with a motion sensor… good idea! Enjoy that fog cooler!
IMNRTST
A-freaking-mazing! Thanks for sharing.
Tee
I’m glad you enjoyed it!!
Randy
Maybe I missed it but what triggers the effect? The change in lighting.
Tee
You got it! As the light fades, the black light shining on the mask behind the mirror shows through.