
DIY CREEPY Halloween Moss-Video
DIY CREEPY Halloween Moss
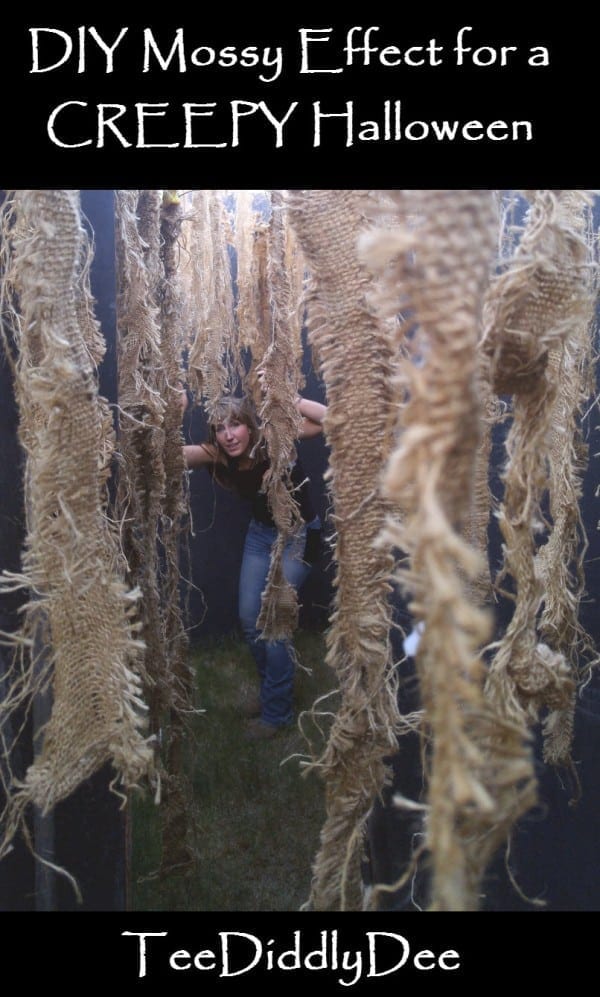
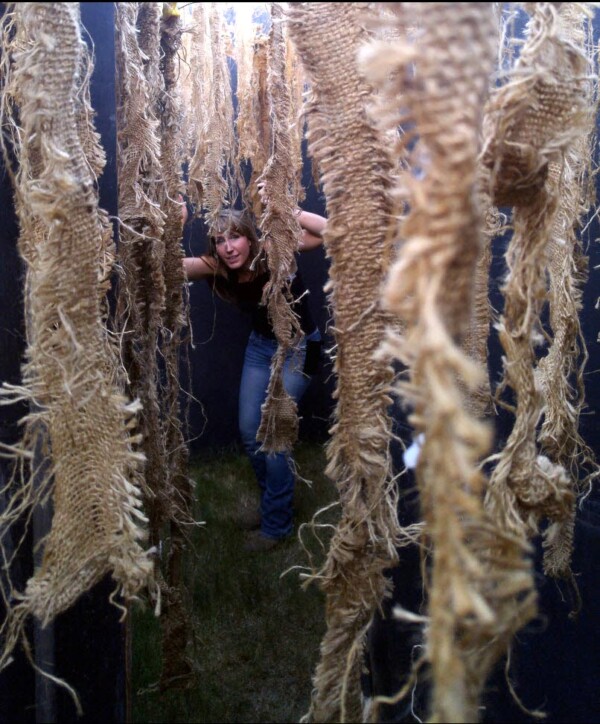
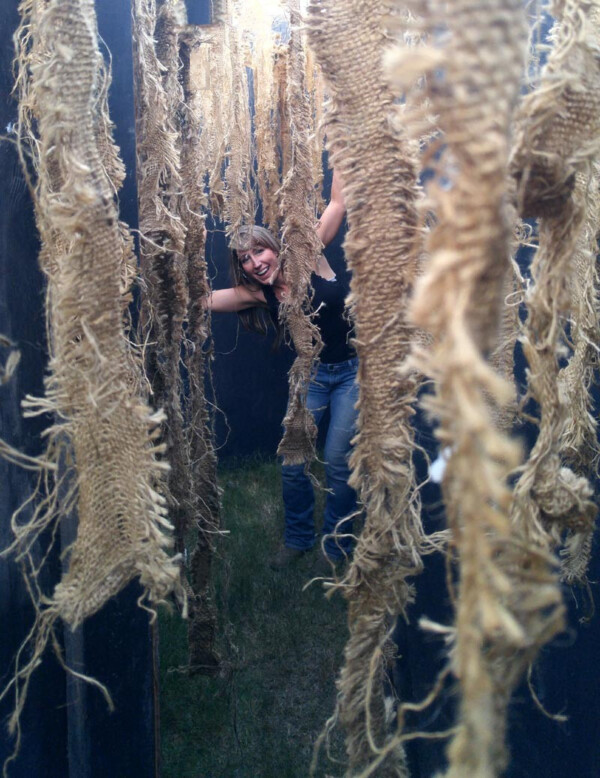
Doesn’t this pathway look creepy??? Better yet, it’s even creepier at night when you can’t see anything, but you feel it touching you as you walk.
As my trick-or-treaters approach this passageway, they definitely pause to look around before continuing on, not knowing if someone or SOMETHING is hiding ahead through the raggedy, mossy-looking pathway. They duck down, squirm, and squeal as they make their way through the long scraggly burlap strips brushing across their heads and shoulders.

Awesome right???
This project makes for a very eerie atmosphere because a passer-by will not only see it, but it also TOUCHES them too.
You’d think it took me hours to hang all those strips of burlap to the ceiling, but it didn’t. Actually it took about 20 minutes to make…and the best part is that once it’s made, it literally takes about 5 minutes to put everything back up the next year!
DIY CREEPY Halloween Moss-Tutorial
Supplies:
- Volleyball net
- Burlap (you can purchase an affordable, nice-sized roll HERE)
Tools:
- Scissors
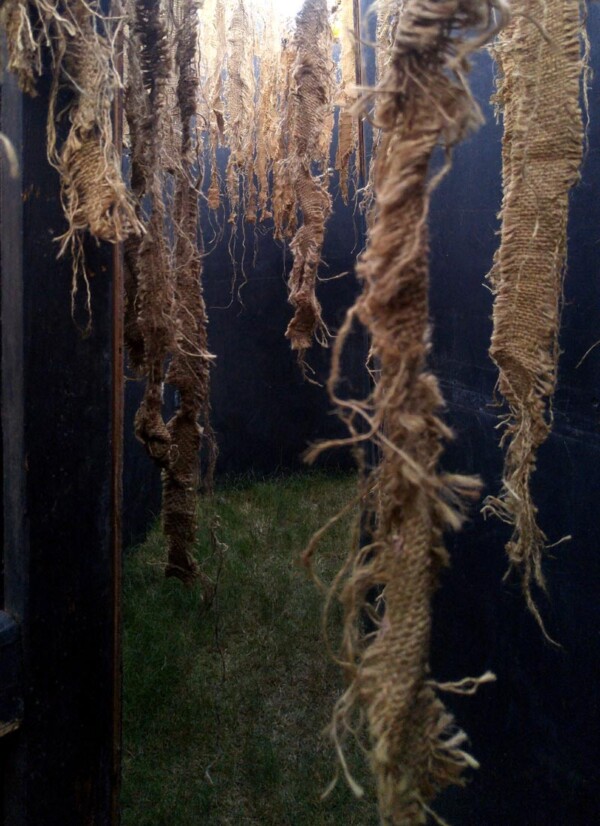
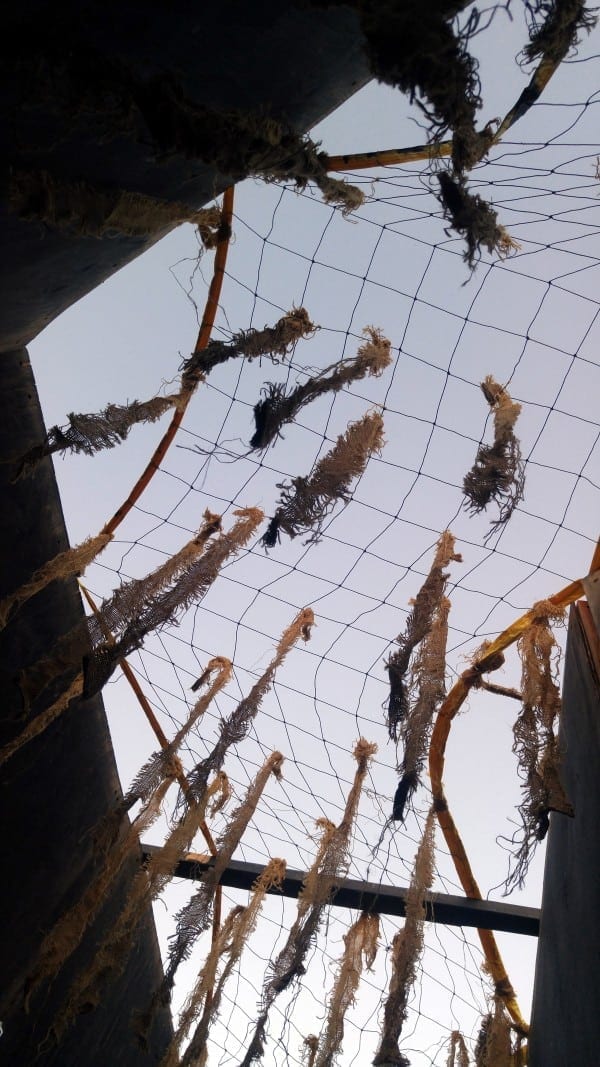
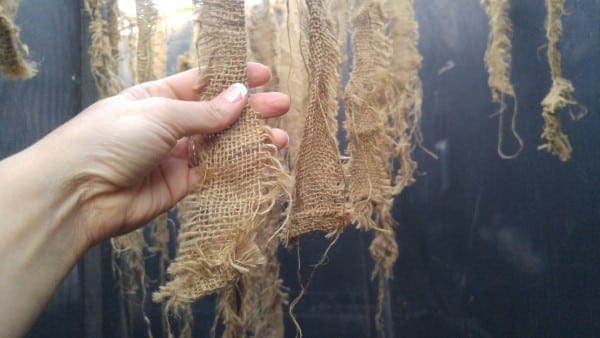
Spread out your volleyball net. I hung my net at a low level so I could reach. Then I cut up strips of burlap and tied them randomly all over the net.
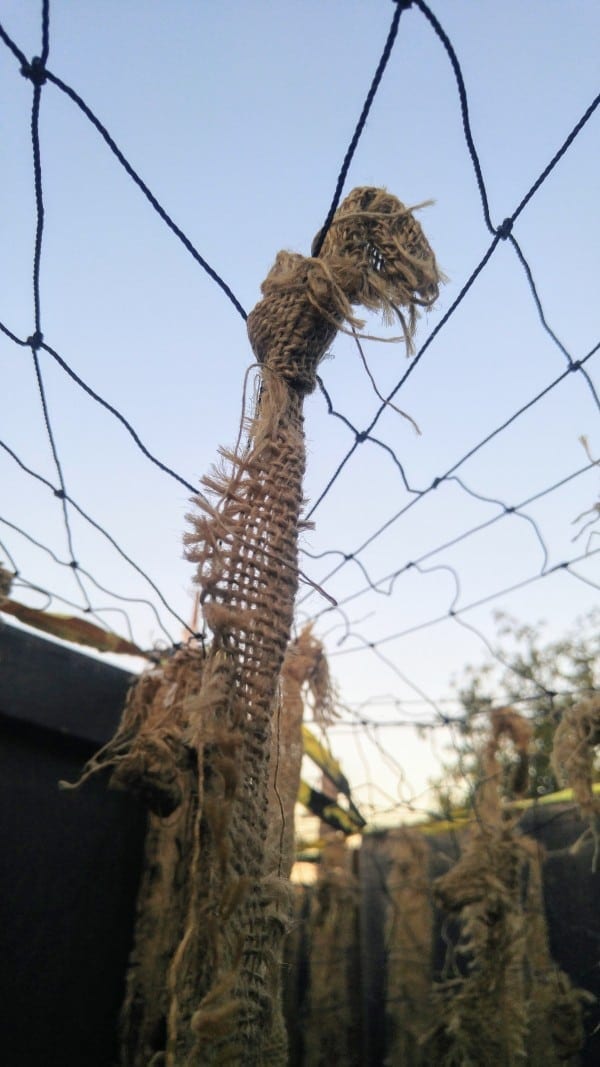
The burlap strips are about 2-3 inches wide and around 2-3 feet in length.
Then I hung the net on the ceiling, over a passageway that trick-or-treaters would be walking through…
Oh and if you really want to freak your trick-or-treaters out, wet down the burlap before they walk through!
The best part is when I take it all down, I simply just throw it all in a bucket with a lid for storage. When I need it for the next year, its all ready to go!
Now it’s your turn to make your own creepy Halloween moss to scare those trick or treaters!!!
James Adams
Great idea getting this wet. Hadn’t thought about doing that.
Tee
It’s WAYYY creepy feeling! 😉
Sue
Brilliantly simple and effective. I love it!
Tee
Thank you Sue!
Sue
How did you get the burlap to be shreddy and stringy?
Tee
Honestly, I didn’t do anything to make it stringy. I’ve had this netting for 20 years plus and it’s just became more stringy as I use it each season. Hope that helps!
Kris Quint
I love Halloween!!! Your ideas are wonderful. Will do this! I have done the chandelier and scarecrow pumpkin…..love them…
Thanks, Kris
Tee
Hi Kris!
You’re right, Halloween is awesome! Glad you enjoyed my collection of Halloween tutorials, I’ve got more coming later this year so stay tuned!
Natalie
Creative and inexpensive idea! what process did you use to shred the edges of the cut burlap? I pulled and clipped and mine don’t have a creepy look.
Tee
Hi Natalie, I just pulled the threads that run each direction on the burlap to leave long threads and feathery edges that tickle. I hope this helps. 🙂