
I am so excited! My “DIY Rustic Christmas Santa Mailbox” was featured on Country Living (see pic below). To view it at Country Living, click HERE.

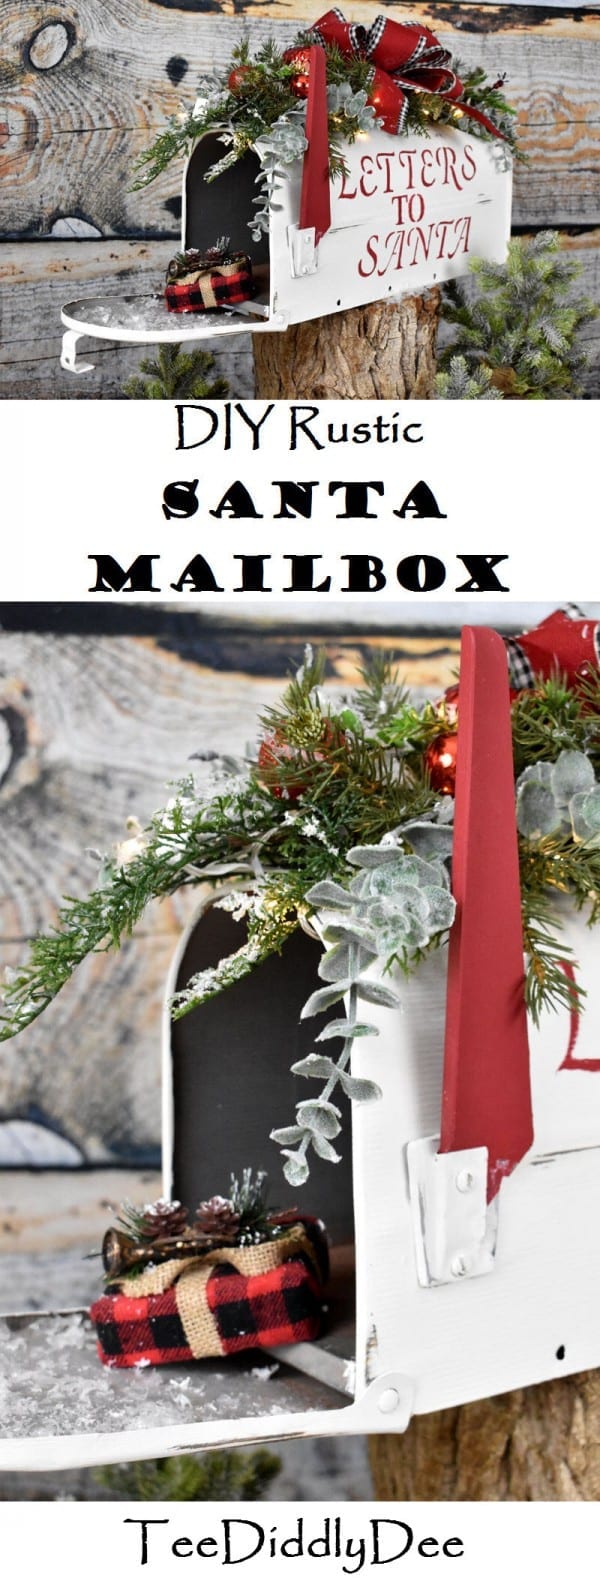
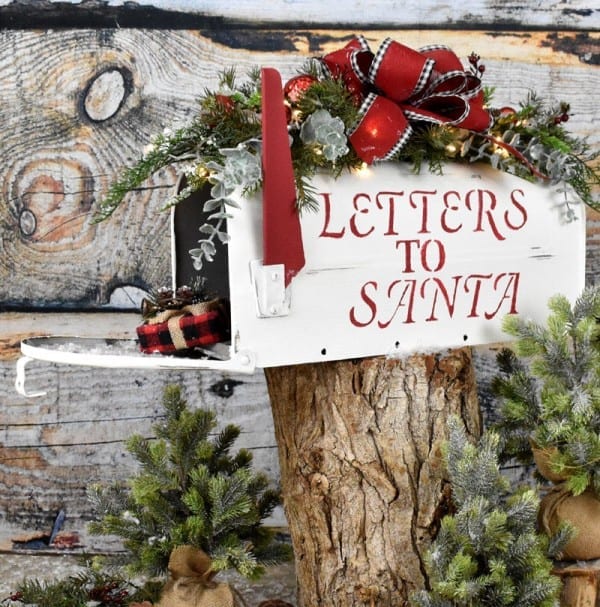
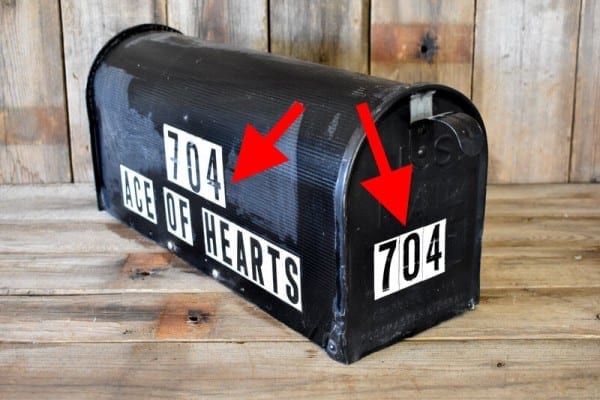
DIY Rustic Christmas Santa Mailbox
Did you ever send a wish list to Santa when you were little? Wasn’t it a magical time?
Now you can re-create those special memories for your own kids (or grand-kids) with this adorable Santa mailbox that delivers their letters directly to Santa at the North Pole!
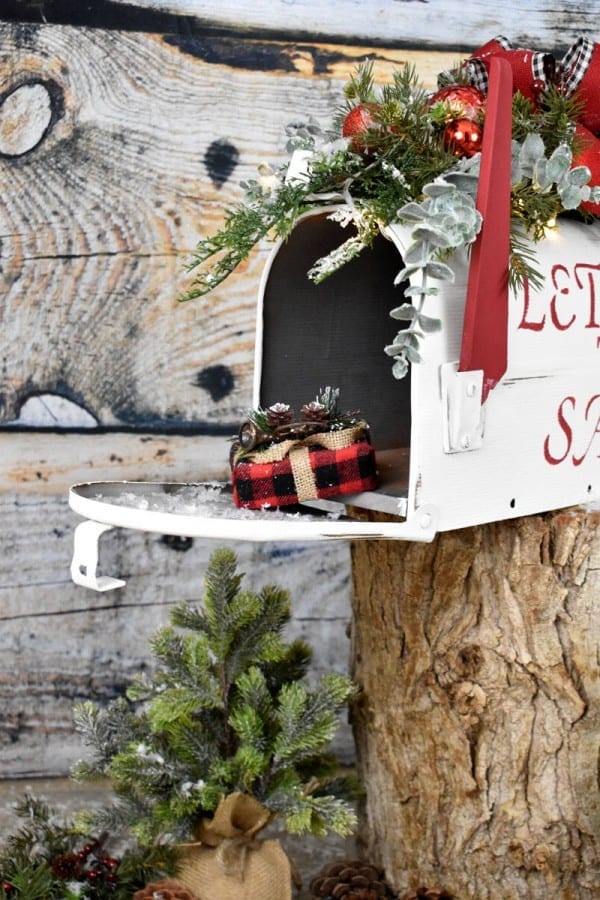
I love how you can place this mailbox anywhere you like…on a shelf in the house, on the front porch, or you can do what I did and place it on a stump that I found in my firewood pile. It worked great!
I can honestly say, this was very easy and fun to make!

Isn’t it cute?
DIY Rustic Christmas Santa Mailbox Tutorial
Tools:
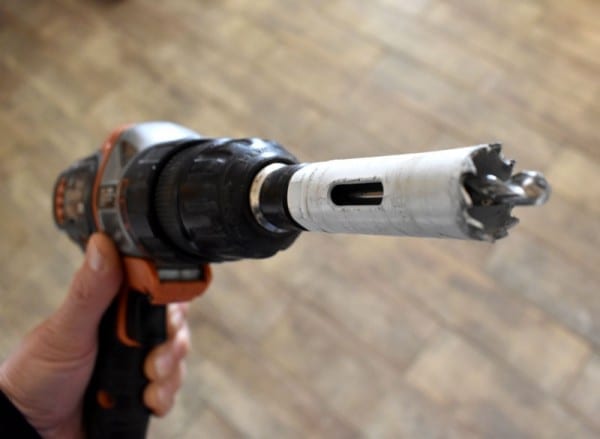
- Hole saw bit (you’ll need this only if you use plug-in lights as you’ll drill a hole into the bottom of the mailbox. Make sure the hole saw is big enough to bore a hole large enough to string your lights through)
- Electric hand drill with bits (to drill a couple of holes in the top of mailbox to wire your greenery on. My mailbox already had holes so I didn’t need to do this)
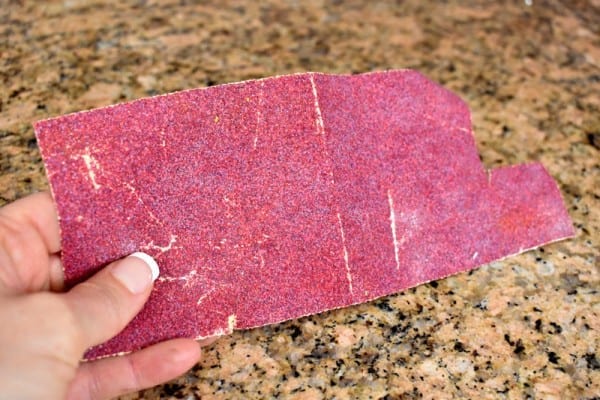
- Sandpaper (60 grit)
Supplies:
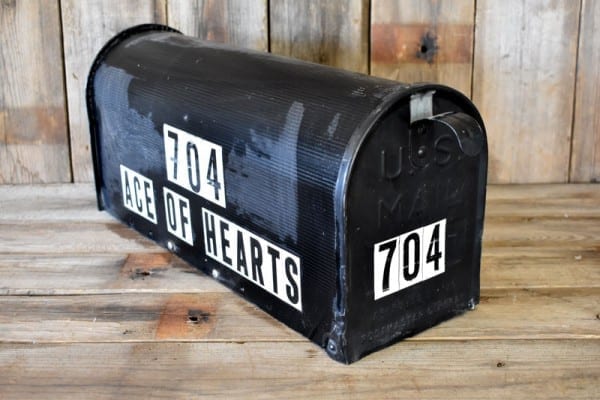
- Mailbox (old or new)
- Letter stencils and sponge paint applicator
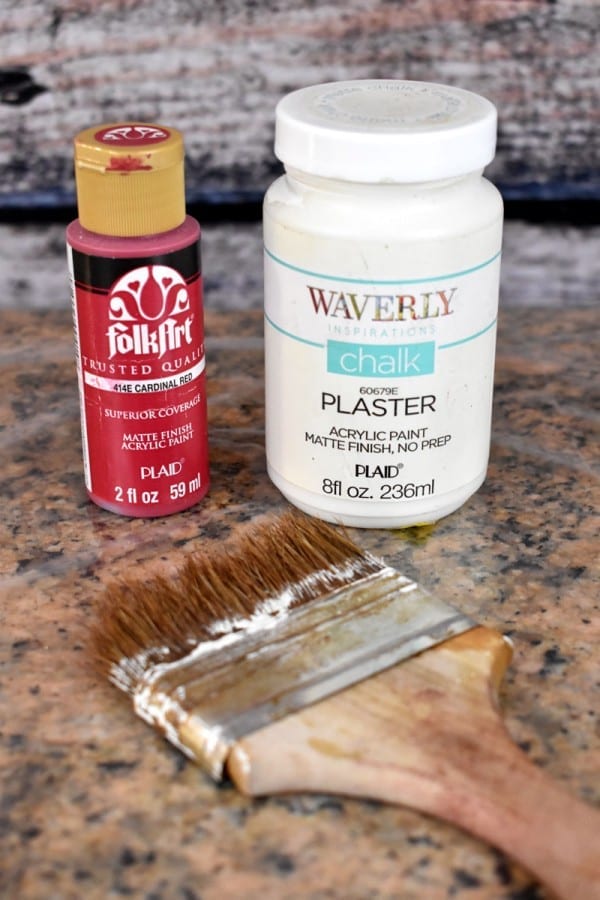
- Matte acrylic paint or chalk paint and paintbrush
- Christmas greenery to add to the top of mailbox (I wired mine on with floral wire)
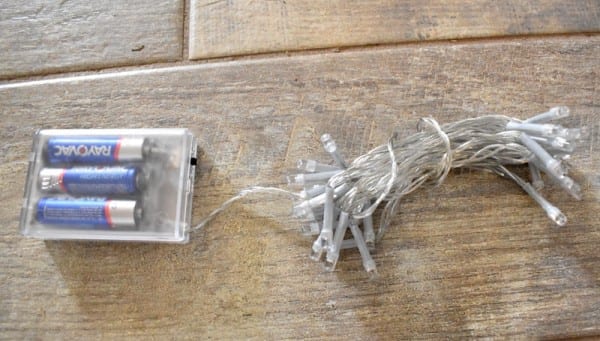
- Fairy lights (battery powered or plug-in)
1
2
3
4
5
6
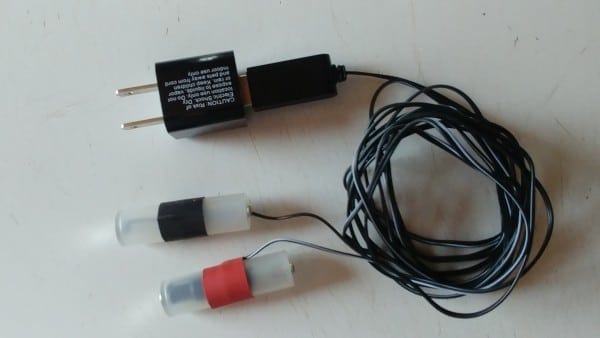
Battery powered lights vs. Plug-in lights: Since I prefer having both options of either using batteries to run my lights, or having a cord that plugs into a socket (which will save my batteries), I ordered myself a SWITCH IT plug in (shown in below pic). This way I can use my batteries for times when my sign is on display where there’s no electric plug-in socket. If there IS an electric socket nearby, I simply take my batteries out, put in the ‘fake’ batteries (that are attached to my SWITCH IT plug), then plug it into the socket! (It’s so easy, I just love this thing!) You can order one HERE.
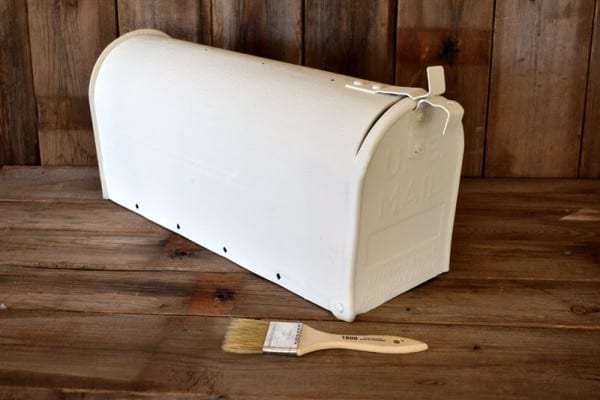
Prep and Painting:
If you’re using an old mailbox, make sure to peel off the old letters and sand off any roughness with your sandpaper.
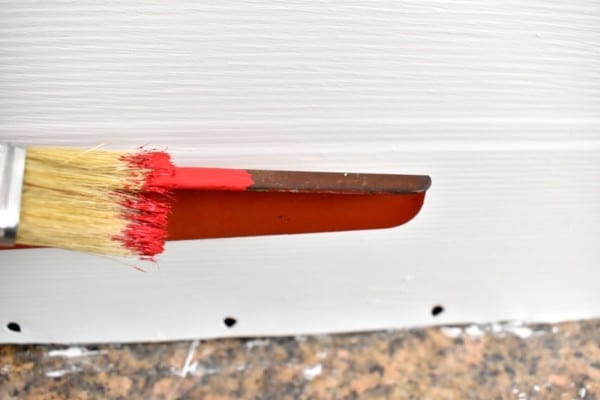
Brush on a couple coats of paint.
My flag was originally red and I decided to keep it that way by brushing on a couple coats of new paint.
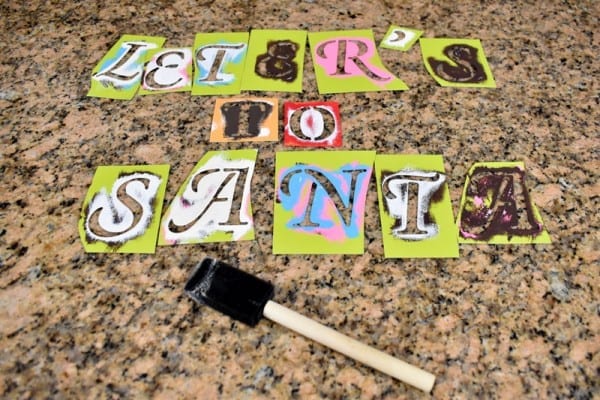
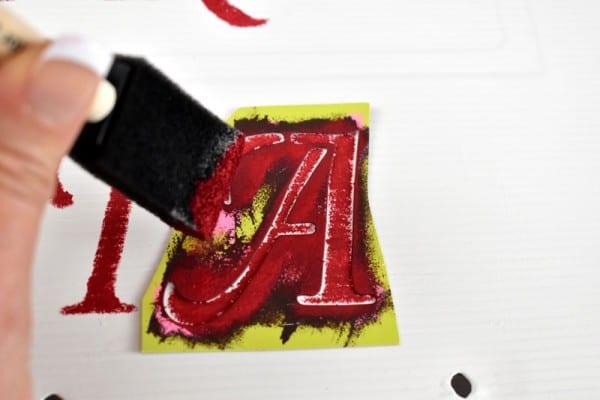
Stenciling Letters:
Stencil on the letters by first dipping your sponge applicator into your paint, and dabbing off any excess before applying. Then carefully dab onto stencils.
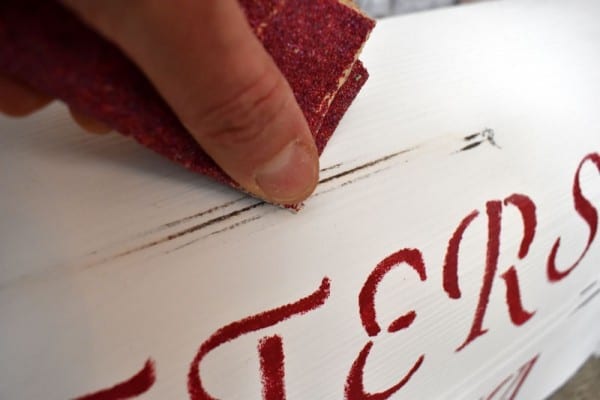
Distress Mailbox:
With your sandpaper, rub off the paint in a few places to give the mailbox an old worn look. I usually look for raised areas to rub away such as the lines that run along the mailbox
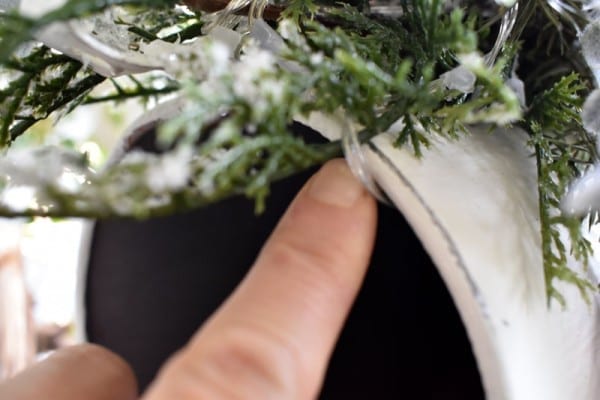
Adding Greenery, Lights & Embellishments:
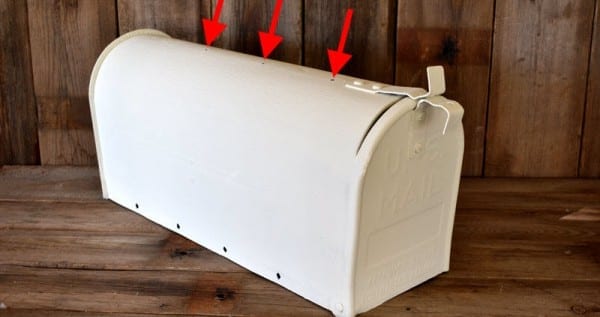
Add your greenery. My mailbox had a few holes at the top of it that I was able to wire my greenery on. If your mailbox doesn’t have any holes, you’ll have to drill a couple
If you choose to use the battery pack lights, simply place the pack way at the back of the mailbox
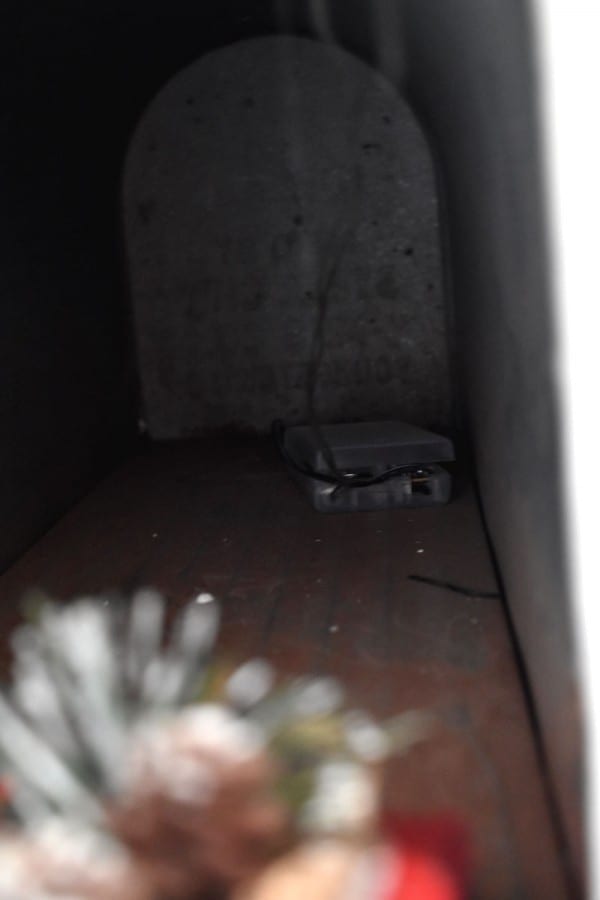
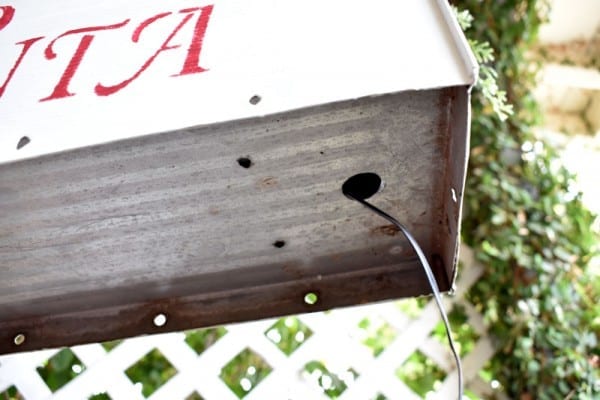
I just ran the light string out the top of the opening of the mailbox. You could also drill a hole in the top of the mailbox and run the lights through to the top if you prefer.
If you choose to have plug-in lights, you’ll have to drill a hole in the bottom of the mailbox with the hole saw.
The greenery is on and sparkly with lights! Santa’s mailbox is finished and ready to send those letters to the North pole!!
Merry Christmas!
Feel Free to comment! I love to hear from you!
DIY Rustic Christmas Santa Mailbox
Sharing at these great link parties:
Busy Monday – Inspire Me Tuesday – The Hearth & Soul – Metamorphosis Monday – All About Home – You’re the Star – Inspire Me Monday – Little Cottage Link Party – Inspire Me Monday – Wonderful Wednesday – Creative Muster Party – Wow Me Wednesday – Your Whims Wednesday – Tuesday Turn About – Homestead Blog Hop – Tuesdays with a Twist – Wonderful Wednesday – – Charming Homes & Gardens – Share Your Style – To Grandma’s House We Go – Vintage Charm Party
Sharing at more great link parties:
Waste Not Wednesday – Party in Your PJs – Thursday Favorite Things – Grace at Home – Keep in Touch – Friday Favorites – Funtastic Friday – Funtastic Friday – Friday at the Fire Station – Happy Pink Saturday – Dare to Share – Saturday Sparks – Create, Bake, Grow & Gather – A Morning Cup of Joe! – Farmhouse Friday – Happiness is Homemade – Snickerdoodle Create Bake Make – Inspire Me Monday – Silver Pennies Sunday – Love Your Creativity
Marjan
I love this, now to find myself a mailbox!
Tee
Thank you! You will have to post a picture if you make one too!
Sandi magle
Very Cute project…and great tutorial! Love the tree stump–perfect height for kids!
Tee
Thank you Sandi! The kids love it because they can open it and insert their own letter by themselves!
Chas Greener
This is so fun and love the added lights. So fun for kids too. Thanks for sharing.
Tee
Thank you for commenting and you are so welcome!
angie
love it so super cute,,, what a great idea for all the little ones
come see us at http://shopannies.blogspot.com
Tee
Hi Angie, I appreciate your sweet comments!
Cecilia
Very cute! Thanks for sharing at Vintage Charm!
Tee
Thank you, Cecilia! I’m glad you like it!
Claire
This is adorable, love it 🙂
Tee
Hi Claire, Thank you for your kind words! I’m glad you stopped by!
Dee | Grammy's Grid
How cute, I love it!@ Thanks so much for linking up with me at the #UnlimitedMonthlyLinkParty 19.
Tee
Hi Dee! Thank you!!
Marilyn
********************************************************
Thank you for sharing at #OverTheMoon. Pinned and shared. Have a lovely week. I hope to see you at next week’s party too! Please stay safe and healthy. Come party with us at Over The Moon! Catapult your content Over The Moon! @marilyn_lesniak @EclecticRedBarn
********************************************************
Create With Joy
What a lovely project Tiffany – congrats on your Country Living feature!
Congrats also on your feature at Inspire Me Monday at Create With Joy #465! 🙂
Tee
Thank you for featuring me! I do appreciate that! Yes, I was pretty excited to be featured in Country Living!
Debbie-Dabble
Love this!! I have a faux one outside to pay homage to my husband who is a retired letter carrier…I cover it with seasonal covers but I would really like to rig up something to hold greenery on the top…thanks for the inspiration and thanks for taking the time to stop by and leaving such a kind comment!! Stay safe, healthy and happy11
Hugs,
Debbie
Tee
Thank you so much, Debbie, and you are very welcome!
Leanna
This is such a special makeover and such a great keepsake for a family.
Tee
Thank you for your kind words, Leanna!
Rachel Harper
This is just so cute. Can’t wait to share on Wednesday’s Charming Homes & Garden Link Party.
Tee
Thank you, Rachel! I’m tickled you are featuring my mailbox!
Barbara Chapman
Tiffany, this Letter Box to Santa is precious!!! I am so over the moon with it… Happy to feature your post on my FaceBook page (French Ethereal) and in this week’s Share Your Style #286. <3
Hope your little ones remember these days and pass it onward…
Christmas hugs,
Barb 🙂