
DIY Sturdy / Collapsible Saddle Rack-Video
DIY Sturdy / Collapsible Saddle Rack
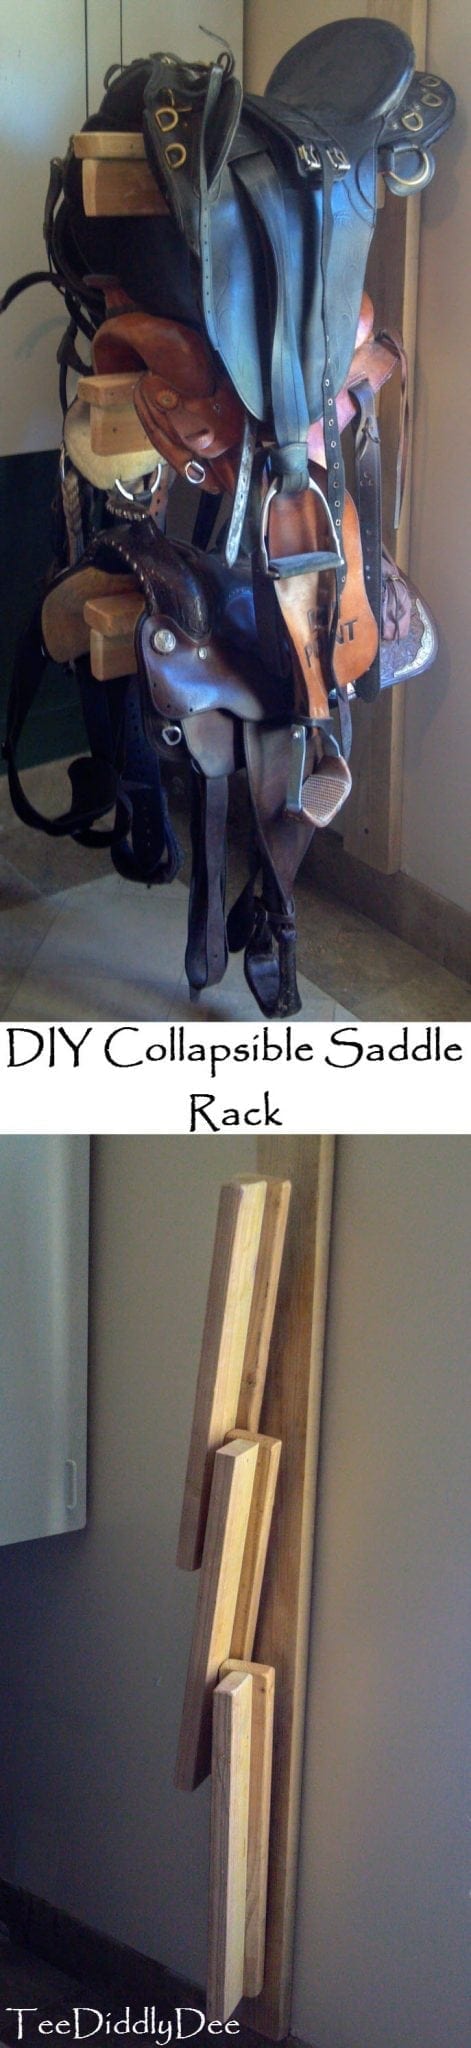
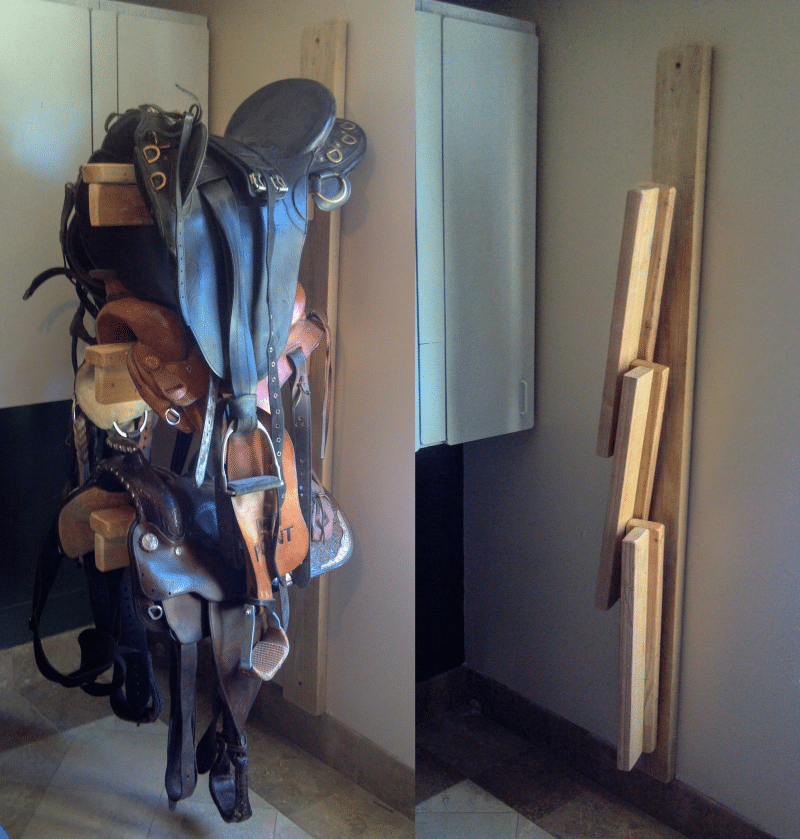
This awesome, sturdy saddle rack has got to be one of the handiest things I’ve made to organize my saddles and to keep them off of the ground! The best part is that the saddle rack collapses!!! It’s great for small, cramped places where sometimes you just need the extra space! You can collapse them in literally seconds and it’s just as fast to put them back up!
DIY Sturdy / Collapsible Saddle Rack Tutorial
- Hand Drill with bits
- Screwdriver
- Chop Saw
- Sander
- Tape Measure
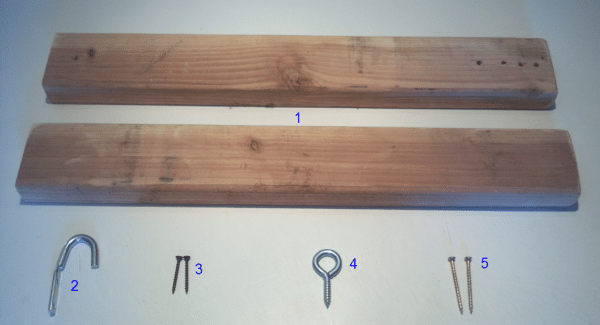
Supplies
- One 2×6 at approximately 6ft long (this is the ‘brace’ along the wall the saddle ‘posts’ will be mounted to)
- Two 2x4s for each saddle ‘post’ (I had 3 saddle posts so I needed six 2x4s)at approximately 2ft 1in (long enough for your saddles to sit on)
- Three J-hooks (also called rope or tarp binding hooks)
- Two wood screws for each J hook (I had three J-hooks so I needed six screws) at about 1 1/4in long
- Three eye bolts
- Some 3in wood screws (for screwing ‘posts’ together and for mounting ‘brace’ to wall)
Optional: Sand all wood pieces before beginning (I did this and it gave the rack a ‘finished’ look)
First, take the 6ft 2×6 brace…

And screw it into the wall with the 3in screws
(For a cleaner look I countersunk my screws, but that’s optional) Click HERE to learn how to countersink.
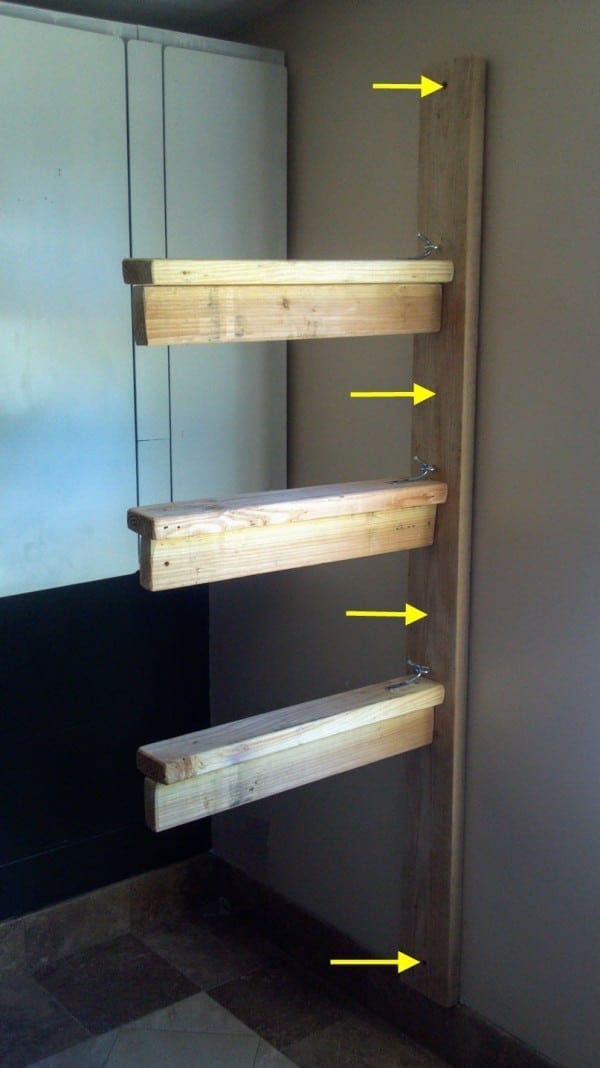
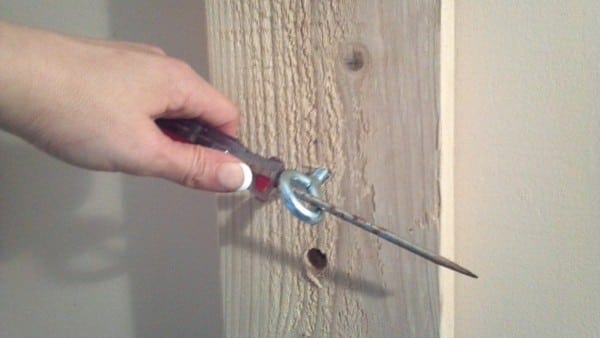
Now find where you want your posts for the saddles to hang, and screw in the eyebolts.
(Drill a pilot hole where the eyebolt will go to make it easier when screwing the eyebolt into the wood ) Click HERE to learn about pilot holes.
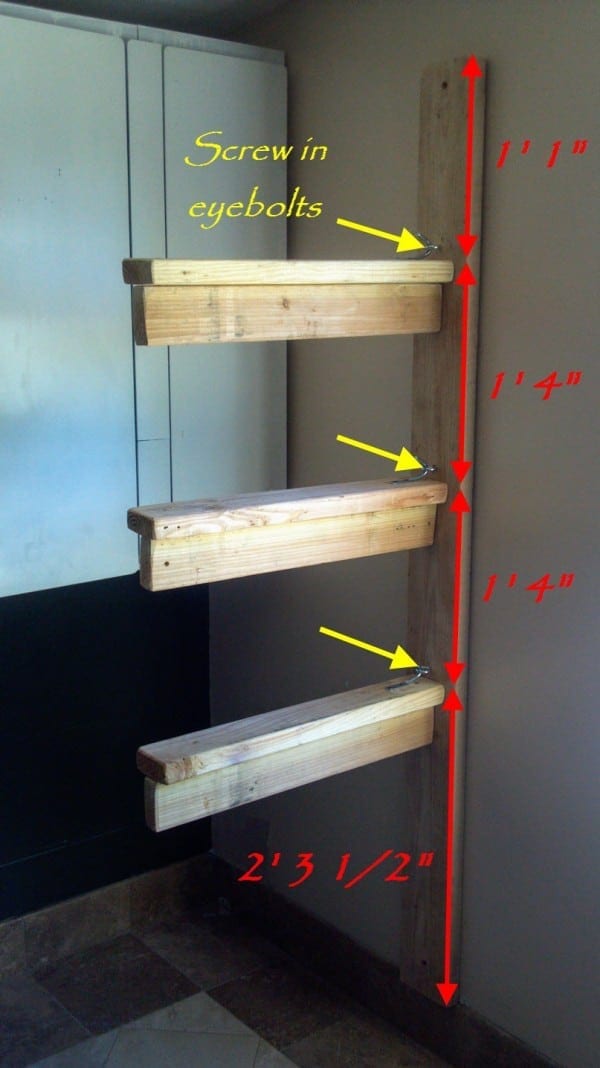
Now screw the eyebolt into the pilot hole you just made. A screwdriver works great to help twist the eyebolt in
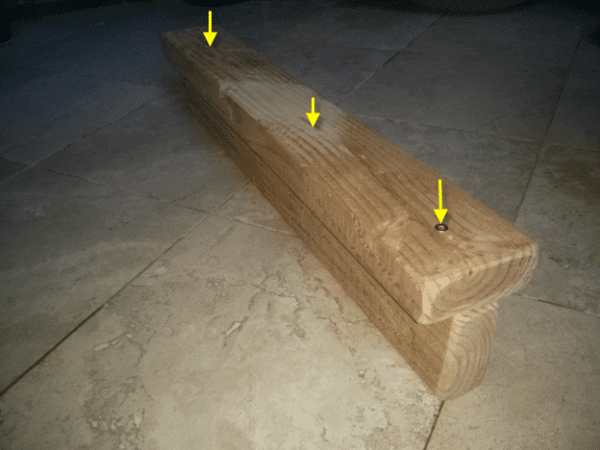
Screw together the 2x4s with your 3in screws, these will be the posts that the saddles will sit on. The finished posts should look like a ‘T’
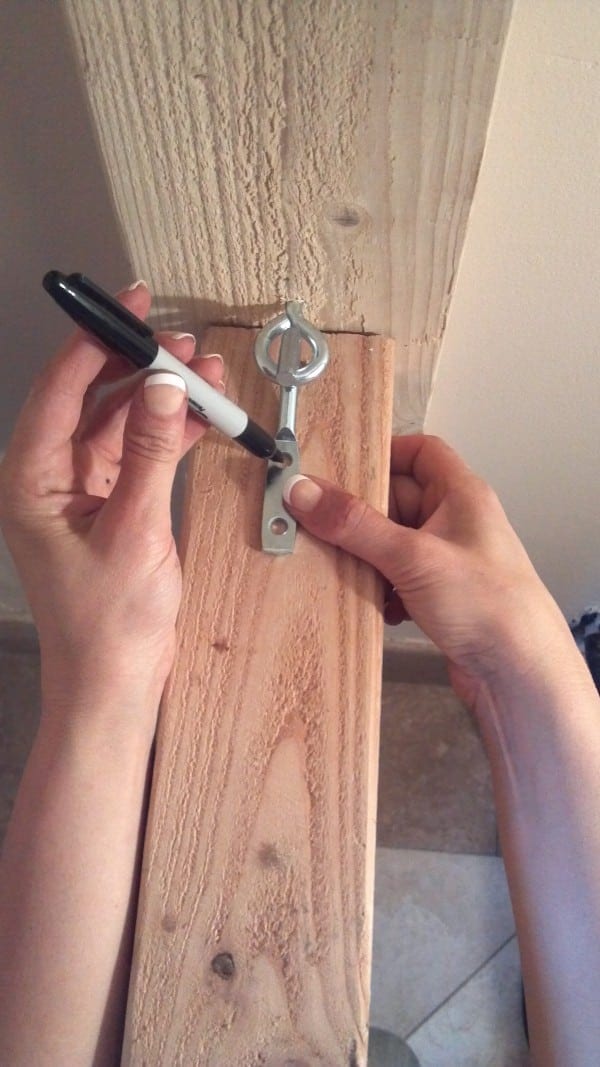
Hold the post up exactly how you want it to hang, positioning the J-hook exactly where it needs to be, and mark the screw holes with a pen. Then screw in the J-hook with the 1 1/4in long screws.
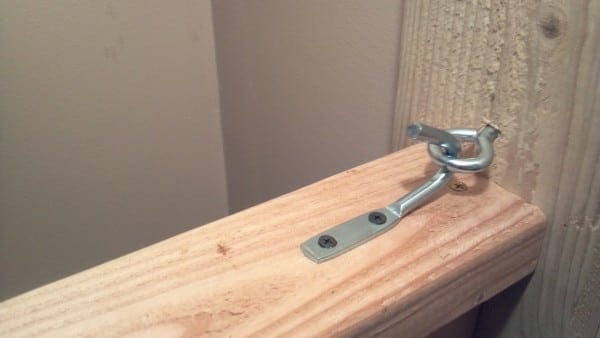
This is how it should look when finished!
Tip: If posts wobble from side to side, the wood was cut slightly crooked. This happened to me so I just straightened it out by trimming off a little with the saw. You will have to reposition the J-hook after re-cutting.
Now hang up those saddles!
Karen
I love this! What a great idea TeeDiddlyDee! 🙂
Brandy
Made two of these today for our tack room, they came out super great, convenient to use, look clean on the wall, don’t take up much space. Planning on installing one or two more in the very near future. Thank you for the ideas! We did adjust some of the measurements to allow more room between the saddles, I thought it looked a little cluttered with them right on top of each other.
Tee
Too cool Brandy! If you get a chance I’d love to see some pics!
[email protected]
Mike cianciosi
Thank you – the kiss rule – keep it simple stupid. thanks so much.
Tee
That’s exactly right Mike! LOL
Lin
Thanks. This is exactly what I needed to know.
Tee
Glad you enjoyed the tutorial!
Alexandra S. Fox
Hi! If you have a close contact h/j saddle it will be more stable with the wood upside down – or, when it’s hanging it looks like and upside down T from the end. Otherwise the saddle tends to rock to the side more easily.
Tee
Great idea Alexandra! Thanks for stopping by!
Patricia
This looks fantastic, but l can’t see how you release it to drop it down? Am I being stupid lol
Tee
Hi Patricia!
All you do is lift the end of the part that the saddle sits on, and it easily unhooks. That’s it!