
Lamp Made From A Modern-Day Shotgun


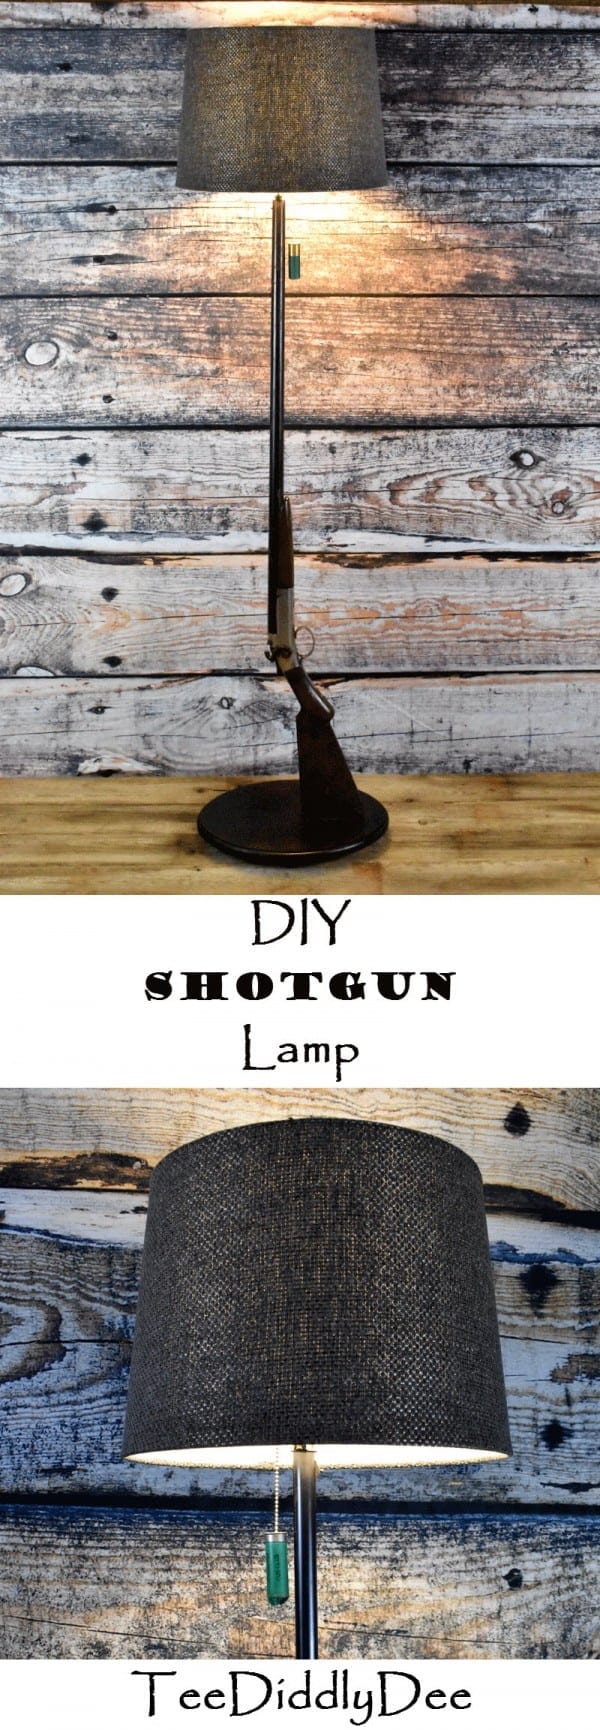
Lamp Made From An Antique Shotgun
Do you have an old shotgun that you’ve inherited or one that has a lot of meaning to you? Or maybe your gun doesn’t work well and you’d like to display it in your house to enjoy? Today I’m going to show you how to make a fun, unique lamp out of an antique or modern day shotgun. These lamps make awesome conversation pieces and looks great in any rustic decor, such as log cabin, lodge, western, trophy rooms or even a man cave!
As you can see from the pics above, I had two different types of shotguns that I converted into lamps. One was a modern day gun and the other was an antique gun. I made two separate video tutorials (found below in the tutorial) because the lamp directions are different for each style of gun.
DIY Shotgun Lamp Tutorial
Tools:
- Chop saw (to cut your wooden dowels)
- Grinder (This is optional as I only needed this for the antique shotgun (see video)
- Screwdrivers (flat head and Philips)
- Hand Drill with assorted Bits
Supplies:
*You will need one Shotgun
- One 10-inch Lamp Shade Harp (found HERE) You can also find it at Home Depot.
- Make a Lamp Kit found HERE (or found at Home Depot) It should come with a cord, a socket, and a few adapters for different sized openings
- Pull Chain Socket found HERE (or found at Home Depot) This is optional if you would like to have a shotgun shell dangle from the pull-chain as mine does. This socket would replace the socket that comes in the ‘Make a lamp kit’
- Shotgun Shell Fan Pull Chain found HERE
- Four round pegs with pre-drilled holes (1 inch x .88 inch) I found these at Joanns HERE.
- 3-Foot Wooden Dowel (cut into 4 small pieces). The pieces need to be the same diameter as the pre-drilled holes in the round pegs. (all found at Joanns or Home Depot) I simply carried the bag of round pegs to where the dowels were, and found one that fit inside the pre-drilled holes of the round pegs. The length of the four pieces you’ll later be cutting will be found when you drill holes into the wooden platform.
- One Wooden Plaque to mount your gun lamp to (found at Joanns) Mine is approximately 1-foot long x 9-inches wide and 0.63-inches thick HERE
- One drill bit the same diameter as your wooden dowel
- Paintbrush and Stain to paint wooden platform (I used Red Mohogany by Minwax found HERE). You can also find this stain at Home Depot
- Lamp Shade (I bought mine at the At Home store). I bought a 12 x 14 x 10 inch Grey Metallic Shade from At Home store HERE.
Pictures of Supplies (Numbers correspond with above)
1

2

3

4


8
9

10
Instructions:
Platform Assembly
First, using the drill bit that’s the same diameter as your dowel, drill four holes into the platform as shown.
Next, measure the depth of one of the holes that you just drilled into your platform, and also the depth of one of the holes in your round pegs, and add those numbers together. Cut your four wooden dowel pieces to that new number measurement.
Now, glue the dowel pieces into the holes of the platform.

Next, put a little glue into the holes of the round pegs and push them onto the dowels.

Last, add some stain to your platform and you’re done!
Running the electric cord through the gun
Time to watch a video to see how to string the electric cord through the gun. Since I had two different shotguns, I made two videos. One is about making a lamp out of an antique shotgun, and the other is how to do it with a modern-day shotgun. So choose the one that best suits your needs.
Finishing up
Note: With the “Make a lamp” kit, you can discard the round plate with the hole in it and also the round screw that is on the end of the socket shaft, as you won’t be needing them.
First, find an adapter that best-fits snugly inside the tip of the barrel of the shotgun, and slide it onto the shaft of the socket
Assemble all parts (as shown below) at the end of the gun barrel.

Now run the cord up through the barrel of the shot gun, up to the socket shaft, through the hole of the harp hanger, then lastly into the socket where you’ll connect the wires. (Simply follow the instructions that’s included in the kit about how to attach the wires to the socket, as it’s really easy to do, even for a novice!).

Finally, after everything has been assembled and wired in, simply push the rubber adapter into the hole of the barrel of the shotgun.

You can also attach your shotgun shell to your pull chain.

Attach your lampshade and you are done!

DIY Shotgun Lamp
Sharing at these great link parties:
The Hearth & Soul – All About Home – Inspire Me Monday – You’re the Star – Unlimited Monthly Link Party – Tutorials & Tips – Inspire Me Monday – Fabulous Party – Inspire Me Monday – Wonderful Wednesday – Tuesdays at our Home – Make it Pretty Monday – Farm Fresh Tuesdays Inspire Me Tuesday – Beautifully Made – Creative Muster Party – Wow Me Wednesday – Turn About Tuesday – Homestead Blog Hop – Tuesdays with a Twist – Wonderful Wednesday – Share Your Style – To Grandma’s House We Go – Vintage Charm Party– Simple Homestead Blog Hop
More great link parties I’m sharing at:
Waste Not Wednesday – Party in Your PJs – Thursday Favorite Things – Grace at Home – Keep in Touch – Friday Favorites – Encouraging Hearts and Home – Friday – Funtastic Friday – Family Homesteading/off the Grid – Best of the Month – Friday at the Fire Station – Flaunt it Friday – Handmade Otherwise – Happy Pink Saturday – Dare to Share – Saturday Sparks Create, Bake, Grow & Gather – A Morning Cup of Joe! – Farmhouse Friday – Snickerdoodle Create Bake Make – Happiness is Homemade – Sundays Best Link Up – Saturday Sharefest – Over the Moon – Silver Pennies Sunday – Dishing it & Digging it
Cecilia
This is so creative, and the lamp pull is the best! Thanks for sharing at Vintage Charm!
Tee
Thank you Cecilia! I’m glad you like it!
Dave
What a unique idea. The pull chain with the empty shell is a nice touch. This would go great in a cabin. Thanks for the clever posting.
Tee
Thank you, Dave, for you kind comments! I’m glad you like it!