
DIY Vintage Calendar Display


DIY Vintage Calendar Display
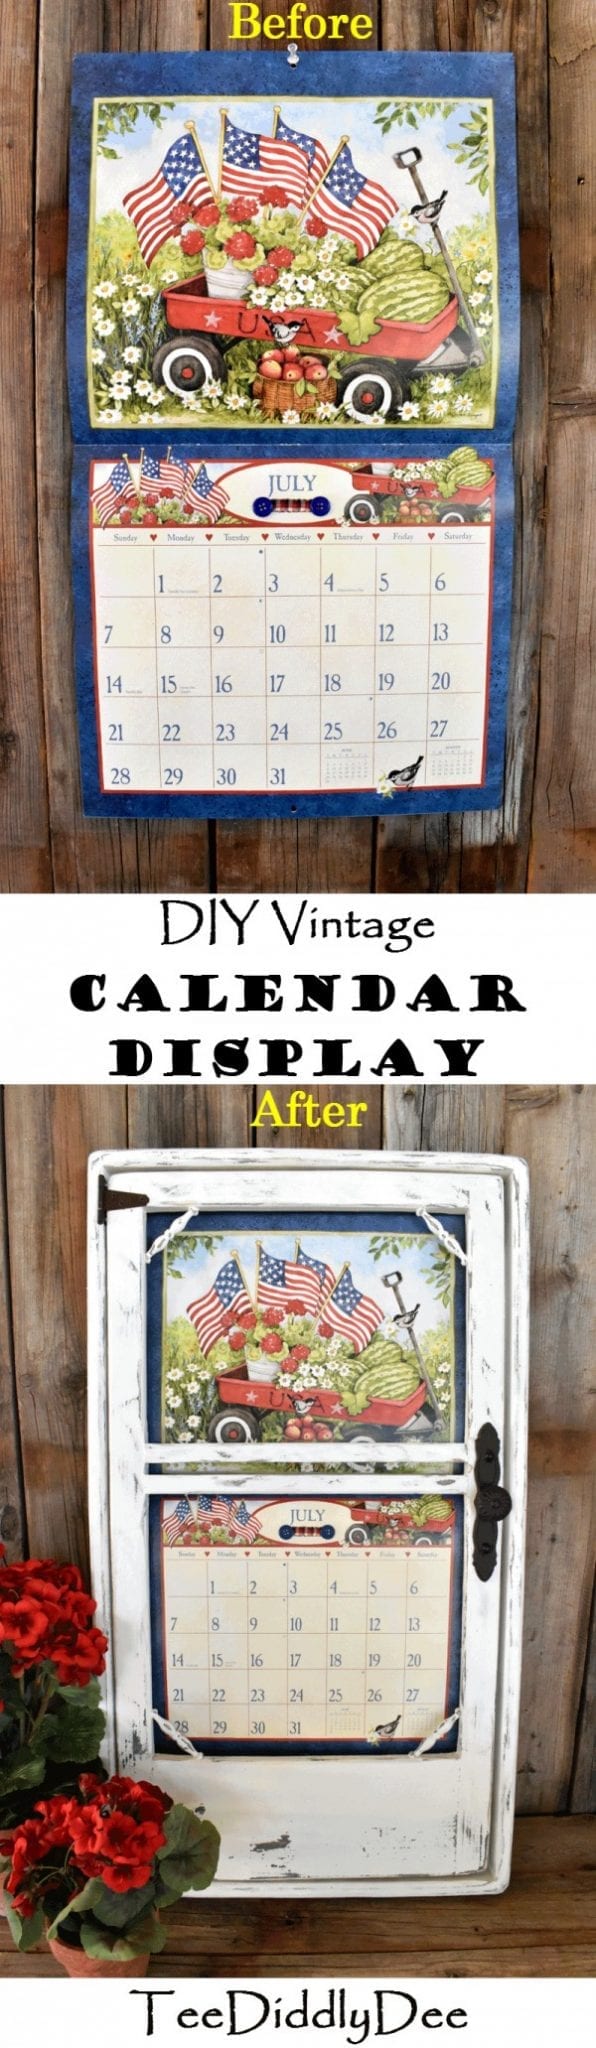
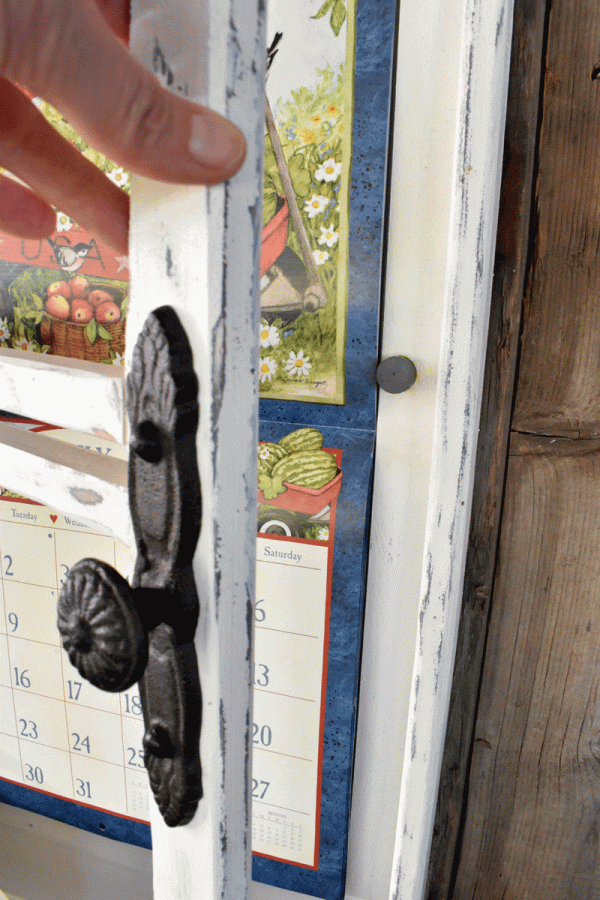
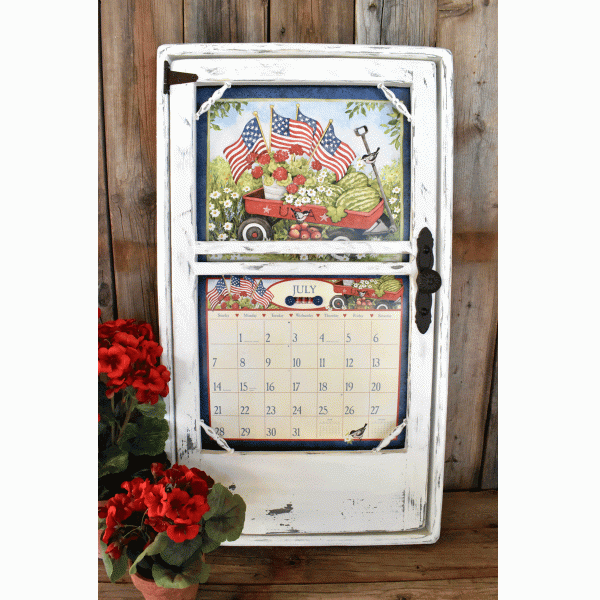
What do you think of my new DIY Vintage Calendar Display? I LOVE that it looks like an old-fashioned farmhouse door, complete with adorable little spindles, tiny hinges that really work and the most perfect, vintage-styled door knob. It’s so easy to change the months too. You just open the door, flip up another page, shut the door, and Ta-Da…..you’re done!
I’ve always loved having a physical calendar to see and write on, but I do hate to have them just pinned on the wall as they don’t look very fashionable. Now, I can hang my calendar up with all my other vintage décor and it looks just awesome! If you would like to make one just like it, I have included a step-by-step tutorial for you to follow below.
Note: For this project, calendars that are anywhere from 12 to 13 1/2 inches wide will fit, with the latter measurement being my favorite size, as it fills out the display the best.
DIY Vintage Calendar Display Tutorial:
Supplies:
Lumber:
- 1/4 inch thick plywood at 17 3/4in x 31 1/4in (Backside)
- Two 1×2’s at 31 1/4in long (Backside)
- Two 1×2’s at 16 1/4in long (Backside)
- Two 1×2’s at 29 1/2in long (Door)
- One 1×2 at 13in long (Door)
- Two 1×1’s at 13in long (Door)
- One 1×6 at 13in long (Door)
- Two pieces of 1/8in thick x 1 1/4in wide trim at 25in long (Backside Calendar Cradle)
- One piece of 1/8in thick x 1 1/4in wide trim at 16 1/4in long (Backside Calendar Cradle)
- Four Wooden spindles at 3 1/2 in long. You can also find them HERE.
Hardware:
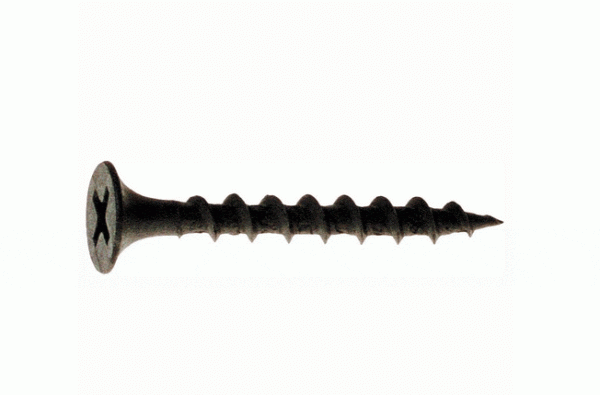
- One bolt and nut (#8 diameter) at 3/4in long (Calendar Hanger)
- Drywall screws at 1-1/4in long (I have found that drywall screws work really well when working with wood)
- Old fashioned Handle (I used one from Hobby Lobby HERE)
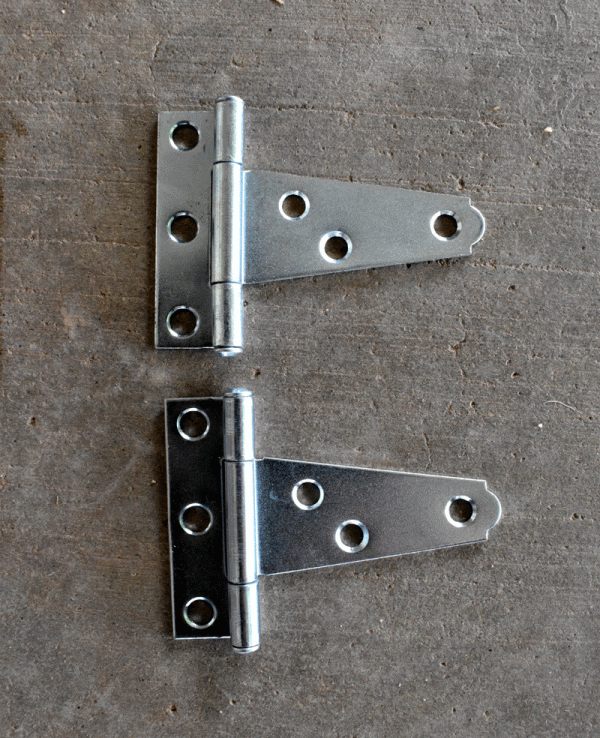
- Two black tee hinges at 2 1/2 x 3 inches (You can also get them at Home Depot HERE, but you’ll have to paint them black
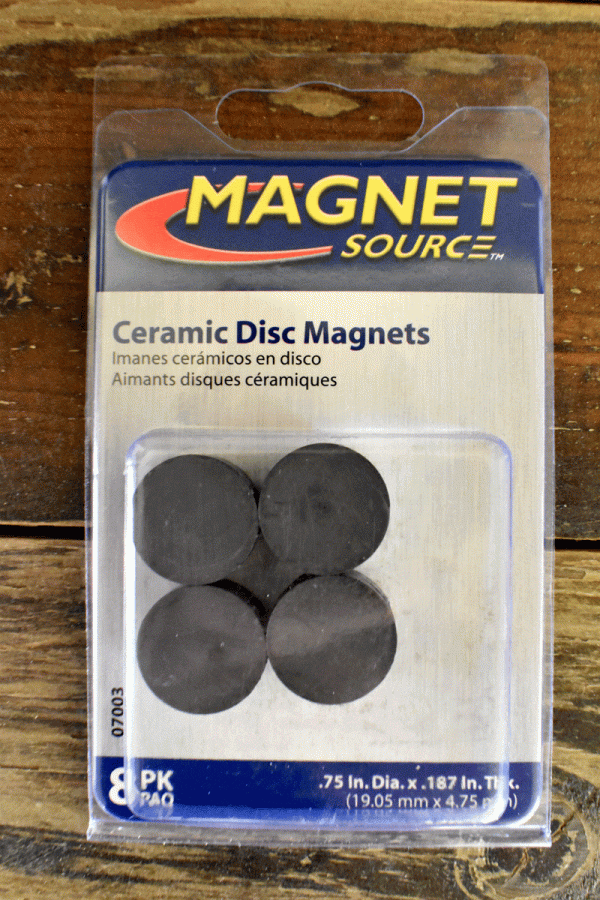
- Ceramic disk magnets (to keep the door shut) I needed them to be about 1/2in thick so I stacked a couple of them together to equal the thickness I needed. You can get some ceramic disc magnets similar to mine HERE.
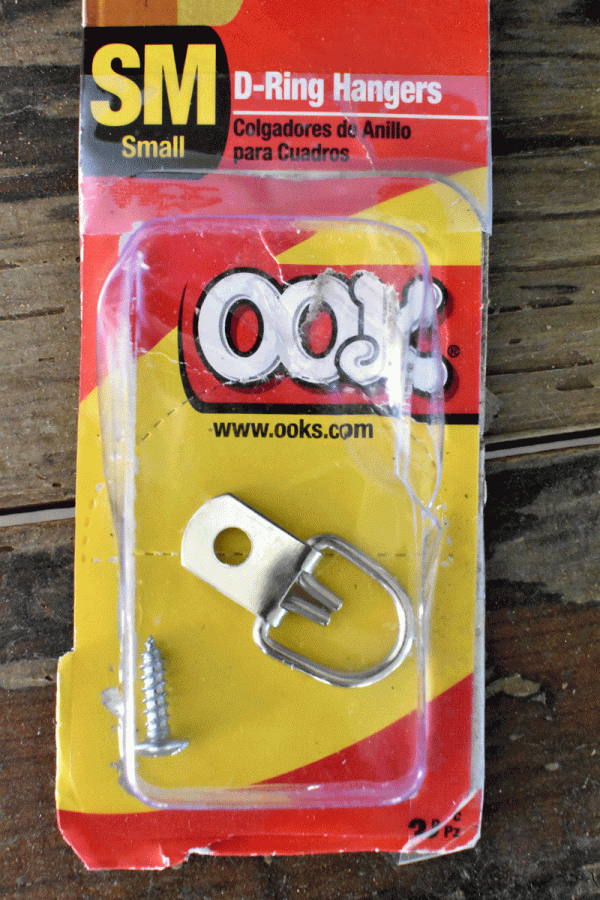
- Two D-Ring Hangers (you can get some like mine HERE)
Miscellaneous:
- Wood glue
- Wood stain (Basically, you want your wood to be dark before you put the white paint coat over it). I used a grey stain bought at Home Depot but you can use whatever color you want, as long as the wood is a darker color). You can even use my east-to-make DIY Weathered Wood Stain.
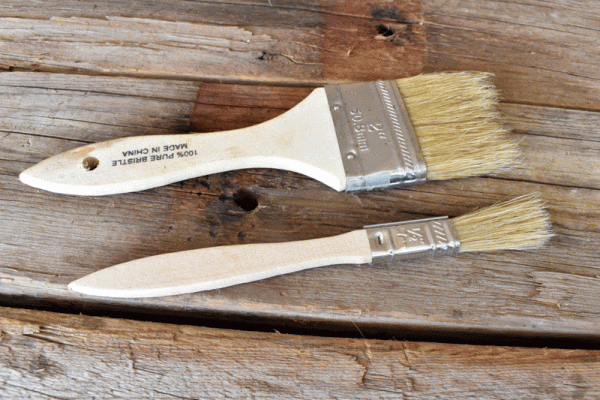
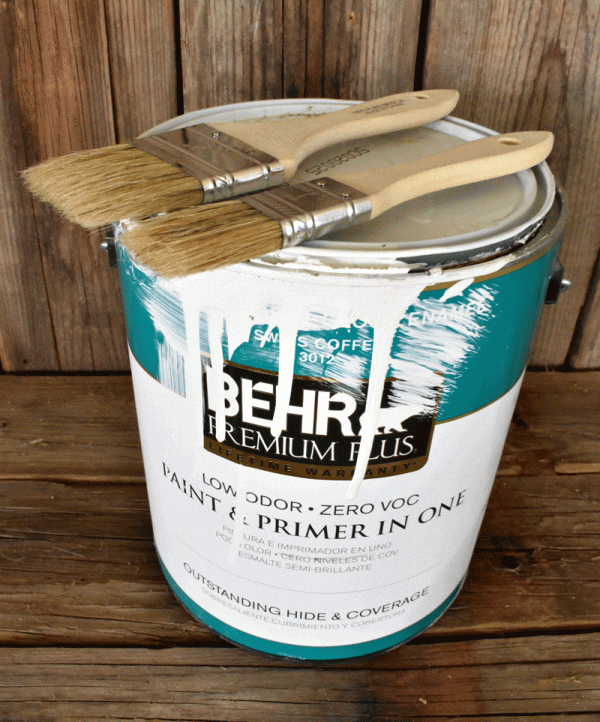
- Paintbrushes (I always use the cheap throw-away ones)
- White paint (Chalk or Matt Latex Paint can be used. I used some old latex house paint that I found laying around.
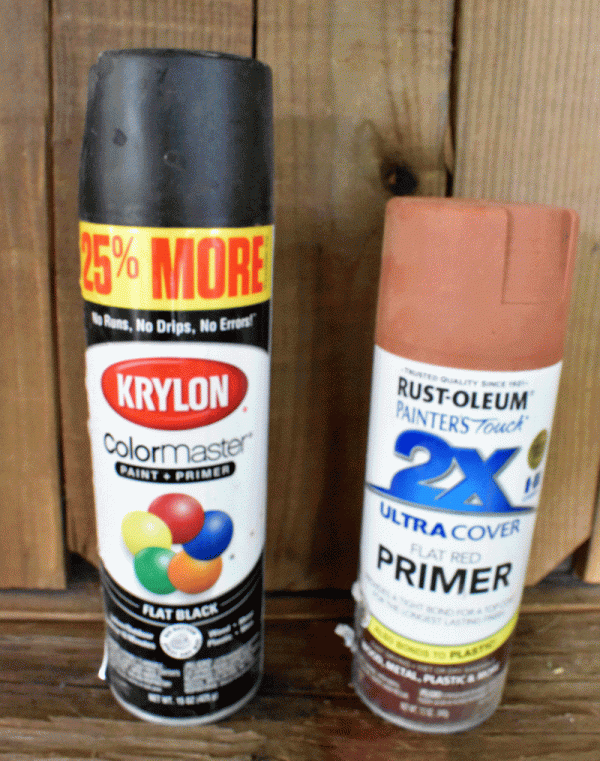
- Spray paint both black and a rusty-color (to paint your hinges). You won’t need the black paint if your hinges are already black.
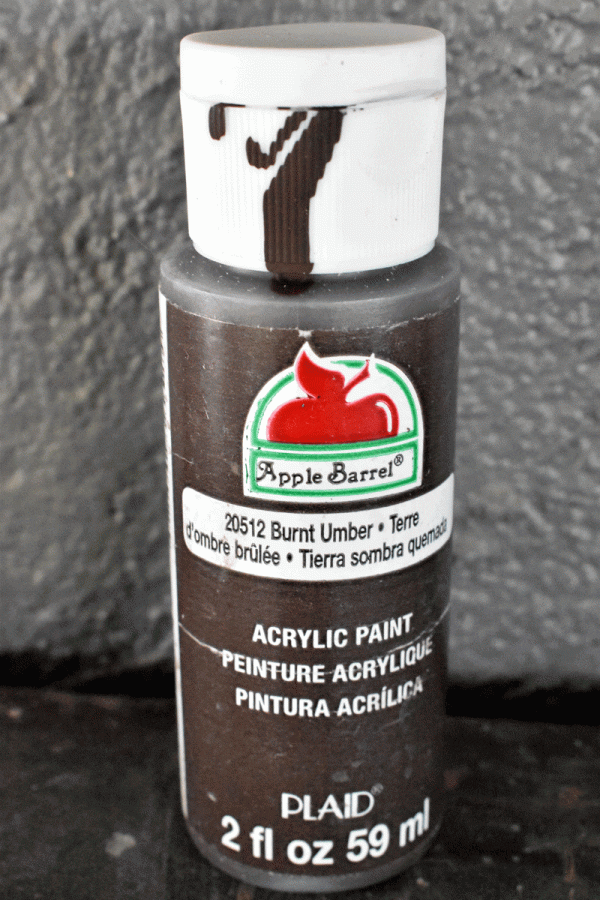
- Some brownish or rusty-colored paint (to paint the hinge screws). Chalk paint or matte acrylic paint found at any craft store will work just fine. You can use a small paintbrush or Q-tip for applying.
Tools:
- Kreg Pocket Hole Jig (you can get one like mine HERE)
- Kreg Pocket Hole Screws (1 1/4in long).
- Orbital sander with 60 grit sandpaper (for roughing the paint up to give it an look old). You can do this by hand if you don’t have a sander.
- Belt Sander with 60 grit sanding belt (to round off the edges of the wood for an old look)
- Hand drill with bits
- Mitre Saw (also called a chop saw)
Pictures of Supplies
(with corresponding numbers)
Lumber

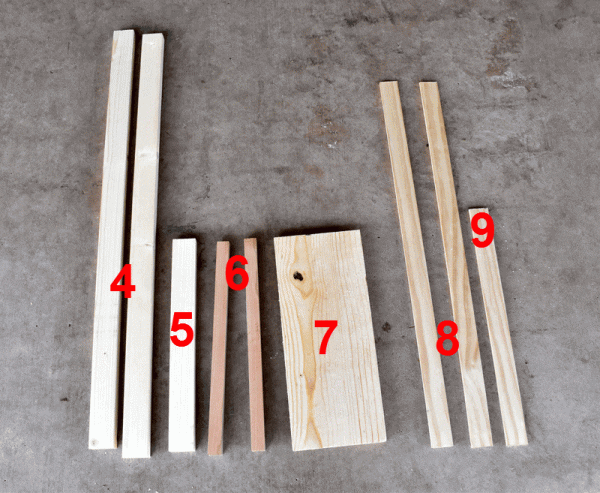

10
Hardware
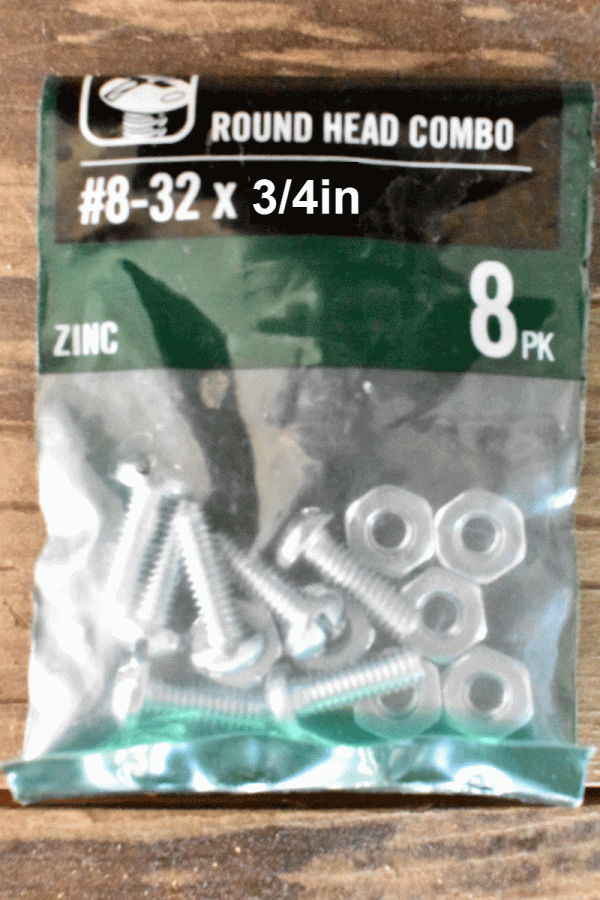
1
2

3
4

5
6
Miscellaneous

1

2
3
4
5

6
Tools

1

2

3

4

5

6
Instructions:
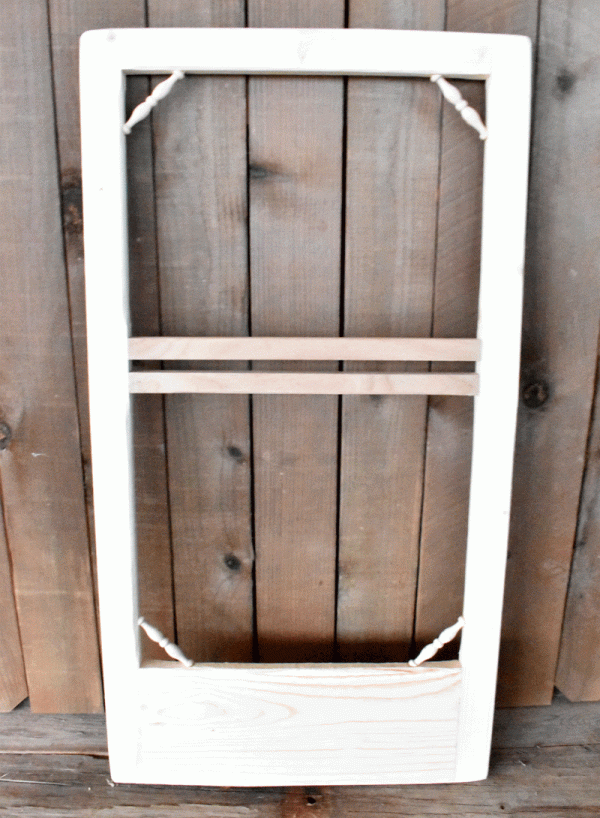
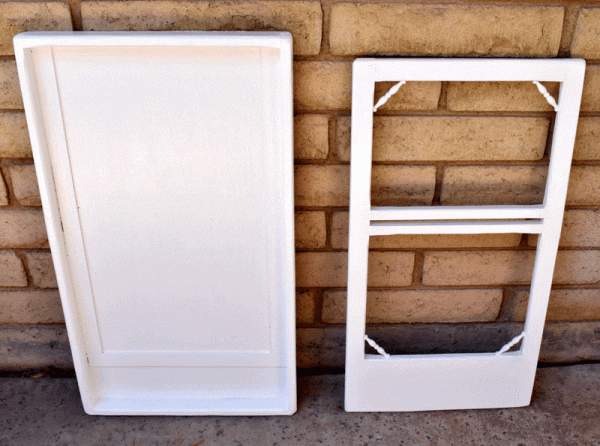
Assembling the Door:
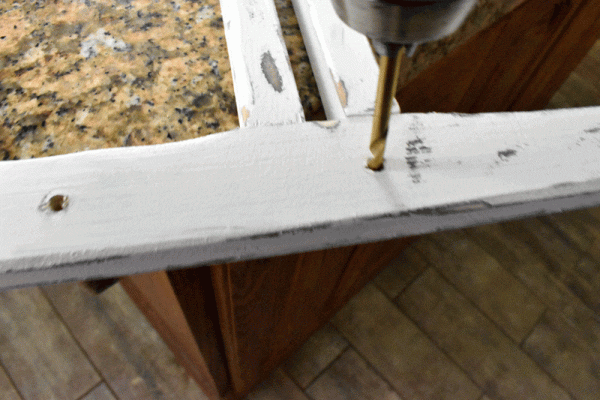
First, gather the wood pieces (Lumber #5, #6, and #7).

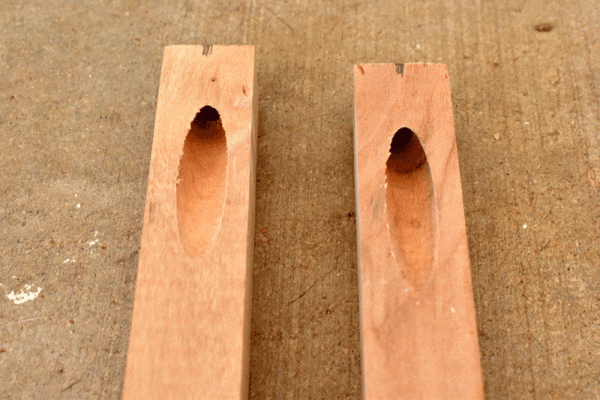
Next, using the Kreg Jig (Tools # 1), drill pocket holes into the ends of all the pieces of wood as shown.


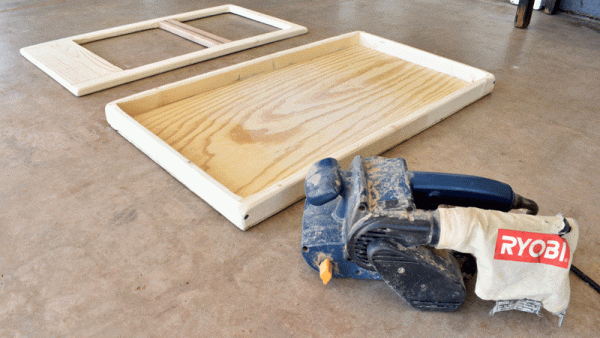
With the Kreg jig pocket hole screws (Tools #2) and the hand drill (Tools #5), screw wood pieces (Lumber #4, #5, #6, and #7) together as shown to make the door, shown below.

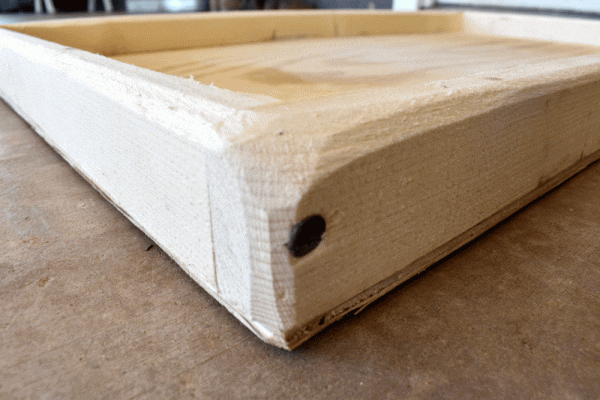
Assembling the Back:
To assemble the back of the holder, first, screw together the 4 wood pieces (Lumber # 2 and #3) with the 1-1/4 inch long wood screws. Note: Make sure to drill pilot holes before adding the screws to avoid cracking the wood!


Next, screw on the plywood (Lumber #1).

Now, round off all the edges of the wood with the belt sander (Tools #4)
Adding the Spindles:
With the chop saw, cut the ends off of the wooden spindles (Lumber #10) at a 45 degree angle as shown below. When doing this go slow and watch those fingers!

Next, add a dab to the ends of the spindles and place one in each corner of the door.


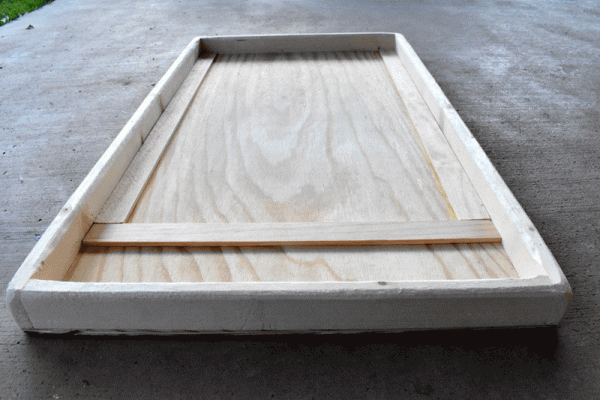
Framing Calendar Cradle on the Backside:
To assemble the cradle you will set the calendar into, first, gather the two longer pieces of trim (Lumber #8) and glue both pieces to the inside of the backside piece as shown.
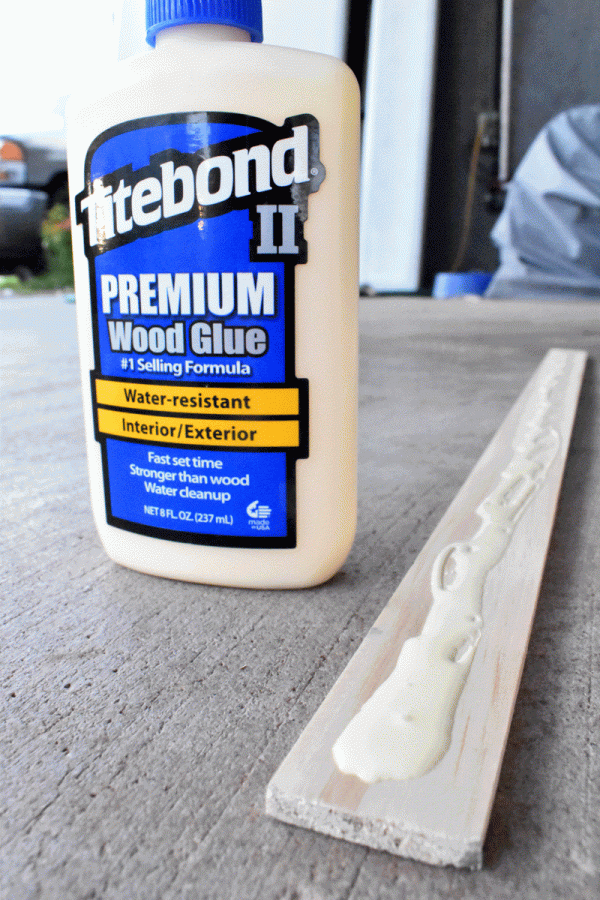

Last, glue on the last piece of trim (Lumber #9).
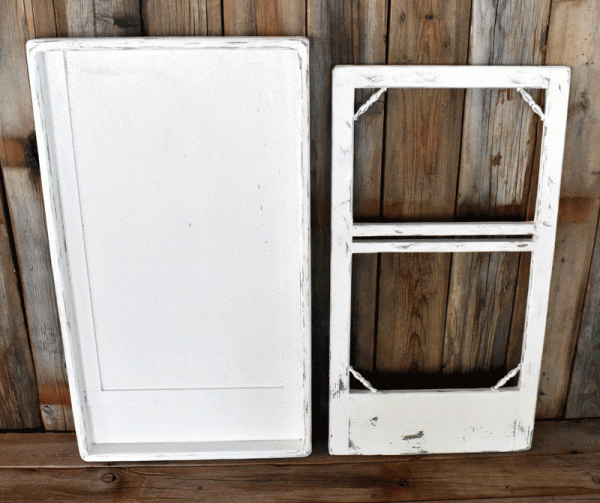
Staining Wood:
After the glue on the spindles and trim has dried, brush on a coat of stain (Miscellaneous #2) to both the door and backside piece. Let it dry.


Now, add a generous coat of white paint (or whatever color you want) to both the door and backside piece. Let it dry.
Painting Wood:

Distressing Wood:
Using the orbital sander (Tools #3), sand down the paint in small random areas so that the darker stain underneath shows through a bit. I do this on the edges, corners, and some of the flat areas as to make the white paint look like it’s been rubbed off from years of use.


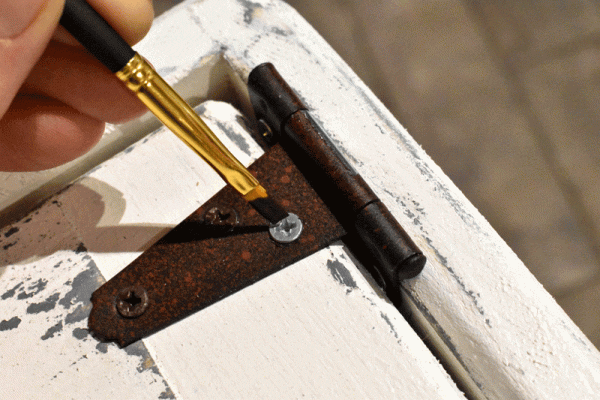
Adding Hinges:
Gather the two hinges (Hardware # 4)

Next, spray paint the hinges black (Miscellaneous #5), then let them dry. Second, spritz them a little bit with the rusty-colored spray paint (If you bought your hinges already black, you can simply spritz them with the rust-colored paint).


Now, screw the hinges to backside and door so that door can open.

Last, dab a little brown or rust-colored paint (Miscellaneous #6) onto the tops of the screws so that they’ll match the hinges.
Attaching Handle:
Now you can attach the handle (Hardware #3) to the door. Place handle on door where you like it. Mark holes for screws. Now drill a hole completely through each mark. Last, I inserted the screws (that were supplied with the handle) from the underside of the wood and then screwed them into the handle.
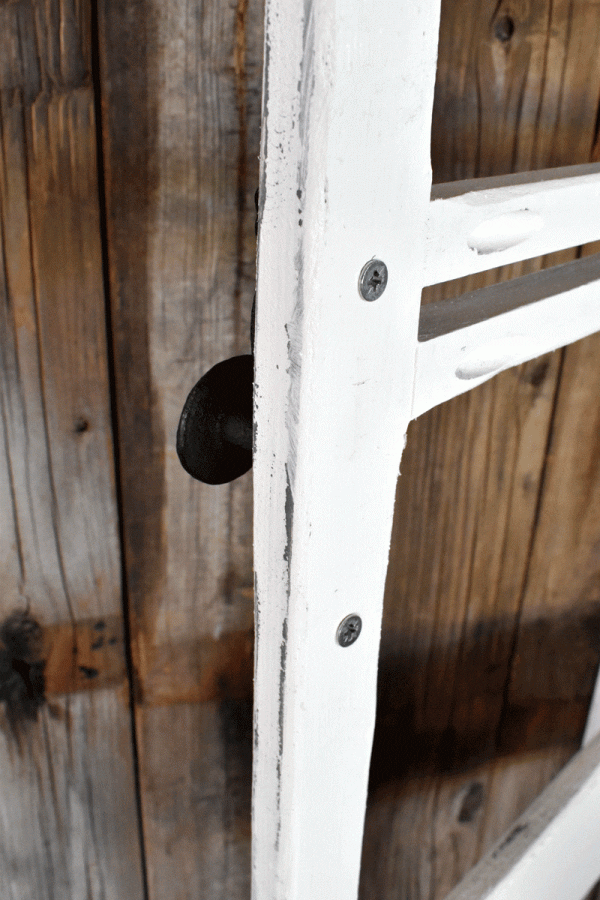

Securing the magnet:
To keep the door closed, I glued a magnet (Hardware #5) to the inside of the display with wood glue.


I made sure the magnet lined up perfectly with one of the screws of my handle when the door was shut.

Attaching Bolt to Hang Calendar:
To attach the calendar, first, place it in the exact spot where you want it in the display. Next, mark with a pencil where the hole is to hang the calendar.

You will need the nut and bolt (Hardware # 1), see below) for your calendar hanger.

Find a drill bit that is the same size (or slightly larger than the bolt).

Now, drill a hole where you marked with the pencil.

Next, slide the bolt through the back to the front.

Last, fasten the nut onto the bolt from the inside. This is where your calendar will hang from.

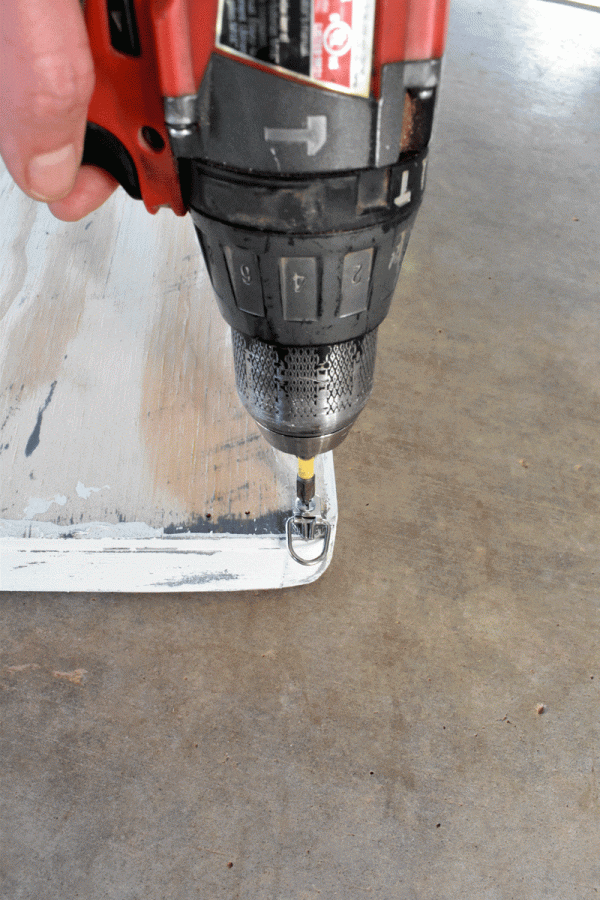
Attaching Hangers on Back to Hang Display:
First, fasten the two D-ring hangers (Hardware # 6) to the back of your display in order to hang it on the wall.
Now it’s time to hang it up!

Doesn’t it look awesome?
Enjoy! Let me know how you like it!
DIY Vintage Calendar Display
Sharing at these great link parties:
The Hearth & Soul –
Sharing at these great link parties:
The Hearth & Soul – All About Home – All About Home – Inspire Me Monday – Inspire Me Monday – Inspire Me Monday – Wonderful Wednesday – Inspire Me Tuesday – – Creative Muster Party – Wow Me Wednesday – Your Whims Wednesday – Turn About Tuesday – Tuesdays with a Twist – Wonderful Wednesday – To Grandma’s House We Go – Vintage Charm Party
More great link parties I’m sharing at:
Waste Not Wednesday – Party in Your PJs – Thursday Favorite Things – Grace at Home – Keep in Touch – Encouraging Hearts and Home – Funtastic Friday – Friday Favorites – Flaunt it Friday – Happy Pink Saturday – Dare to Share – Saturday Sparks Create, Bake, Grow & Gather – A Morning Cup of Joe! – Farmhouse Friday – Snickerdoodle Create Bake Make – Happiness is Homemade – Over the Moon – Silver Pennies Sunday – Love your Creativity
Pamela @ DIY Vibes
Such a fun and unique idea!
Tee
Thank you Pamela!
Joanne
That is so adorable!
Tee
Thank you Joanne!
Cynthia
This turned out so great, I love all the details you added. We added those same knobs on the cupboards in our laundry room in our old house. I loved them.
Tee
Thank you so much, Cynthia! I wanted it to look like an old-fashioned door so I added the spindles and the vintage-styled door knob! I am pleased with how it turned out.
Michelle
This is absolutely adorable!!
Tee
I’m so glad you like it, Michelle!
Cecilia
Love how this turned out! Thanks for sharing at Vintage Charm!
Tee
Thank you Cecilia! I’m glad you like it!
Ann
What a show-stopper! I absolutely love this idea – Pinned and being featured on my blog Tuesday evening. Thank you for sharing at Party In Your PJ’s!
Tee
Thank you so much Ann! I’m glad you like it! I appreciate the pin and being featured on your blog!
Melynda Brown
This is totally adorable! Your post, DIY Vintage Calendar Display is one of my favorites for tomorrows Encouraging Hearts and Home link-up! Stop by and say hello.
Tee
Thank you so much for the feature! I will definitely stop by!
Linda Primmer
Very cute project. Looks like a lot of work, however it shows beautifully. Thank you for sharing at Love Your Creativity. I am featuring your diy calendar today. Happy Mother’s Day
Tee
Thank you Linda! It was actually not very hard to make at all. Thank you for featuring my calendar! I really appreciate it!
Debbie-Dabble
Tee,
LOVE this idea!! I have a wood frame that i ordered a long time ago to place calendars in and I have it in my Den..I am now looking at it and trying to figure out what and how i can add to it to look like yours!! Thanks so much for the inspiration and thanks too for taking the time to drop by and for letting me know that you did by leaving such a kind comment!!
Stay safe, healthy and happy!
Hugs,
Debbie
Tee
Thank you Debbie! I hope you can figure it out! I would like to see how it turns out! Thank you for visiting today and for your sweet comments! Stay safe and happy too! Tee