
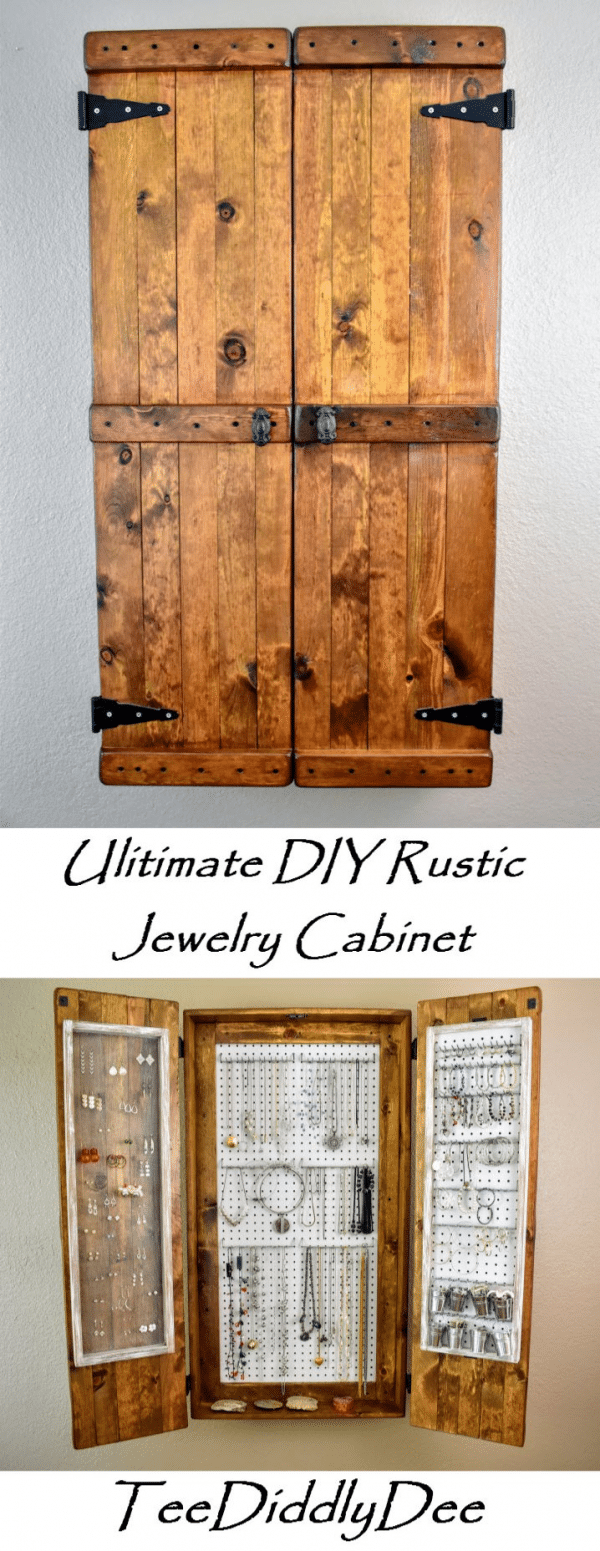
It’s up!!! My new jewelry cabinet has been sitting in my bedroom, waiting to be hung as I’ve been unpacking for the past 3 weeks. I actually completely finished it last month and have been so excited about mounting it, but I’ve been absolutely swamped with the move to the new house that I haven’t had time to hang it up on the wall till now…and I must say it looks as good as I imagined it would!
Oh, and I’m also happy to say that I was able to finally put my old, puny jewelry box to rest because I have something WAY BETTER NOW.
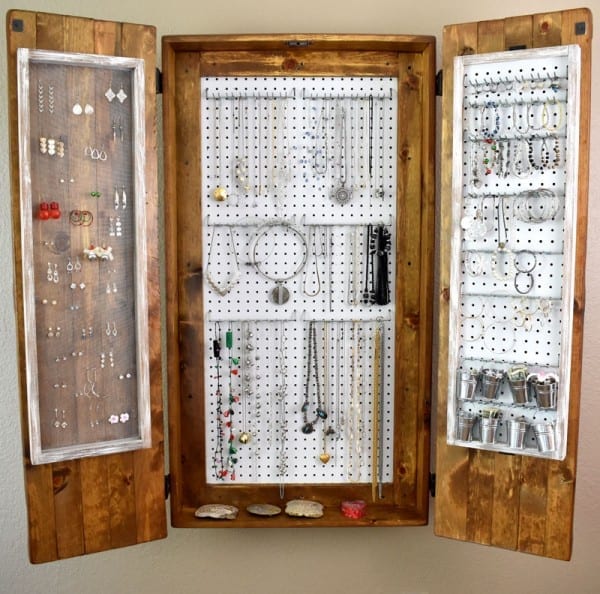
What girl WOULDN’T want one of these!
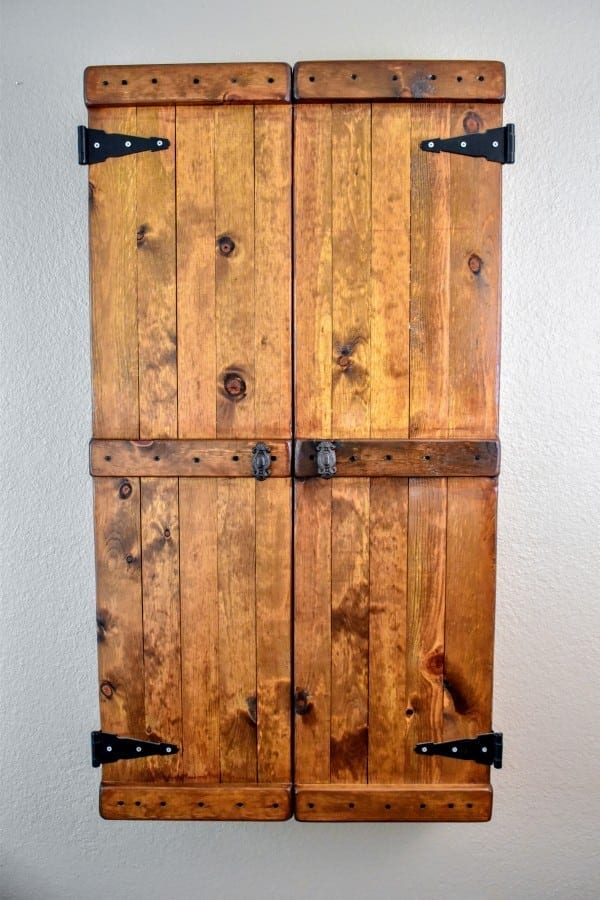
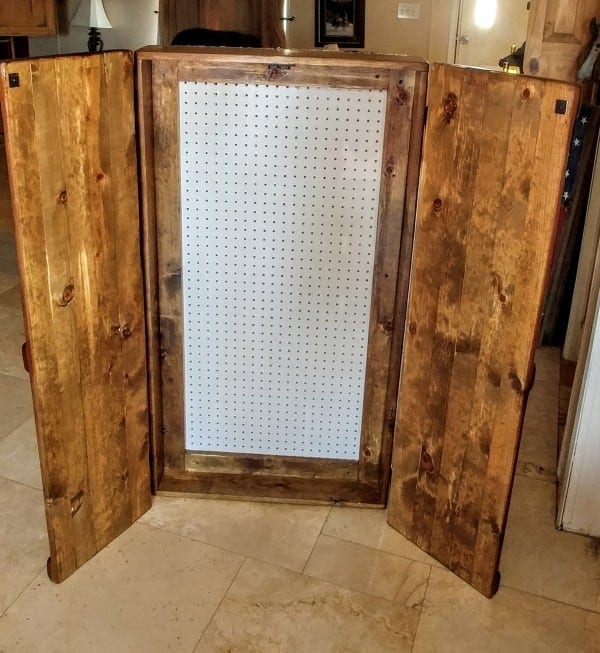
The Ultimate DIY Rustic Jewelry Cabinet
Plenty of room for EVERYTHING!!!
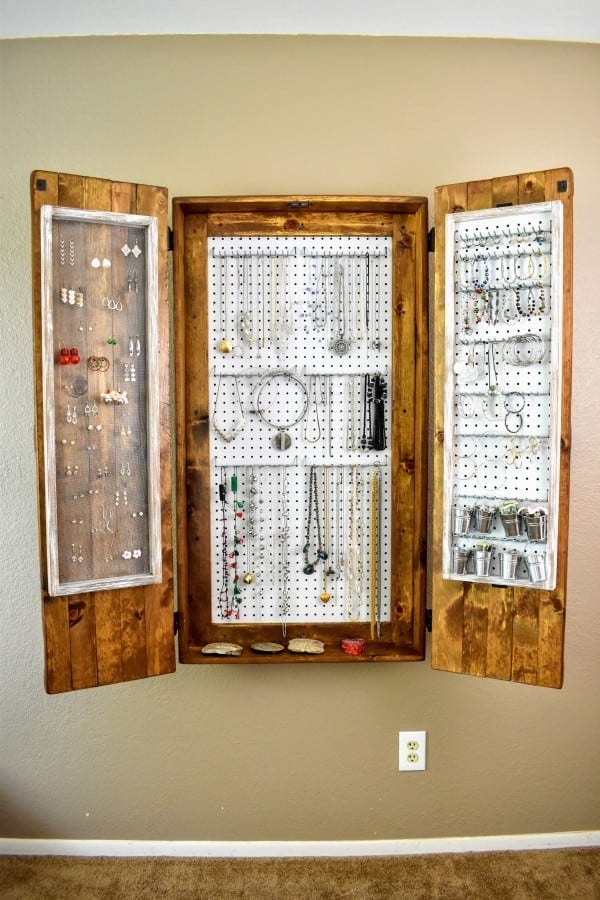
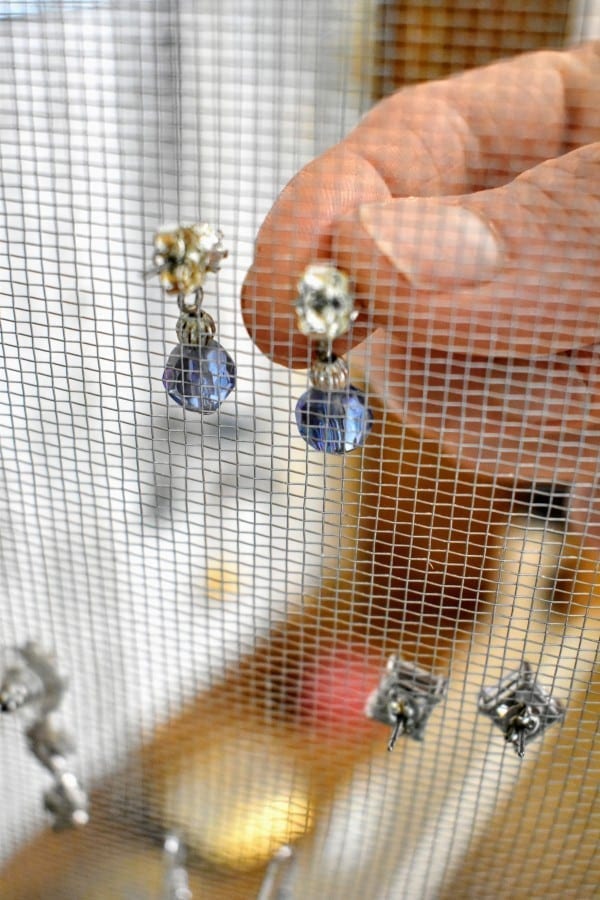
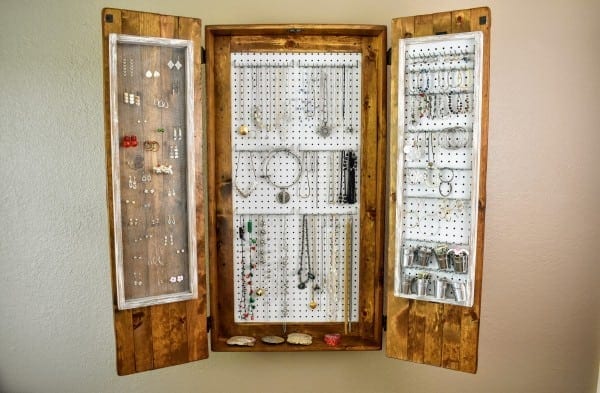
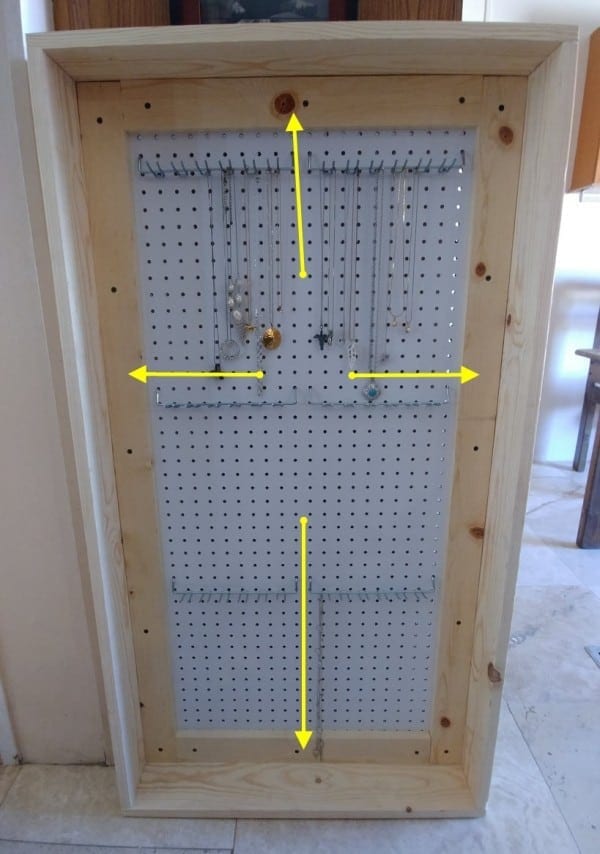
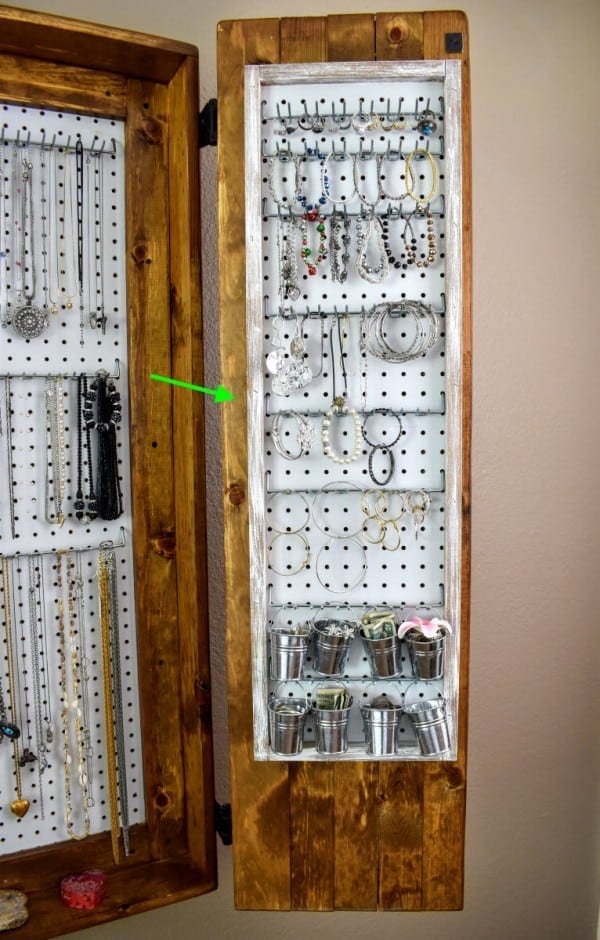
The earing hanger is my favorite part of the whole thing…check it out!
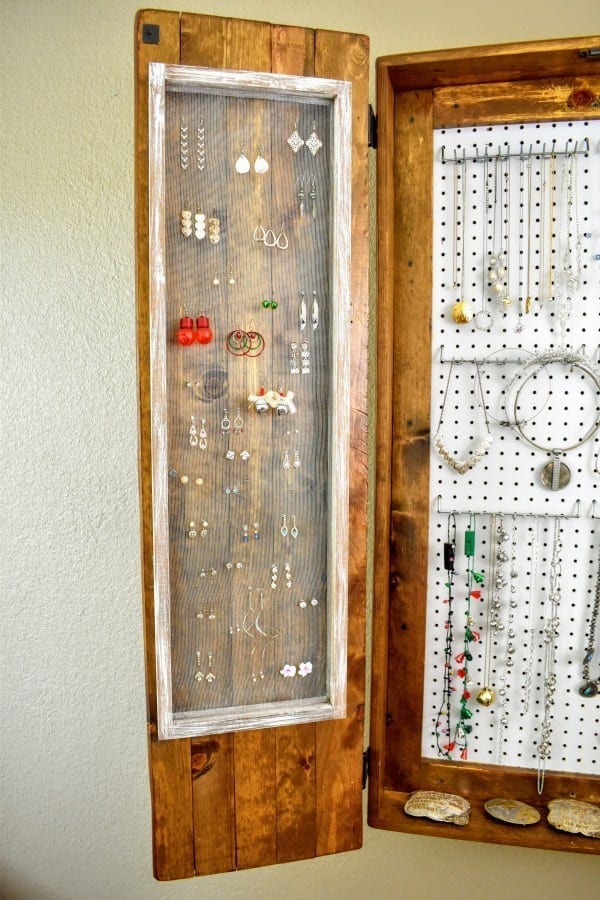
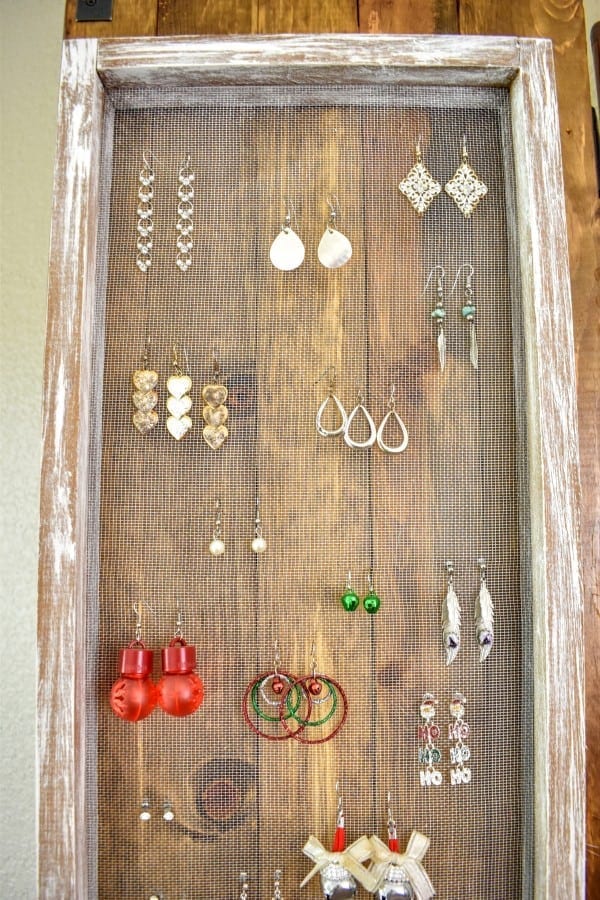
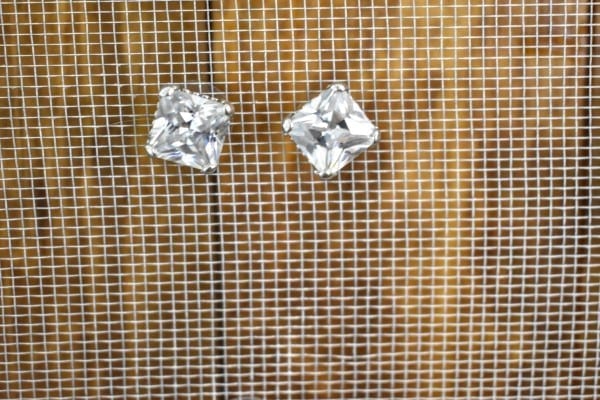
It actually swings out so you can get to the backs of your earrings to unhook them from the hanger

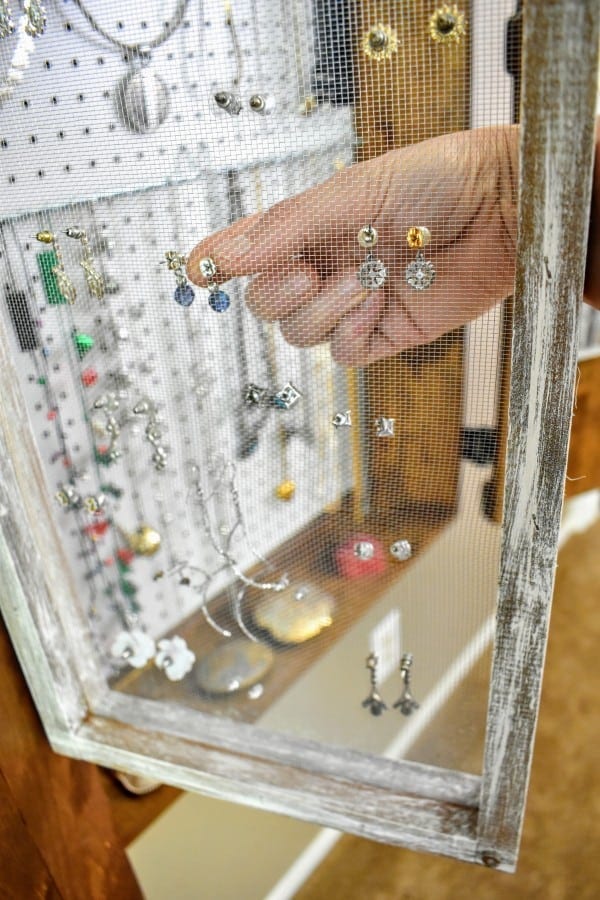
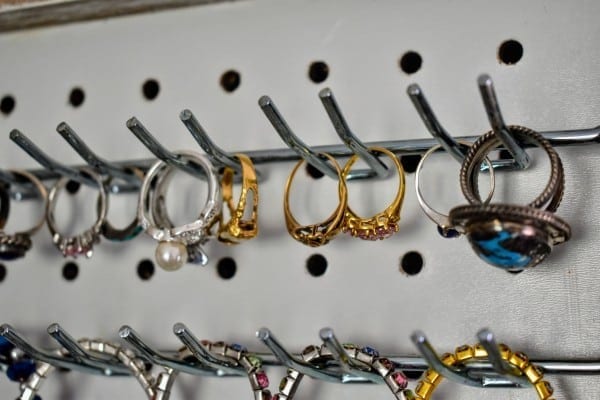
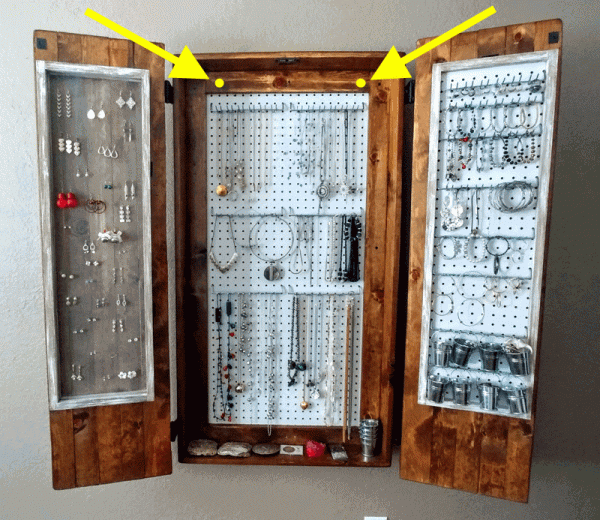
The other door is just as amazing, as it hangs my rings and bracelets…
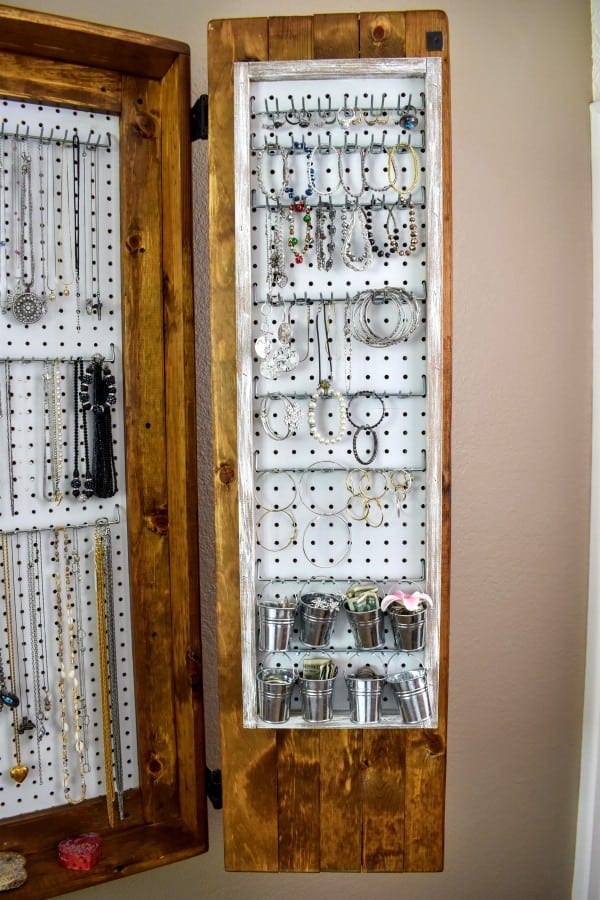
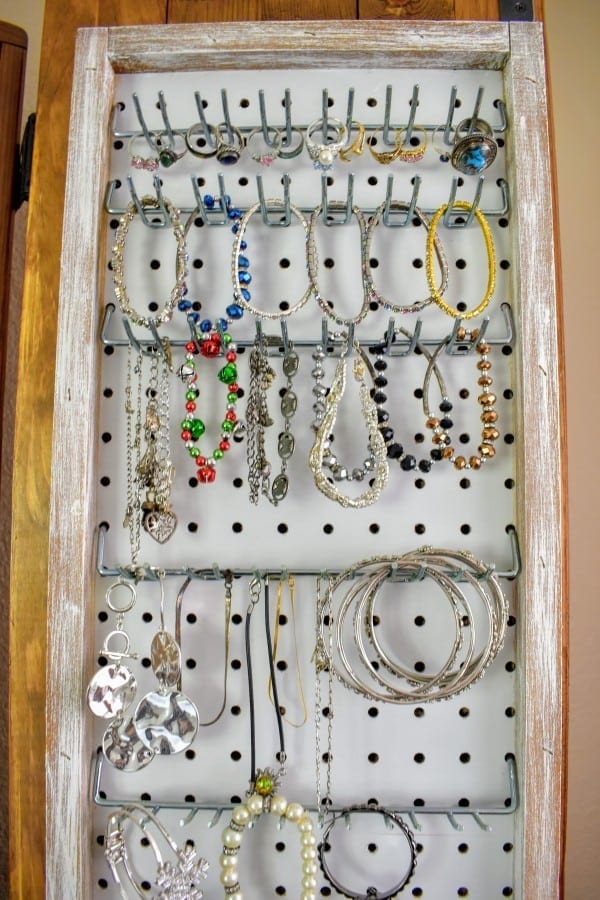
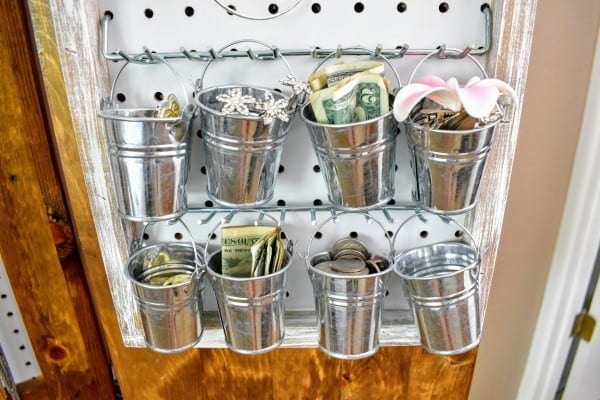
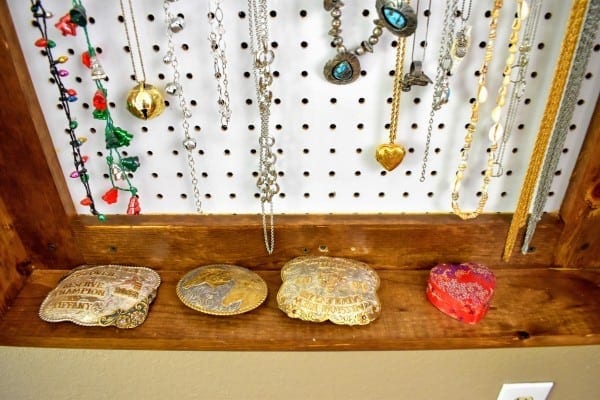
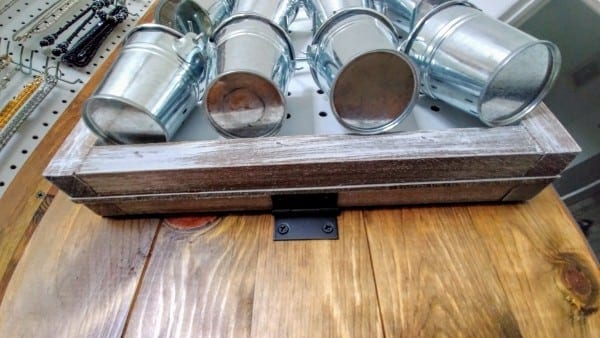
I hung tiny galvanized buckets to hold all of my little things that couldn’t be hung by themselves.
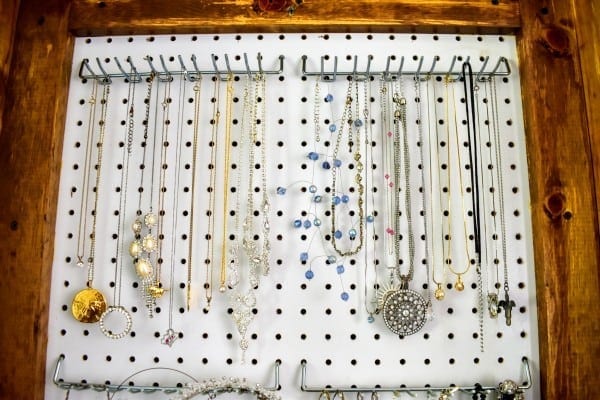
…and then there’s the center part of the cabinet that displays all of my necklaces. No more tangled-up messes!!!
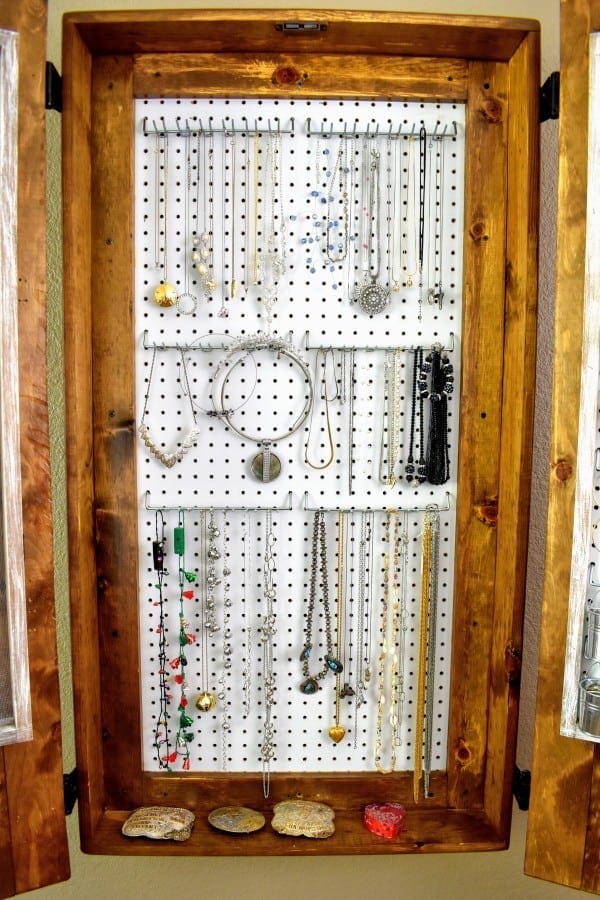
At the bottom there’s enough room to store a few larger things (like my belt buckles that I won in competitions with my horse)
Here’s how I built it!
Ultimate DIY Rustic Jewelry Cabinet
Supplies:
- Four 1x3s at 1ft 8 1/4in (Inner Frames)
- Four 1x3s at 4ft (Inner Frames)
- Two 1x6s at 2ft 2 3/4in (Outer Frame)
- Two 1x6s at 4ft (Outer Frame)
- Eight 1x3s at 4ft 2in (Doors)(26inches)
- Two 1x4s at 4ft 2in (Doors)(26inches)
- Six 1x3s at 1ft 1 1/4 in (Door Braces)
- One sheet of pegboard at 2ftx4ft
- Box of 1 1/4 wood screws
- My easy DIY old wood stain
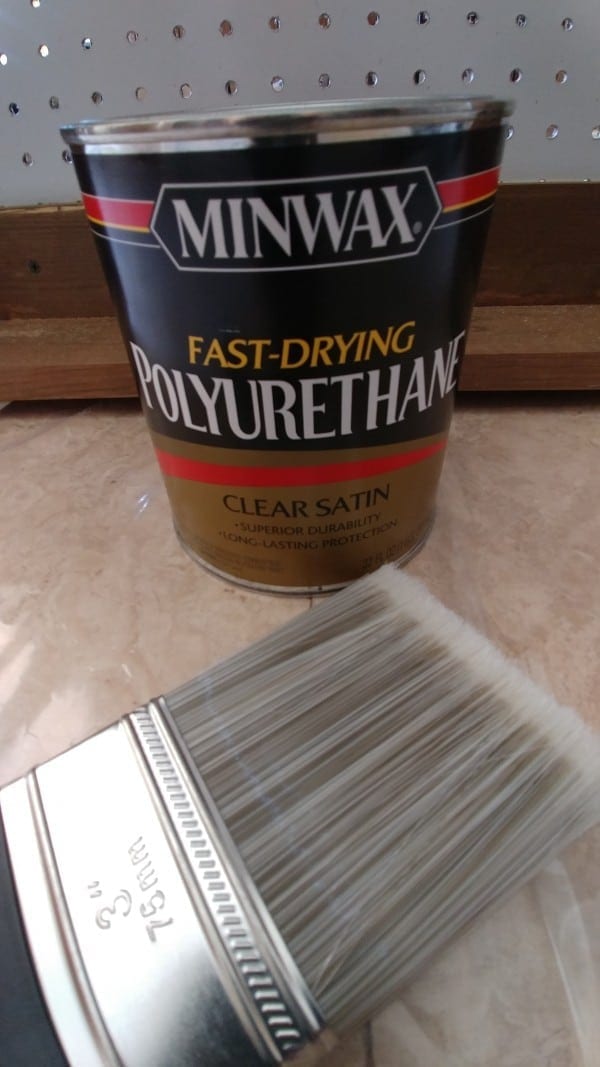
- Oil based polyurethane (I used Minwax clear satin)
- One or two paint brushes (for applying the wood stain and also the polyurethane)
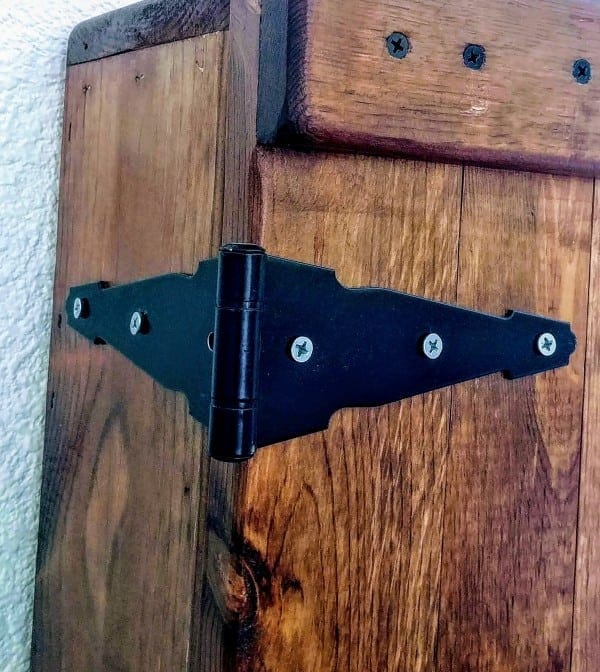
- Four large double-sided strap hinges (I bought mine at Home Depot HERE)
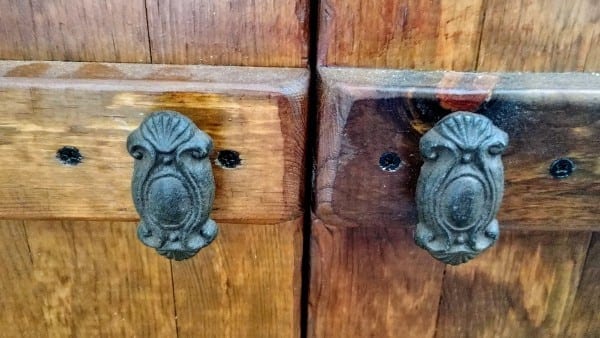
- Two old fashioned knobs (I bought mine at Hobby Lobby)
- Double Magnetic catch (for the doors)
- Five or six pegboard multi-tool racks for hanging your jewelry (I bought mine at Home Depot)
- Tiny Metal buckets (for holding small pieces of jewelry that can’t be hung by itself)
Tools:
- Chop Saw
- Skill saw or table saw (only if you don’t buy the pegboard already pre-cut)
- Hand drill with bits
- Nail gun with 1 1/4 long finishing nails (if you don’t have a nail gun you can use a hand drill with screws)
- Sander
You’ll also want to visit the links below to see how to build the side door organizers (which are really easy to make)
- DIY Rustic Pegboard Jewelry Organizer (on the right door)
- DIY Hinged Vintage Earring Organizer (on the left door)
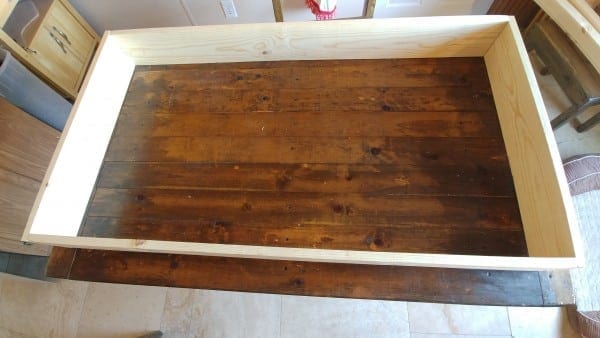
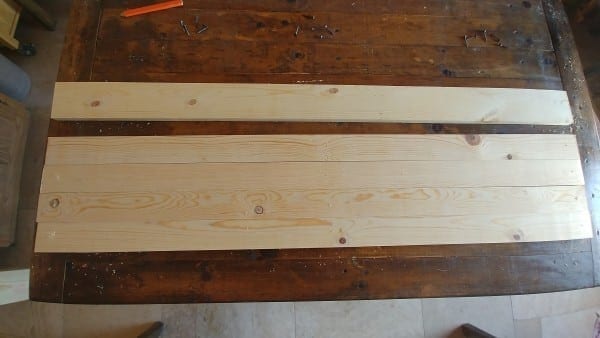
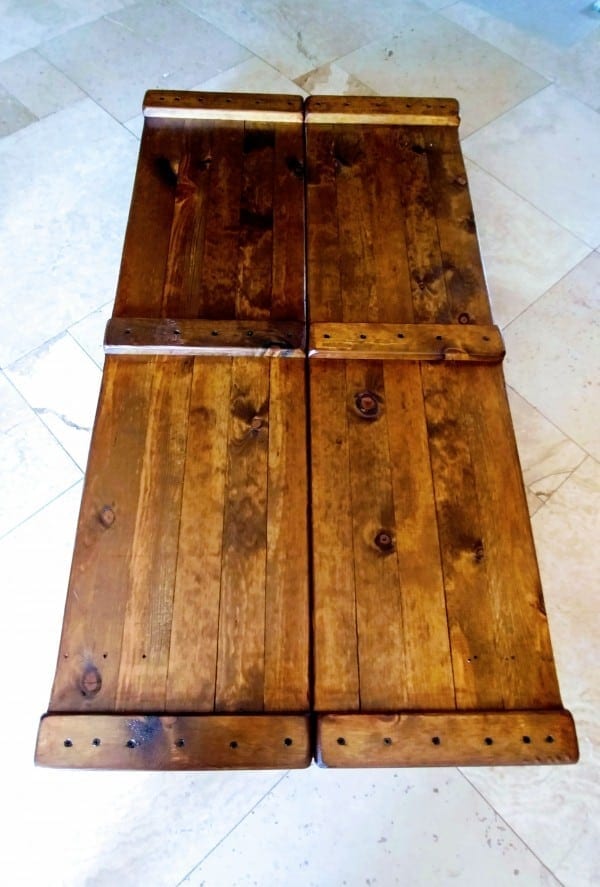
Make a frame by sandwiching the longer 1x6s in between the shorter 1x6s. Then screw together with wood screws (remember those pilot holes!)
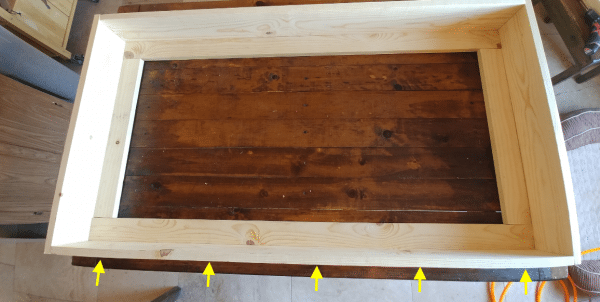
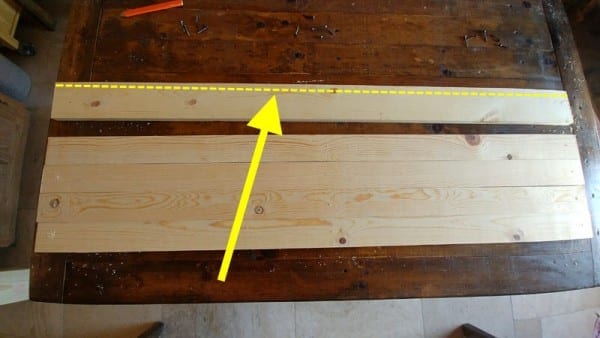
Place two 1ft 8 3/4in 1x3s and two 4ft 1x3s inside the outer frame, making an inner frame. I attached the outer and inner frames together by nailing around the perimeter of the outer frame with my nail gun (where the arrows are pointing)
Place pegboard on top of the inner frame and center it
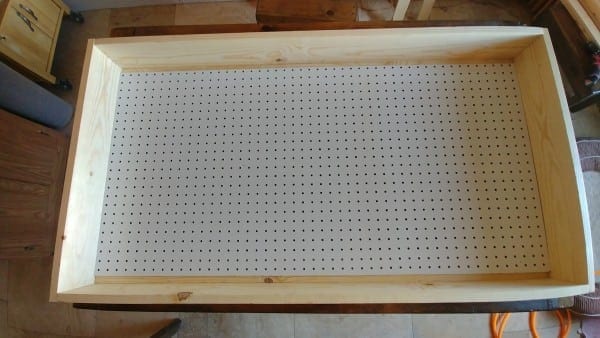 Now add a second inner frame on top of the pegboard and screw down into the pegboard.
For each door, gather four 4ft 2in 1x3s and one 4ft 2in 1×4.
For both 1x4s, cut off 1/4 of an inch with a saw.
Now screw the doors together using three 1ft 1 1/4 in 1×3 braces. (Although the pic doesn’t show, I later found that the best way to make sure the doors will line up with the frame you just built, is by putting the doors together on top of the frame. This way you can make sure all the sides and corners match as the doors are screwed together). I also later found that to make the doors extra sturdy and prevent future shifting, I put two screws into the 1×4 when attaching the braces (see red dots).
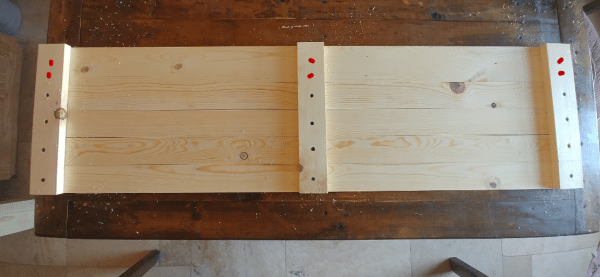
Make two doors
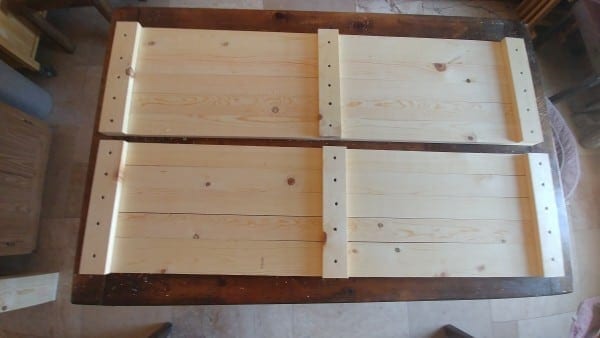
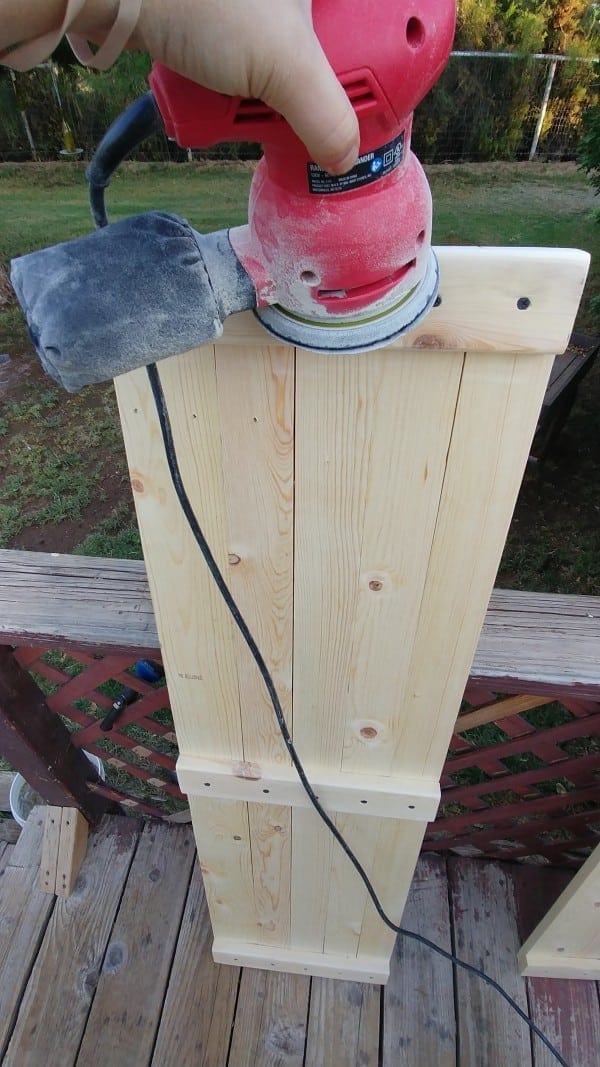
I rounded off all the edges with a sander

(This is optional) I wanted to make sure the doors fit before staining so I attached them to the box with the hinges. Doing this gave the cabinet pre-drilled holes to easily put everything back together when completely finished.

Now that I knew the doors fit nicely, I removed them and stained the box and the doors with my easy DIY old wood stain. I used masking tape to avoid getting stain on the pegboard.
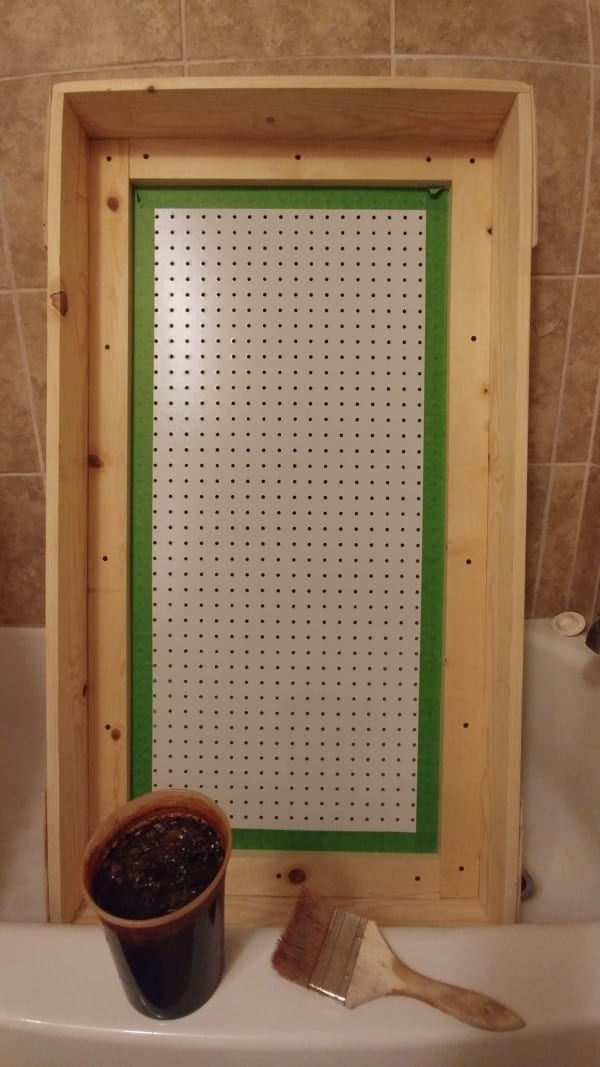
Add a couple coats of polyurethane to the wood, again making sure not to paint the pegboard.
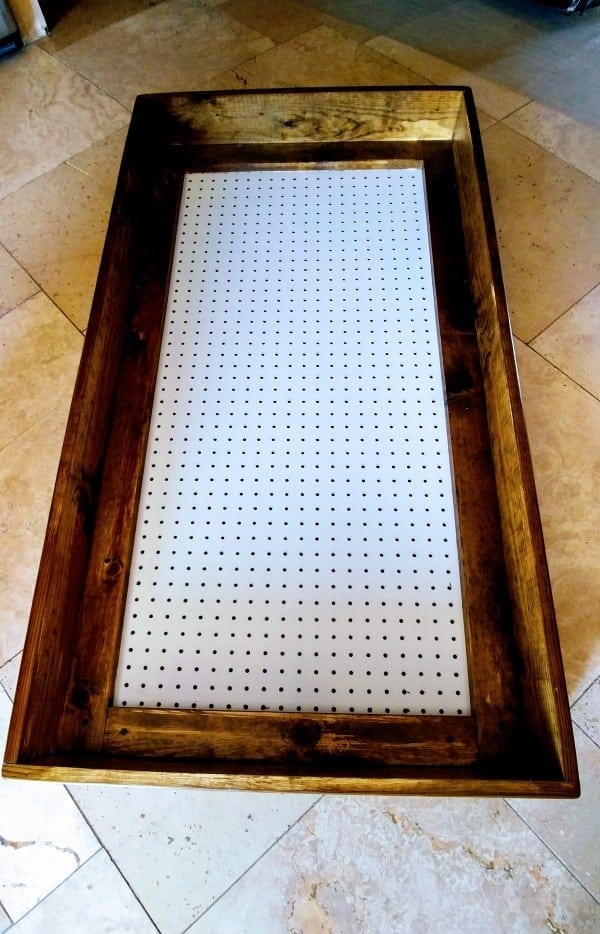
Beautiful! Now just add the hinges and door knobs
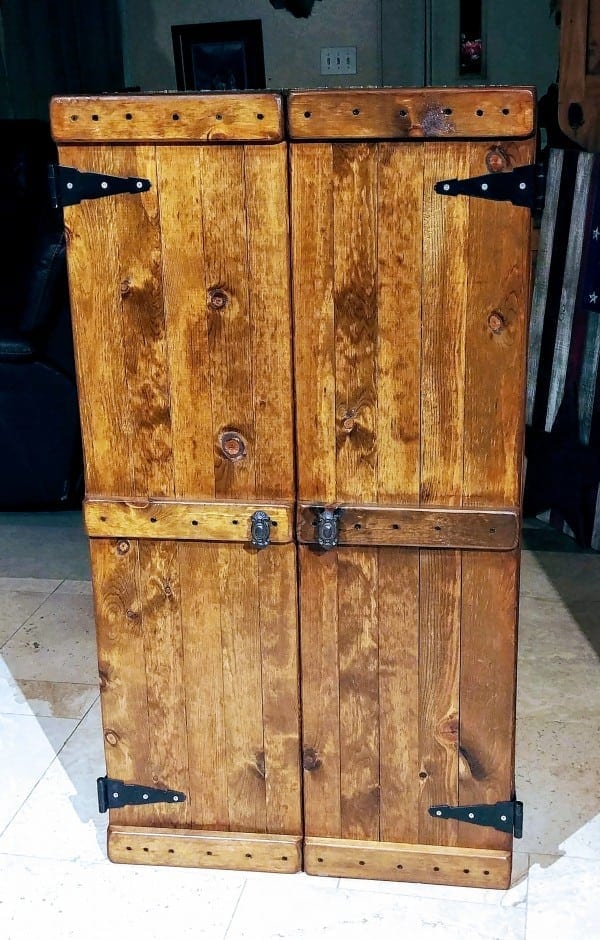
Add the Double Magnetic catch to keep the doors closed when not in use

We are done with the main cabinet part!
If you haven’t yet made the side door jewelry organizers that fit inside the cabinet, make sure to visit the links below:
- DIY Rustic Pegboard Jewelry Organizer (on the right door)
- DIY Hinged Vintage Earring Organizer (on the left door)
If you’ve already built the side door organizers, here’s how to mount them:
Mounting the DIY Rustic Pegboard Jewelry Organizer:
Center the organizer where you want it on the door, leaving a 1 3/4in margin on the inside of the door, to allow it to shut properly when the pegboard organizer is attached.
I simply used a small hinge on the top and bottom of the organizer for mounting
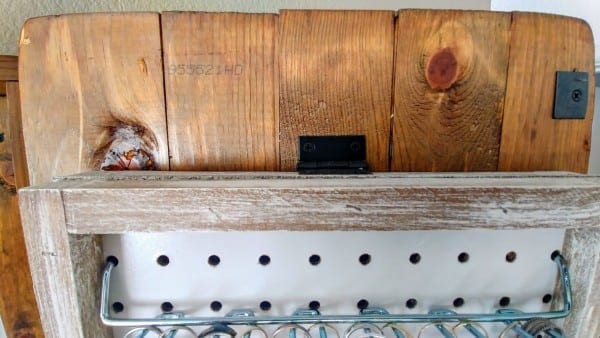
Mounting the DIY Hinged Vintage Earring Organizer:
Center the organizer where you want it on the door, leaving a 1 3/4in margin on the inside of the door to allow it to shut properly when the earring organizer is attached.
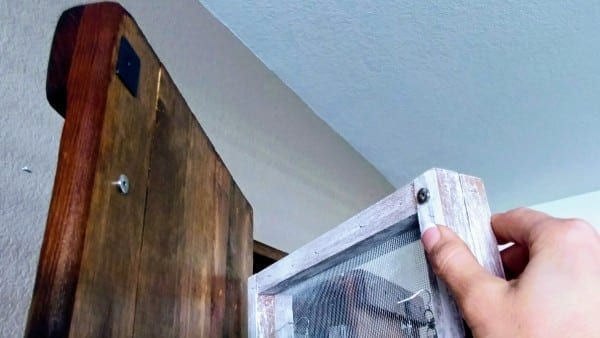
Attach earring organizer with two small hinges

To keep the earring organizer closed, attach 4 small magnets at the top and bottom of the organizer (I glued mine on with Super glue).
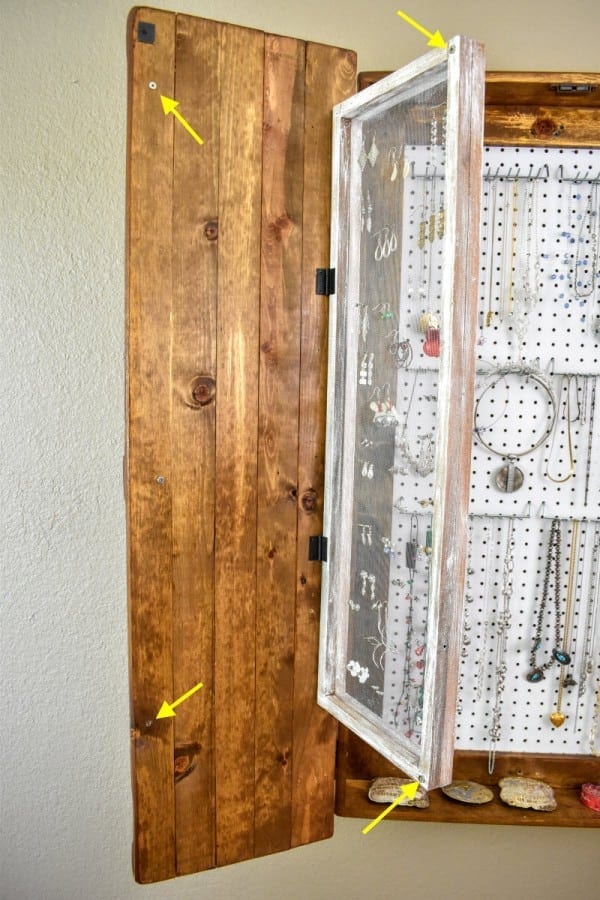
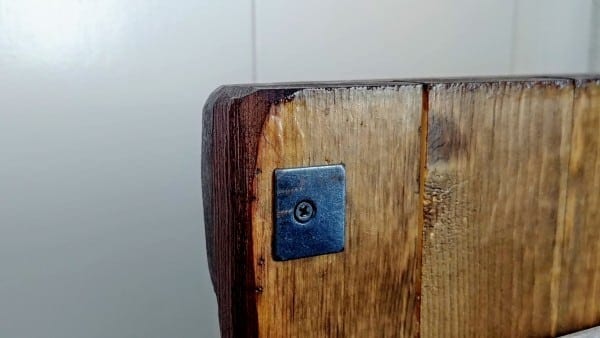
To mount the cabinet I drilled two 3 inch screws through the inside of the cabinet, and into the stud of the wall.
Now just one more thing…
Throw out that tiny, cramped jewelry box you’ve been trying to fit all of your jewelry in!

Check out the Ultimate DIY Rustic Jewelry Cabinet at the following Linky Parties below:
Tink
This is the most awesome jewelry cabinet I have ever seen! Finally, a jewelry storage unit where anything and everything can be stored all together! Thank you, thank you, thank you for the directions! Right now I have jewelry in my small jewelry box, on the wall, on another hanging item on my dresser and in my drawer. I will be able to finally organize it into one place! I can’t wait to get this project done. Thanks again Tee!
Tee
Thanks Tink! I’m glad you like it!
the cape on the corner
now this is brilliant! i love that you can close it away, and it looks like a perfect rustic piece. great idea!
b
Tee
Glad you love the post! I am loving how I can put things inside as I’m always needing extra storage!
Marie
Love the rustic charm of your jewelry cabinet, Tiffany! The earring hanger is VERY clever and I’m going to modify my similar cabinet with this idea. Pinned
Tee
Thank you, Marie! I appreciate your kind comments!
Kelsey
This is so amazing! Rough estimate, how much did this cost to build? I’m obsessed.
Tee
Thank you Kelsey! After wood, hardware, and polyurethane, I would see it cost around $50-$70 to make.
Zach Hilburn
Where did you buy your stuff. I just did a rough estimate, and came up with about $200
Tee
I went to Home Depot and bought the cheaper wood because I like the rustic look and used 50 % coupons for all the hardware at Hobby Lobby. Hope this helps!
Suann
I actually don’t see here on your pattern what sizes of peg board you need. Do you have the dimensions that are needed?
Tee
Hi Suann,
You are right! It’s a 2ftx4ft sheet of pegboard that’s needed. I’m glad you let me know and I’ve since fixed it. Thank you!!!
Suann
Hey Tee!
So my sister and I started constructing a cabinet like this for our mom and the measurements came out really weird.. we cut it to exact lengths listed above and we ended up being like 2 inches shy on the inside frame and we had to take 1 – 1×3 board off of each door. We followed directions to a T but something was still off… Not sure what happened!
Doug Johnson
Love your jewelry cabinet, thinking of making one for my wife. Do you remember whate type of wood you used?
Tee
Hi Doug,
I just used regular pine…hope that helps!
Suann
Hey Tee!
So my sister and I started constructing a cabinet like this for our mom and the measurements came out really weird.. we cut it to exact lengths listed above and we ended up being like 2 inches shy on the inside frame and we had to take 1 – 1×3 board off of each door. We followed directions to a T but something was still off… Not sure what happened!
Tee
Hi Suann!! Oh my goodness I’m glad you caught that mistake! Sometimes I get so overwhelmed with building the project and then creating the tutorial, that I occasionally miss something. (I have since fixed it) Aside from that, I hope your jewelry cabinet turned out wonderful! Post a pic…I’d love to see it!
Kelli
My dad just made me one, and I absolutely LOVE it, can you tell me how you hung yours on the wall?
Tee
Hi Kelli,
Your dad’s awesome for making you one! To mount the cabinet I drilled two 3 inch screws through the inside of the cabinet, and into the stud of the wall.
Tamera Brown
Do you have this project in pdf or word format for printing?
Tee
At the moment no, but it is a good idea to do this for all my projects. 🙂