
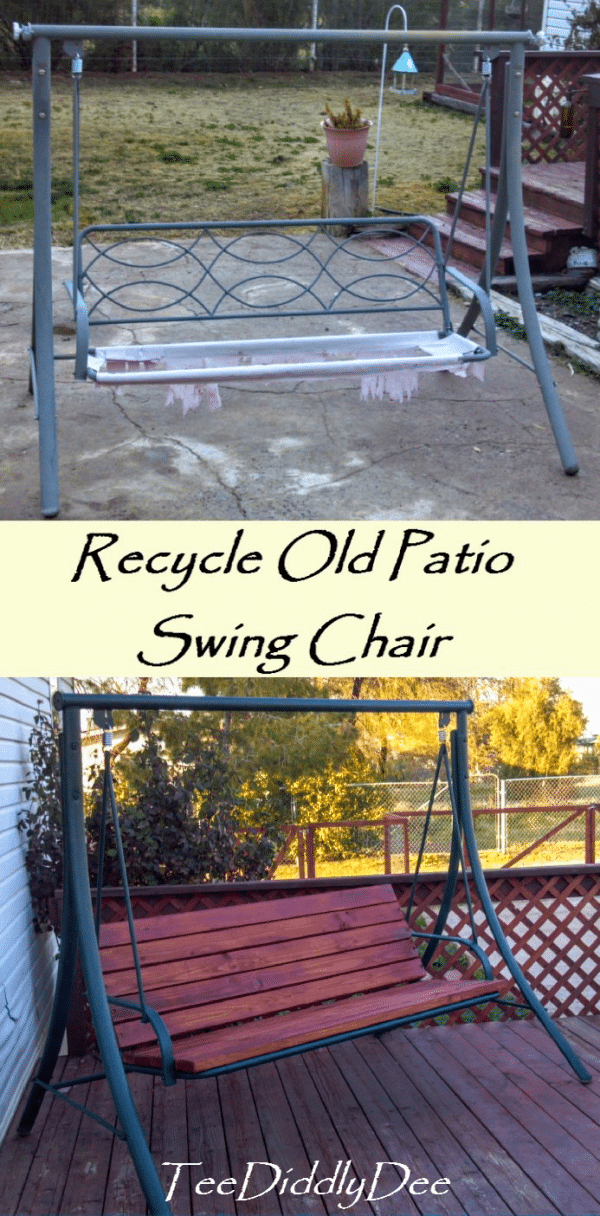
Recycle Old Patio Swing-Video
Recycle Old Patio Swing
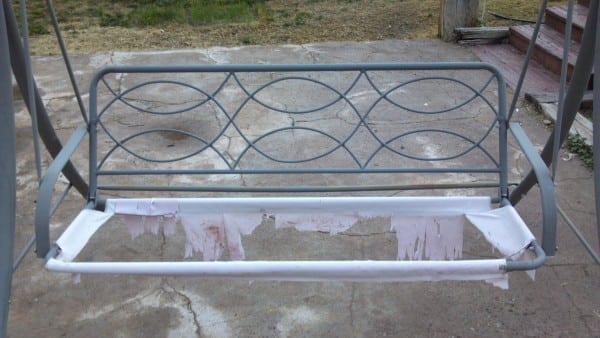
Does this look familiar?
Recycle Old Patio Swing Tutorial
Want to print out this tutorial without the ads?
Click here to download my DIY Recycle Old Patio Swing Chair PDF Printable Tutorial for only $5!
Supplies
- Self tapping screws (I used 1-1/2 in long screws but since the metal piping on these frames vary in size, you may want to measure what length you’ll need to screw through wood into frame)
- 2x4s (I used ten 5ft 3in 2x4s but each swing chair will vary)
- High quality outdoor spray paint
- Stain or paint for wood
- Polyurethane Sealant
Tools
- Chop Saw
- Hand Drill w/drill bits
- Sander
Directions:
First, remove all the old fabric from the frame.
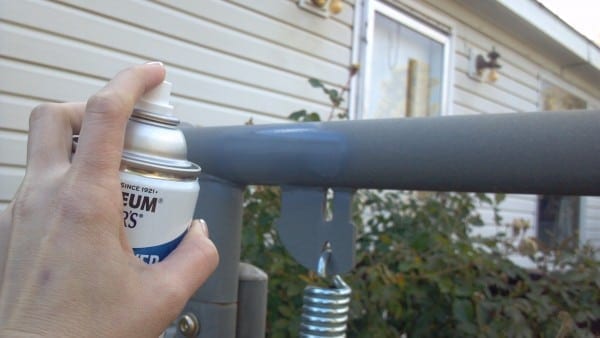
Next, sand any rusty areas with sandpaper, then wipe down the frame with a wet rag and make sure it is clean. Cover any areas with tape or foil that you don’t want painted. Last, spray paint the frame until it is covered well. I gave mine 2 coats.
Preparing bench for wood:
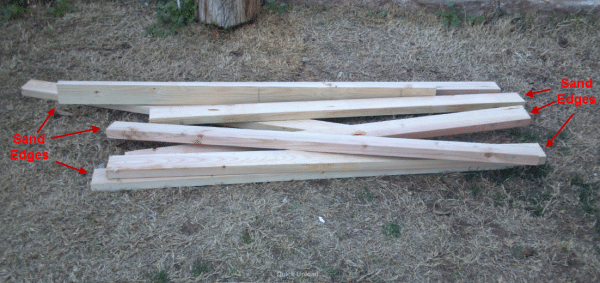
Measure and cut 2x4s to fit length of bench. Make sure they overlap each edge.

Sand the ends and the long edges of 2x4s to slightly round them, then paint or stain them the color you desire. You can paint them with a polyurethane sealant to further protect them from the elements, if you desire.
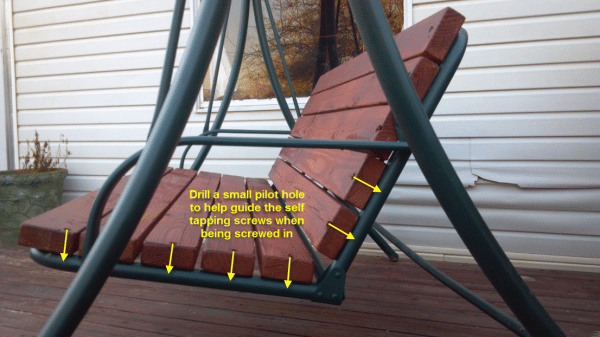
Space 2x4s out on bench.
Drill tiny pilot holes where your screws will be, making sure to drill through the wood and into the metal tubing.
Click HERE to learn how to do a pilot hole.
Now, drill countersink holes about halfway into the wood, so that when the self tapping screws are drilled in, the top of the screw will sit below the surface of the wood and penetrate the metal tubing.
Click HERE to learn how to countersink.
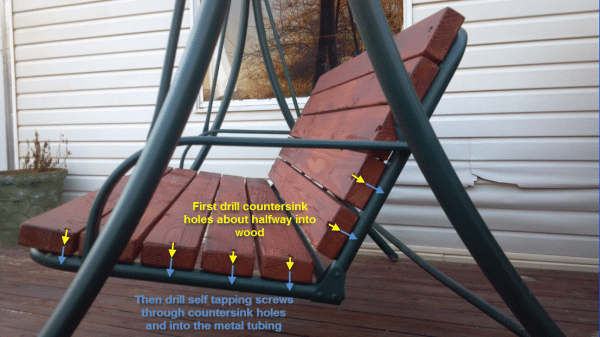
These are self tapping screws. Drill your self tapping screws into the wood where you drilled the pilot and countersink holes.
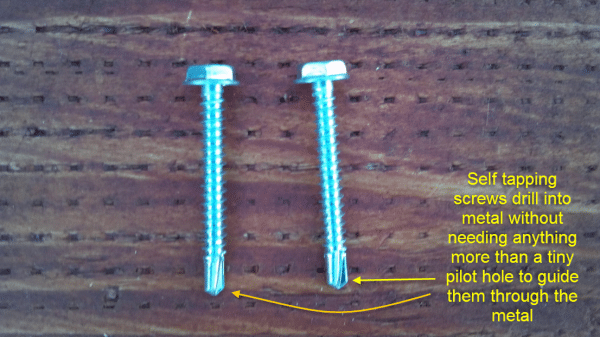
As you can see, the screws are all countersunk into the wood and penetrating into the metal tubing.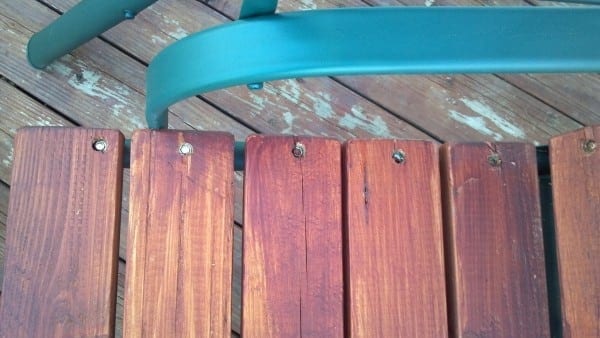
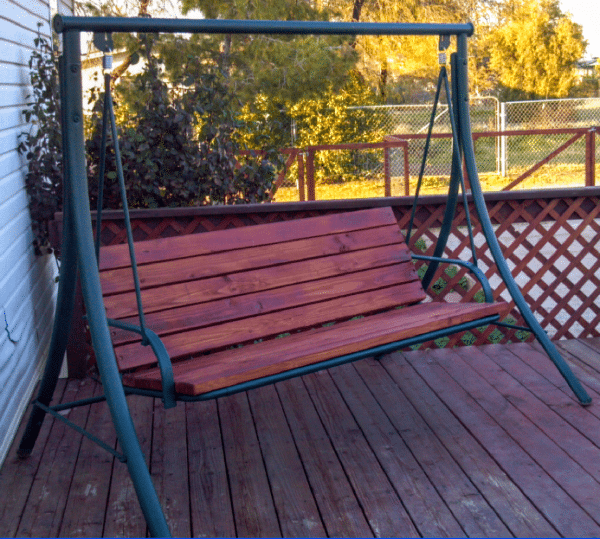
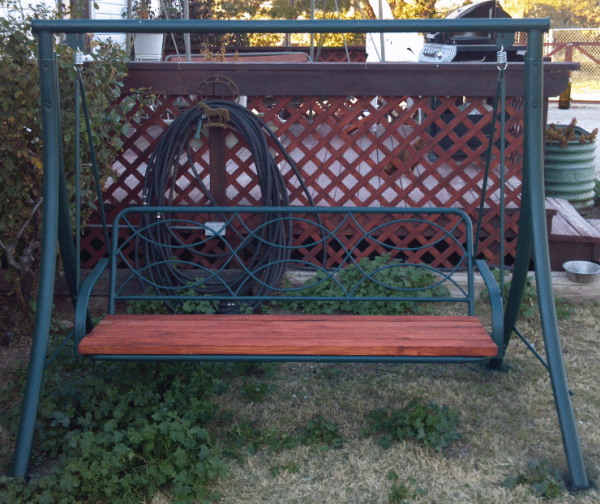
Finished!
Isn’t this beautiful?!!
Want to print out this tutorial without the ads?
Click here to download my DIY Recycle Old Patio Swing Chair PDF Printable Tutorial for only $5!
I love to hear from you in the comments below!
kirk
Thanks for the swing rebuild
Tee
No problem Kirk! I hope you enjoy your old ‘new’ swing as much as I love mine! 😉
Stuart
What do you use for the middle of the swing for the seat to support the weight of people? A Metal brace? I don’t see any mention of it.
Tee
If you use 2x3s or 2x4s the wood is thick enough to support the weight without a brace…if you use anything thinner like a 1×4, the wood will bend and won’t support the weight very well.
Julia
Love your idea and have a “patient” waiting for this treatment outside.
Slightly confused though: You used 2x4s and 1 1/2 in long screws . And these screws were long enough to go through the wood and into the metal pipe? How deep are the countersink holes?
Tee
Hi Julia! The countersink holes are pretty deep, they go about halfway down into the wood. Happy building! 😉
Stephen Bliley
I thought to do this yesterday. Would there be more support of I laid the 2×4’s front to back instead of left to right? Would it weaken the metal frame?
Tee
Hi Stephen! Unless you use anything thinner, I have found that the 2x4s are really sturdy and don’t really need any bracing. If you are still concerned, I don’t see why it would be a problem to lay the 2x4s front to back. You would have to do a lot more cutting and screwing, but it would give it a different look and be just as cute! If you decide to do this I’d love to see a pic 😉
Stephen Bliley
I decided to use steel angle iron to cross brace front to back. I’m using four of those and then going to lay premium deck boards down. The boards are thinner and already rounded at the edge. I’ll post a picture when I’m done. It was good too see that someone had also thought of this, since I was looking for a picture of a completed one.
Stephen Bliley
I want to share my pictures with you. I finished mine. Just waiting for the boards to dry and then stain it.
Tee
Awesome Stephen! I would love to see those pics! My email is [email protected]
Rhonda
I have a swing that lays down flat that the cushions rotted away . I always wanted to fix it with would . I just never knew how to and your instructions are going to help me so much . Thank you.
Tee
I’m so glad you were able to find my post helpful Rhonda! 🙂
kevin
Can we use 2* 6 instead of 2*4 , Or that 2*4 are better ?
Tee
Hi Kevin!
2x6s should work just as well!
kevin
did you use regular 2*4 or the pressure treated ones ?
Tee
Hi Kevin!
I just used regular ones 🙂
Carolyn
I love this!! I am so happy to find out about this! I have a swing that needs saving and this is perfect! Thank you so much!
Tee
Hi Carolyn!
Glad you enjoyed the post! I think we all have or have had ‘one of those swings’ that needs saving!
Larry
Hi Kevin, depends on the size of your swing because 2×4’s fit just fine.
Aimee
Finished ours! It looks awesome! Thanks for the idea!
Tee
Awesome Aimee!!! I’m sure it looks fantastic!
Xiomara
What you used in your wood to color it
Tee
I used red wood stain for the wood 🙂
Roger
Thanks. I was hoping to find someone who tried this. I thought this would work was wasn’t sure how to make it happen. Any ideas for the sun shade?
Tee
You know I’ve thought about adding a sun shade but just never did it…as long as there is a shade structure above the swing chair (some don’t have this), I’m sure it would be just as easy to lay and screw in some 1x4s onto the top…
Kim
I have an old swing frame that I just couldn’t throw out in hopes I would figure out some way of making a new seat for it. Saw your post a while back and “WOW!”
Perfect!! I dug out my swing frame, cut off the ripped canvas, gathered my boards and I’m ready to go!!!! Thank you so much for posting this!!!! Can’t wait to get men finished!!!
Kim
Tee
Awesome Kim!!! Your swing is going to look great with a new wood makeover!
Cindy
Your swing looks great and we are going to try out your method. I was wondering if your screws go all the way through the metal pipe or just the top layer. I have seen some that use a bolt that goes through with a nut on the back. I would like to avoid this if it will work without going all the way through.
Tee
Hi Cindy!
I wanted a clean without having to worry about nuts and bolts, so I purchased self tapping screws that only went through the top layer. Hope that helps!
Nicole
Is there a center support
Tee
Hi Nicole!
The metal frame on the chair had center supports so I didn’t need to add any.
Yvonne
We have two swings but they have fancy curly que under arm bar. Has anyone got suggestion on how we get the boards screwed in with these in the way. They are welded from frame to arm rest with spot welds. They look nice would like to keep but how do we fit in boards and screw them?
Tee
Hi Yvonne,
Post a pic so we can see it 🙂
Linda Coyer
I currently have two swings that were used in my pool area. I’m moving into an apartment and have offered the larger swing to my neighbor, so she will refurbish it for her yard; with the assistance of your web site. I’m taking the smaller one with me to use on my patio area at my new location. Thank you for showing us how to make this happen and make two friends very happy.
Tee
Hi Linda,
I’m so happy you and your friend found my post helpful! It’s such a shame to waist the whole swing when the frame is still good…enjoy your new swings!
Sierra Juhl
Do you think that using a 2×4 in the center from front to back screwed into the metal frame under the swing seat would work as a support? Just worried over time the wood will bend and warp with no support in the middle at all.
Tee
Hi Sierra,
Sure, I don’t see why not! You could even just make all of your planks go front to back and not worry about doing a brace if you wanted. The planks would definitely be a lot shorter and stronger going this way 🙂
Ewa
What size of drill end would you use?
I have seen your idea, and it is exactly what I need to fix our swing.
I only hope I can find the right wood.
Thank you
Tee
You will need to drill a pilot hole with a drill bit that is slightly smaller, in diameter, than the diameter of the screw that you are going to use. Go here https://www.teediddlydee.com/drill-pilot-hole/ to see my tutorial on How to Drill a Pilot Hole. I hope this helps.
Richard Grand
Thanks for this info, gonna get into this for sure.
Tee
Glad you liked the post Richard! It’s so worth it!
Dori Tucker
Do you have any pictures of people actually sitting on this ? My husband doesn’t think 2×4 without some type of support under it will work. I’m looking to do this for a 62” width.
Tee
Hi Dori,
I had a several get-togethers after I built my swing and didn’t have an issue with the wood sagging or showing a lot of stress with the weight, but I only kept them for about a year. Honestly, the way I found out it would work was just by laying the wood across and test- sitting on it before screwing it all together. This way you won’t waste your time with it if you do feel it start to sag. If you still don’t feel comfortable, another option is to lay the boards width-wise instead of length-wise. The boards are shorter this way with support underneath them that’s closer together. Another idea is that you could buy one or two strong metal strips to lay across the metal frame and either weld or drill screws through them for support. I hope this helps!
Chavela
I really love this, I found a beat up swing in the Free section of Craigslist and could never find the correct replacement fabric cover. I searched ideas and I was about to take it to the recycle center! So glad I found your blog , I am gathering the materials to give this old swing a second life. I just love the color combination of your swing and it was look great in my parent’s yard. My mom said she always had a wooden swing growing up, she turns 90 this September! So this is for my mom and I want it perfect. I read you used a red stain and I have a nice red stain from another project, I just can’t match the color of the frame. Do you happen to remember the color? Would be fantastic if you could share that with me. Thanks so much for this beautiful idea!
Tee
Hi Chavela,
I wish I could remember the exact red stain that I used for the wood on the swing, but I just can’t recall at the moment. Fortunately, Home Depot and Lowes have a nice selection of all different variations of red stain that you can choose from. I’m sure your mom is going to love her new swing, and it will definitely last a lot longer than the old fabric that was on it before!
Ursula
My husband and I refurbished my old backyard swing, we followed your amazing directions, and it turned out perfect. We use the swing again, sharing it with family and friends. We received so many compliments on this project. Thank you so much for sharing your fantastic ideas. We will be working on a few more projects for our yard
Tee
Hi Ursula,
Sounds like you both did a great job refurbishing your swing and it’s wonderful you’re able to enjoy it with everyone!!! Glad you enjoyed the tutorial!!!