

DIY Halloween Skull Chandelier-Video
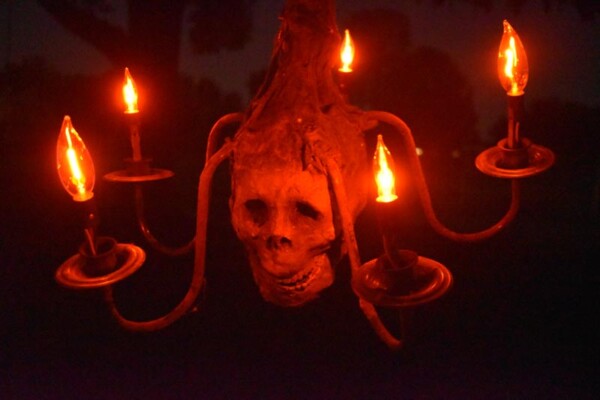
DIY Halloween Skull Chandelier
Here’s another one of my best-loved props that’s literally been around my haunts since it all began, WAY-BACK-WHEN!
The ambiance this chandelier gives when placed in a dark room is absolutely creepy… with it’s flickering bulbs casting an eerie glow on the half-rotted corpse face staring back at you…


DIY Halloween Skull Chandelier-Tutorial
Jeremy (my brother) is actually the one who put this gem together using an old, working chandelier he bought at the thrift store, and a good ol’ Bucky skull.
Supplies:
- One Bucky skull
- One working chandelier that fits well with your skull (I found mine at the thrift store)
- Painter’s plastic at .7mm thickness (to corpse the skull)
- Cheap brown wood stain (to paint skeleton corpse)
- A couple cans of black and brown spray paint (for touch ups and to paint the chandelier)
- A couple of drywall screws (to fasten the jaw open)
Tools:
- Dremel Drill (to cut skull)
- Hand drill with bits (so secure the jaw)
- Heat Gun (To corpse the skull)
Since this prop was made BB (Before Blogging), I had to reenact the steps so I could show you just how it was done. (So if you notice that the chandelier doesn’t match the one in the finished photo, that’s why!
Find an already-working chandelier that will fit well with your skull

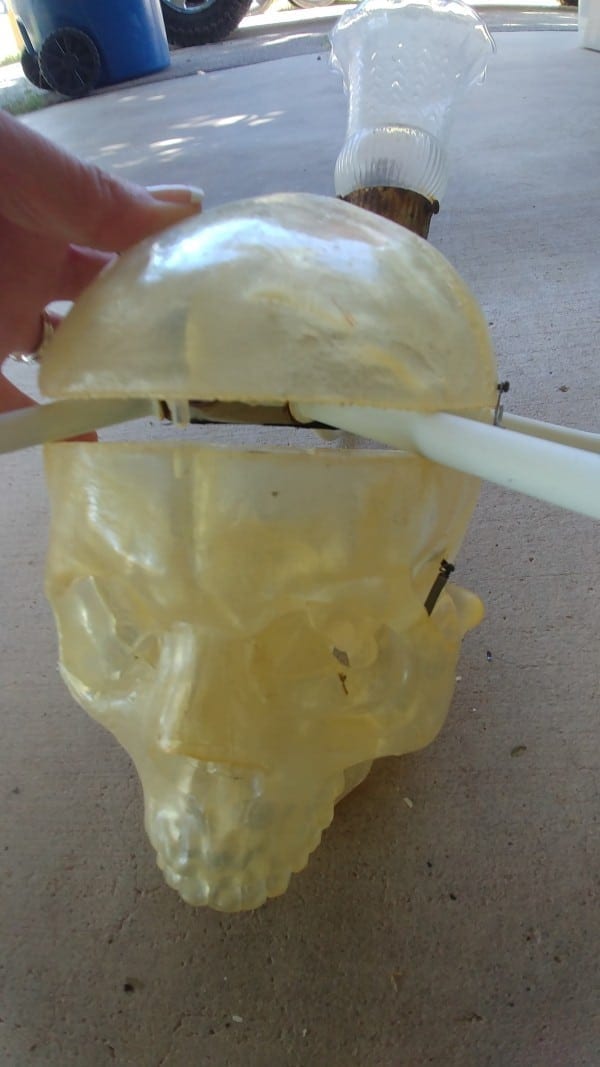
Make sure the main wire compartment of the chandelier is small enough to fit inside the skull.

I took the top of the skull off so I could eyeball it to check the size

This is the main rod of the chandelier from the top view looking down
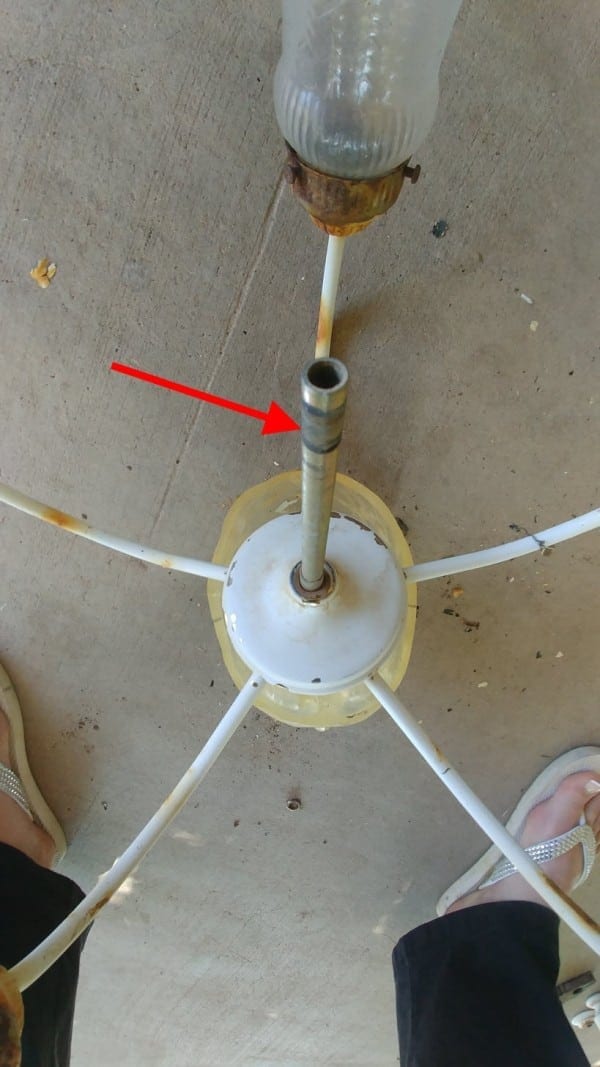
(By the way, I had already removed the decorative piece that fit over the main rod)

The red dot shows where a hole needs to be drilled in the top of the skull so that the rod of the chandelier can run through it. The size of the hole completely depends on how fat the rod is.

Slide the top of the skull down the rod, and onto the lower half of the skull. The main wire compartment is basically ‘sandwiched’ in-between the bottom and top of the skull.
With the dremel, drill out notches for the chandelier arms to fit through. This will allow the top and bottom of the skull to fit flush

Secure the top and bottom of the skull together with the little hooks that are located on the sides

Oh and get rid of these things too, as we want our chandelier to look scary!

One more thing!
Decide if you want the jaw of your skull to be open or closed. I wanted my jaw to be open, so I removed the spring and screwed the jaw into place with a drywall screw

If your chandelier is pretty and white like mine, now is the time to ‘ugly it up’ with the brown and black spray paint.
It’s also time to corpse the skull! Corpsing gives your skull a very realistic look and it’ll make it look even more gross if it looks like there’s a little rotting ‘flesh’ on it. Although mine was corpsed using the older version (cotton batting and latex), I suggest using the newer, WAY faster version (plastic drop cloth and heat gun method)
Here’s a really good video on how to corpse a skeleton using the plastic drop cloth and heat gun method…
The rod of my chandelier was also corpsed, making it look like the skull is hanging from it’s hair. (Just make sure to keep the heat gun away from the main electric cord)

An airbrush was used to highlight the face and darken the eyes, but this is only optional, and he looks great with some raggedy-looking fabric or spider webs hanging from him!

Now add some flicker bulbs to the light sockets and plug ‘er’ in!!!
Wishing you all a Happy Haunted Halloween!!!
Check out my other creepy Halloween Haunt Ideas and Tutorials, HERE!
Leave a Reply