
DIY Happy Fall Y’ALL Mason Jar Sign-Video
DIY Happy Fall Y’ALL Mason Jar Sign
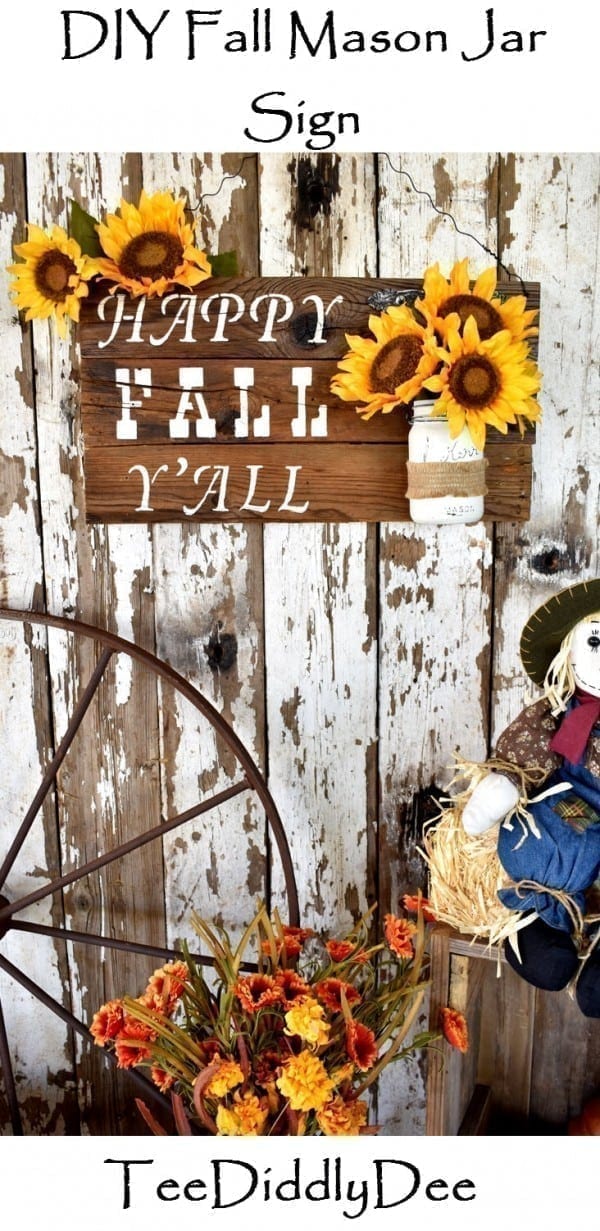
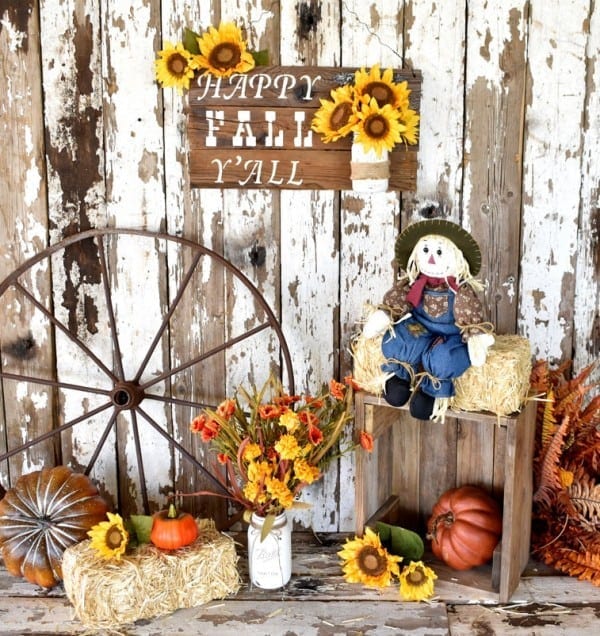
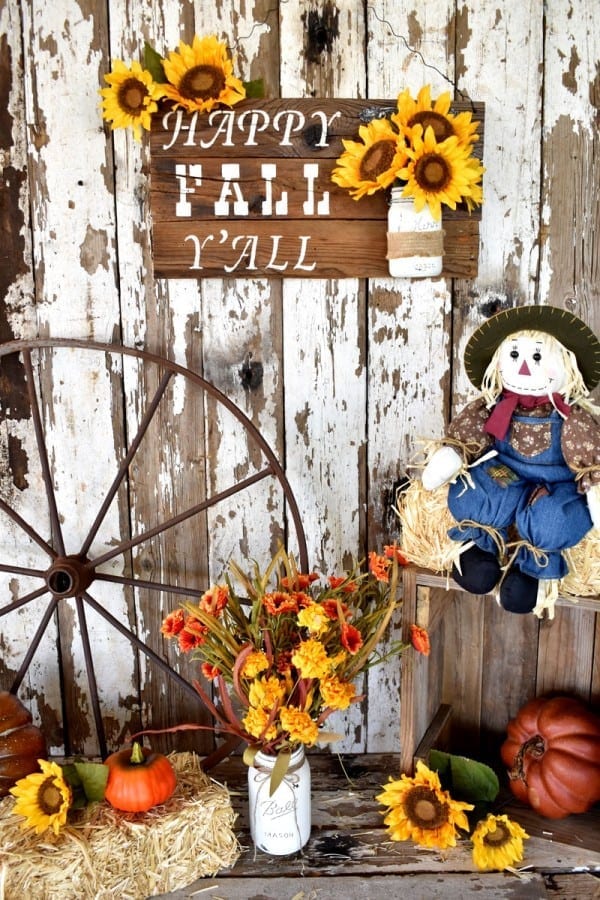
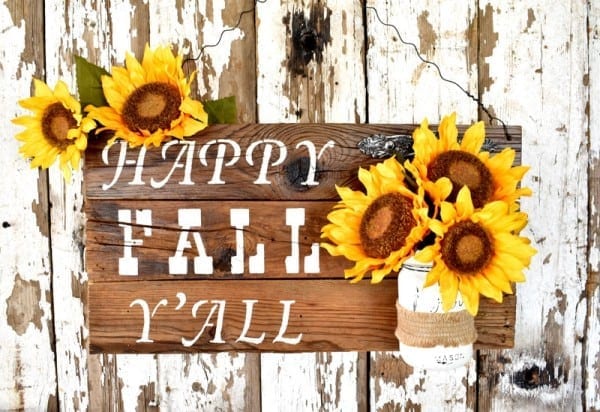
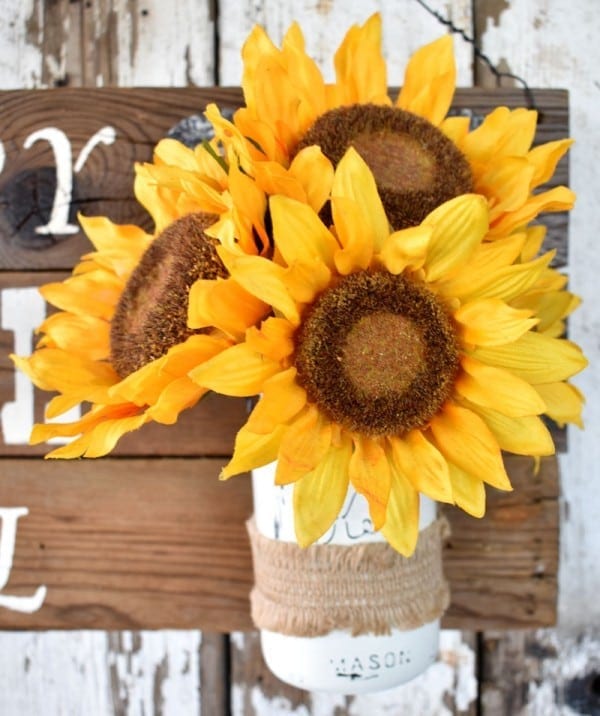
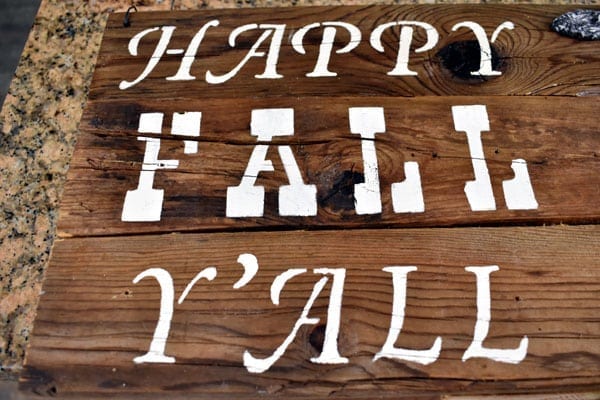
Happy Fall Y’ALL!
Autumn is my most favorite time of year, and what better way to bring in the season than with this welcoming fall mason jar sign! Isn’t this “DIY Happy Fall Y’ALL Mason Jar Sign” the cutest ever?!!
All you need are a few new or used pallet wood boards, and some supplies from the craft and hardware store. Best of all, you can have this whole project put together in about an hour!
DIY Happy Fall Y’All Mason Jar Sign Tutorial:
Tools:
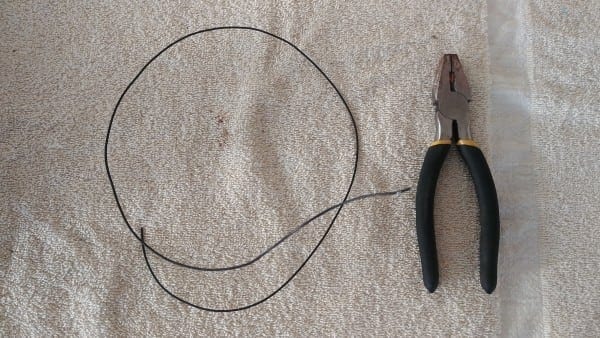
- Pliers
- Hand drill with bits
- Chop Saw
- Hot glue gun
- Scissors
Supplies:
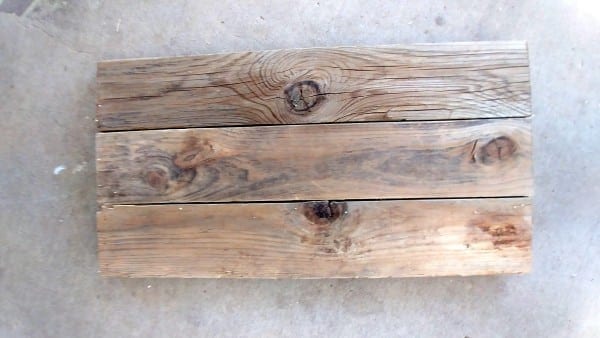
- 3 (1x4s) at 1ft 8in long (I used old pallet wood, but you can also use new wood and stain it to look old with my easy DIY Old Wood Stain)
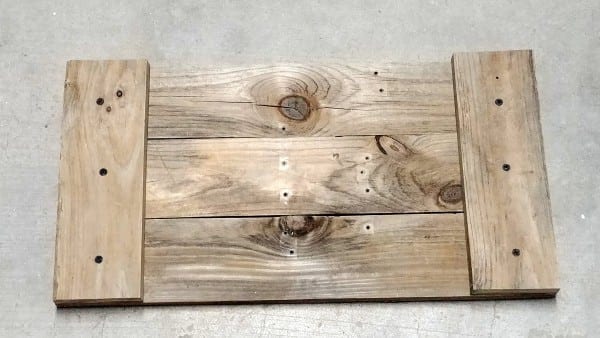
- 2 (1x4s) at 10in long (back braces of sign)
- 8 (1-1/4in) screws
- Stencils (I used two different sizes and styles)
- White Chalk paint or matte acrylic paint (found at craft stores)
- Sponge paint applicator (to paint over the stencils)
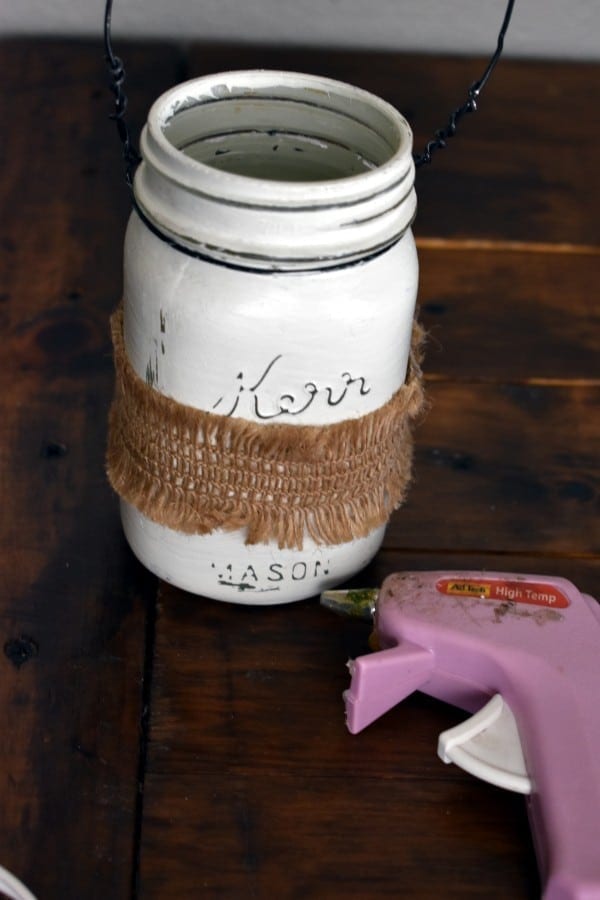
- Mason jar (pint size)
- Paint brush (to paint mason jar) I used a smaller one, but an inexpensive chip brush would do just fine.
- Wire (to hang mason jar)
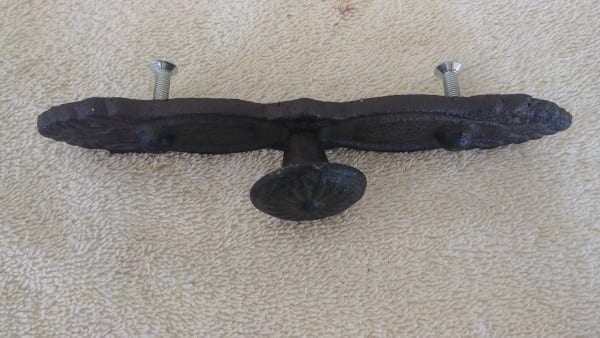
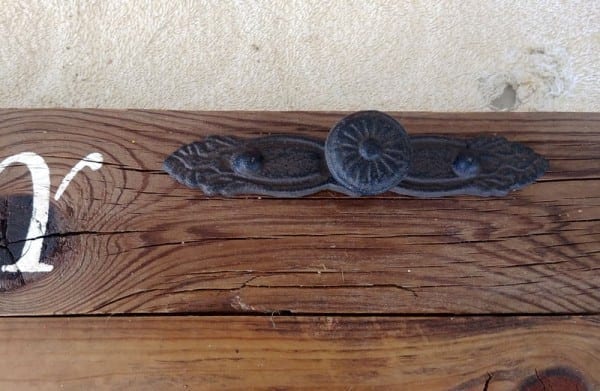
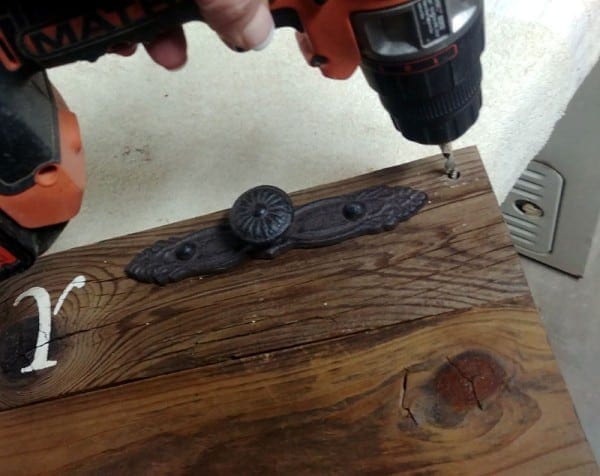
- Rustic decorative knob (to hang mason jar from)
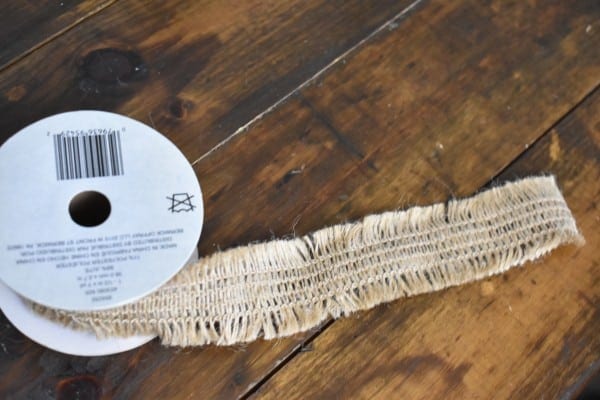
- Burlap ribbon (enough to wrap around mason jar)
- Fall Foliage (to put in mason jar and to tuck in above the sign)
- DIY Old Wood Stain (if you use new wood and need it to look old)
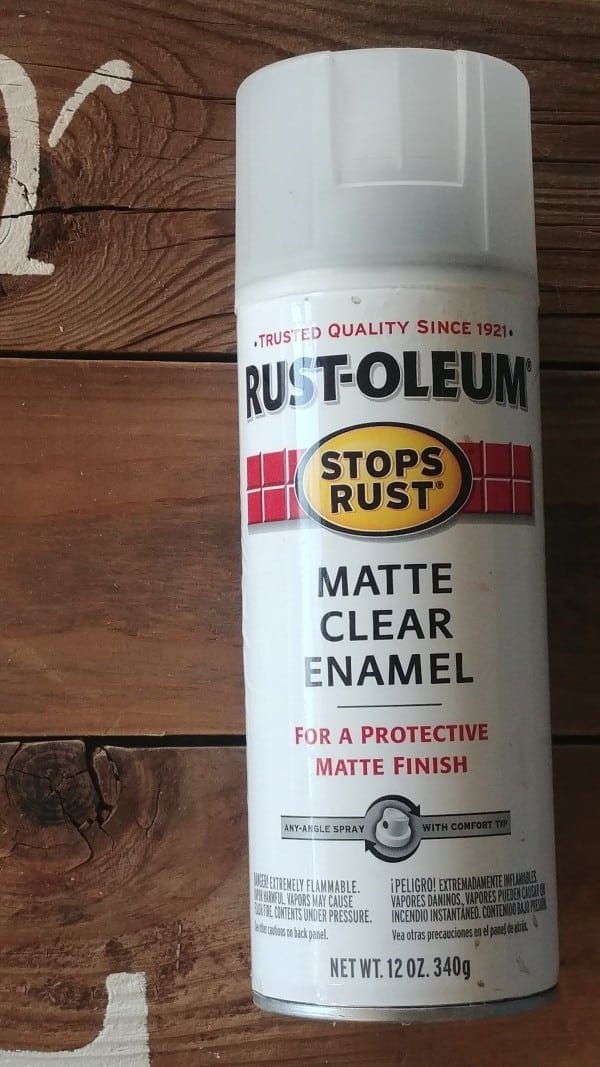
- Satin Clear Coat spray paint
Directions:
Making the wood backdrop:
Align the three 1ft 8in long 1x4s.
Screw on the 1×4 back braces to the 3 main pieces of wood.
Stenciling:
Now it is time to line up your stencils to see where you want everything to be. You can tape them down if needed.
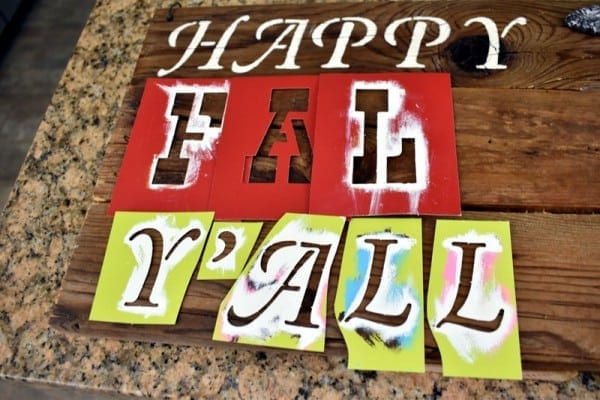
Carefully dab the white paint into the stencils with the sponge applicator. Make sure to wipe any excess paint off your brush bristles before applying. By doing this, you will avoid paint smudging under the stencils.

Adding the decorative knob:
Next, add the decorative knob. With the screws in, I marked where I wanted the holes to be drilled. (After finishing the project, I decided to dry brush some white paint into the crevasses of the handle. I liked the antiqued look! I show this at the end.)
Sealing the wood:
Spray the wood with a layer or two of clear coat to protect the stenciled paint
Making the wire hanger for the jar:
Take your wire and pliers and add a ‘handle’ to the rim of the mason jar by twisting the wire around it. It is better to cut it after you thread it through both holes and after curling it to secure it.

Adding the Burlap Trim:
Cut a piece of burlap ribbon (enough to wrap around the mason jar), then hot glue the strip around the middle of the jar.
Hanging the sign:
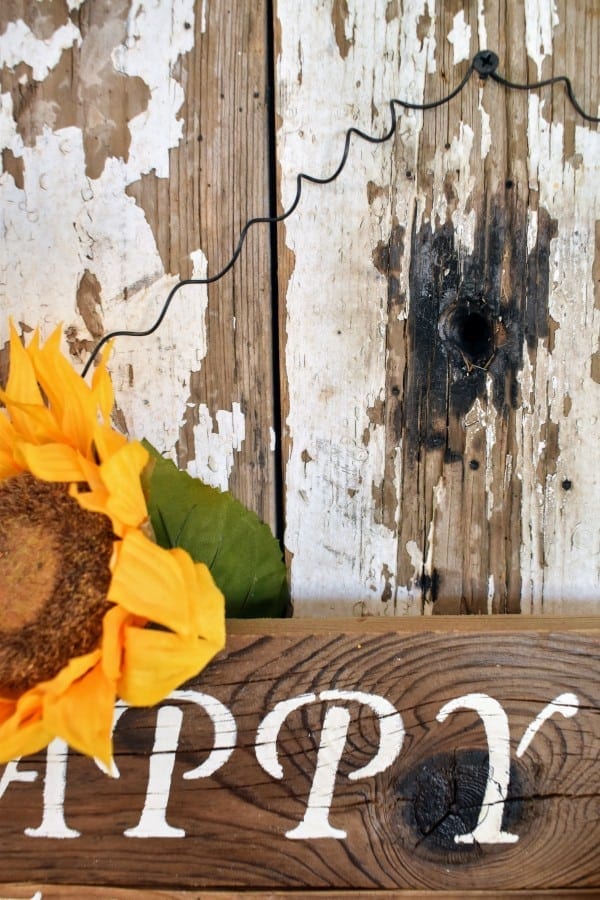
Drill a hole on each end of the sign, then loop some wire through the holes to form a hanger for the sign.
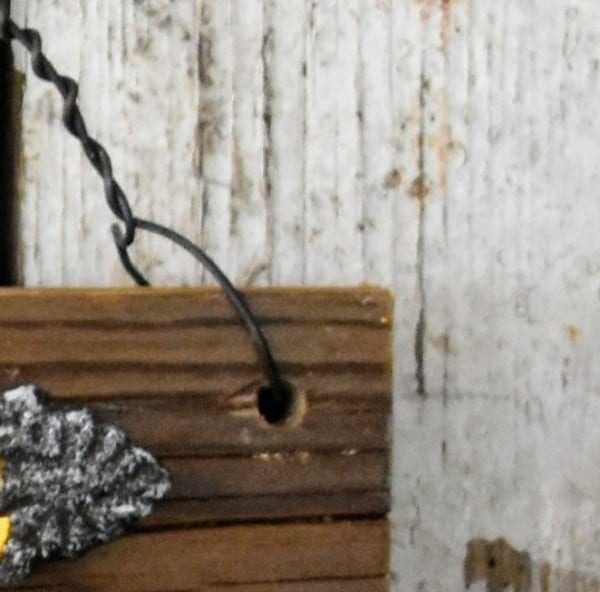
To get this curly-Q look, wrap the wire around a pencil after threading it through the first hole in the sign, but before you thread it through the last hole. Then twist the wire ends to the hanging wire to secure. Make sure you leave enough wire to curl, because curling the wire will shorten it considerably!
Antiquing the decorative knob:
My rustic decorative knob was a little too dark on the wood, so I dry brushed some white paint to it to add some depth.

It is time to put some flowers in the mason jar! Be sure to tuck in a couple flowers on the top corner of the sign. Now it is ready to hang and show off!
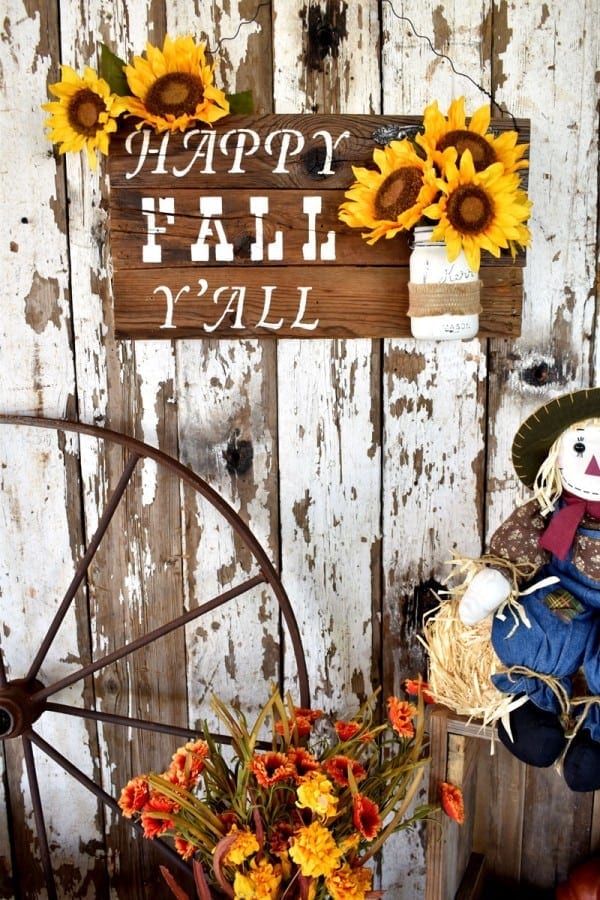
I hope you enjoyed this tutorial. Happy Fall Y’All!
My DIY Happy Fall Y’ALL Mason Jar Sign can also be seen at:
https://thecottagemarket.com/2018/09/a-morning-cup-of-joe-linky-party-and-features-2.html
http://www.howsweetthesound.typepad.com/my_weblog/pink-saturday/
https://eclecticredbarn.blogspot.com/
https://www.findingsilverpennies.com/silver-pennies-sundays-link-party-282/
https://www.ishouldbemoppingthefloor.com/2018/09/pumpkin-crafts-at-inspiration-monday.html
https://www.thepaintedhinge.com/2018/09/20/the-farmhouse-friday-link-party-75/
https://piecedpastimes.blogspot.com/
https://www.chiconashoestringdecoratingblog.com/
http://mstoodygooshoes.blogspot.com/
http://myuncommonsliceofsuburbia.com/fall-soups-and-stew-at-inspire-me-monday/
http://celebrateanddecorate.com/celebrate-your-story-147/
http://flusterbuster.com/2018/09/great-ideas-299.html
https://mythriftstoreaddiction.blogspot.com/2018/09/vintage-charm-party-152.html
http://www.condoblues.com/2018/09/friday-favorites-linky-party-444.html
https://www.frenchcountrycottage.net/2018/09/feathered-nest-friday_27.html
https://eclecticredbarn.blogspot.com/2018/11/over-moon-linky-party_18.html
Candice
I just wanted to give a friendly tip that it’s Y’ALL, not ya’ll. You All = Y’all.
Still a super cute project!
Tee
Hi Candace,
Omg, you are so right! I guess I never learned how to spell slang in school…LOL I actually redid the whole project after your heads up. Thanks a bunch!
Melissa
This sign is soooo cute! I just bought the supplies and I’m making it today. Thanks for the idea. Your blog is awesome, by the way. Lots of great ideas!
Cecilia
So cute! Thanks for sharing at Vintage Charm!
Tee
Hi Cecilia,
Thank you so much for hosting your parties every week, I really appreciate the work you put into them!
Kathryn Griffin
Such a cute sign!Thank you for sharing! You are one of the features at the Make it Pretty Monday party at The Dedicated House. Here is the link to this week’s shindig: http://www.thededicatedhouse.com/make-pretty-monday-week-269/ Hope to see you again at the bash! Have a great week! Toodles, Kathryn @TheDedicatedHouse
Tee
Hi Kathryn!
Oh goodness, thank you so much for featuring me, you have made my day!