
DIY Halloween Haunted Entrance Gate-Video
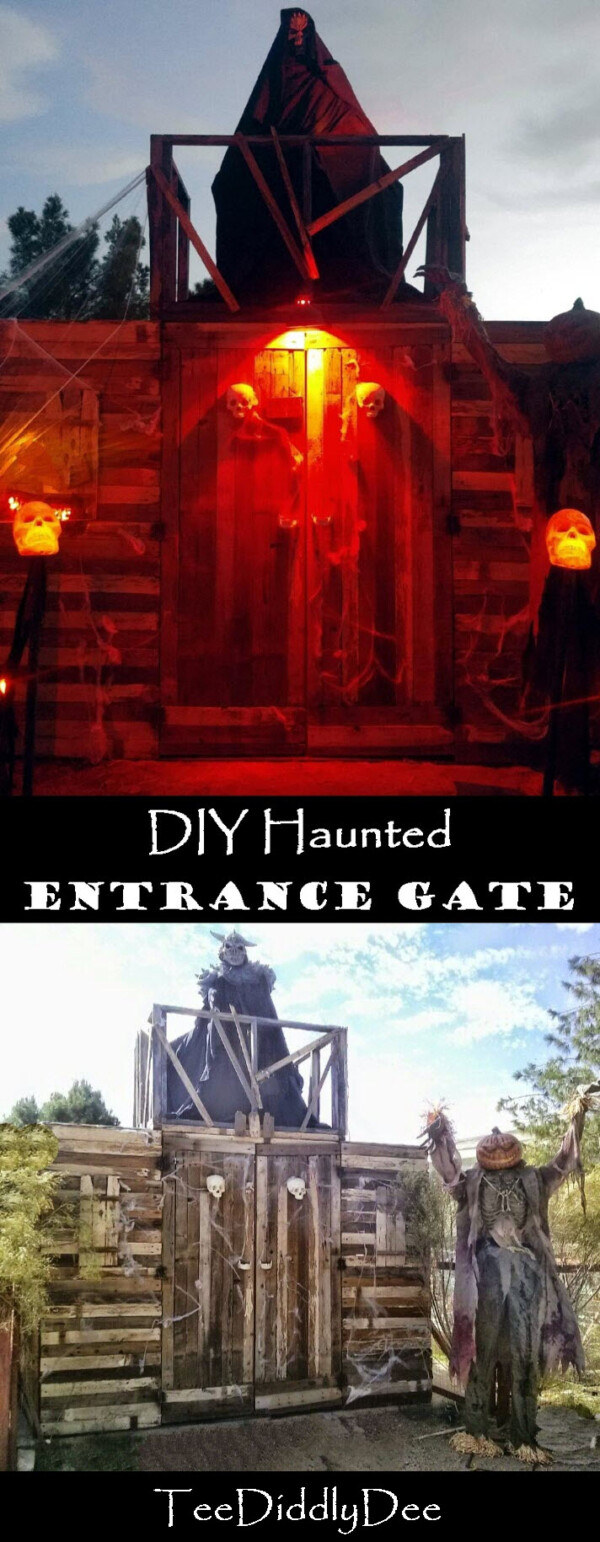
DIY Halloween Haunted Entrance Gate
Anyone who has ever gone through my home haunts will recognize this one! This is my famous entrance gate…the one that welcomes only the bravest of trick-or-treaters who dare come to my place for a shot at some Halloween candy (Bwahahahaha!).
Most will look up at the gate, wondering if that giant ghoul staring down at them is real or not. Many will dare each other to be the first ones to open the doors before entering! As they tip toe on through, the doors will automatically slam behind them! Keep in mind that this gate looks even scarier at night with dim lights illuminating it. The best part is that it’s collapsible and easy to store!!! No matter what year it is, this spooky entrance gate is always a hit!


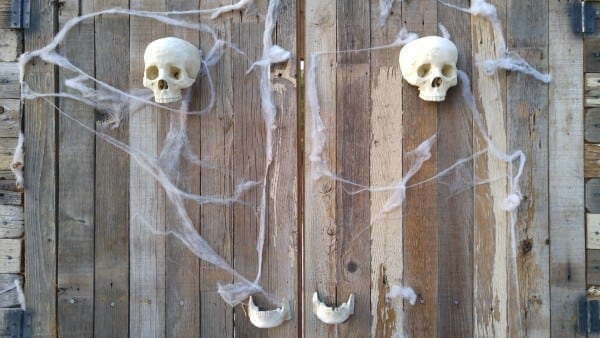

Gotta love these jawbone doorknobs!!!

When you pull the jawbone doorknobs, the doors swing open…


This is what the gate looks like at night with eerie red lights shining down on it. It really gives a spooky look!


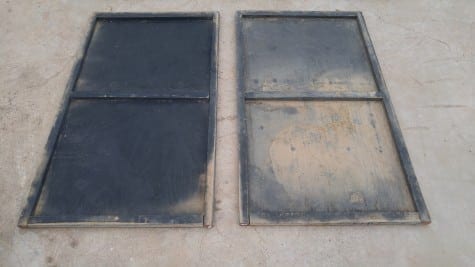
The best part about this gate is when Halloween is over, you can easily disassemble it which makes it all easy to store!
DIY Halloween Haunted Entrance Gate-Tutorial
As I mentioned before, it’s simple to disassemble the gate when Halloween is over. Just remove the 4 door springs and disassemble as shown below. It makes it really easy to store this way! (not to mention a cinch to put up the next year!)
(The Gate)

(Stabilizing Walls)
(Top Platform)

Supplies:
The Gate
(I used old 1x4s from and old fence to give this project a weathered-look, but you can also find them on pallets OR you can buy new 1x4s and make them look old as I will explain in this tutorial)
- One 2×6 at 10ft long (top beam)
- One 1/4in thick metal strap at 10ft long (bottom support)
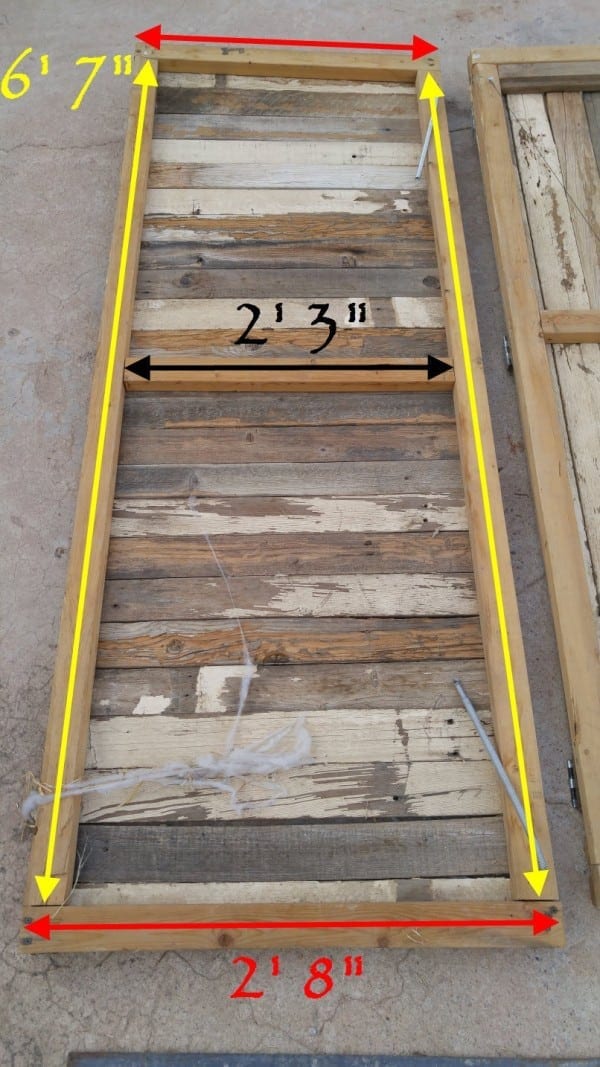
- Four 2x3s at 6ft 7in long (Side panels)
- Four 2x3s at 2ft 8in long (side panels)
- Two 2x3s at 2ft 3in long (side panels)
- Two 2x3s at 6ft 6 1/2in long (side panels)
- Forty-Eight old-looking 1x4s at 2ft 8in long (side panels)-You can also use new wood
- Four 2x3s at 6ft 3 1/2in long (doors)
- Four 2x3s at 2ft 4in long (doors)
- Six 2x3s at 1ft 11in long (doors)
- Sixteen old-looking 1x4s at 5ft 8 1/2in long (doors) You can also use new wood
- Six old-looking 1x4s at 2ft 3 1/2in long (doors) You can also use new wood
- Two 2 piece Bucky skeleton skulls (doors)
- Six Leftover 1×4 scraps approx. 2ft long (Old wooden shutters for side panels)
- 6 door hinges
- Black spray paint (optional for touch-ups)
- Box of 3in long wood screws
- Box of 1 1/4in long wood screws
- Small tube of silicone or wood putty & some paint that is the same color as your skulls (for hiding screw heads when mounting skulls to door)
- 4 screen door springs
- 4 strong hooks or eyebolts to stretch screen door springs from
- My DIY weathered wood stain or a can of black outdoor paint (optional if you use new wood and want it to look old)
- Paintbrush & white or grey paint for dry brushing (optional if you use new wood and want it to have a ‘worn’ look) This looks great if done after first staining new wood with my DIY weathered wood stain or painting wood with black paint first. Test it out and see what way you like best!
Stabilizing Walls
- Two sheets of 1/4in thick plywood at 4ft x 7ft
- Six 2x3s at 3ft 7in
- Four 2x3s at 7ft
- Black paint (optional)
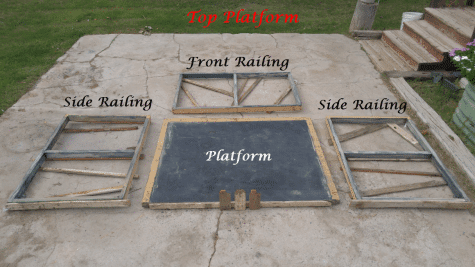
Top Platform
- One sheet of 1/2in thick plywood at 4ft x 5ft 1in (if you are planning on having a live actor stand on the platform instead of a dummy, you may want to use a 3/4in thick piece of plywood instead)
- One 2×3 at 3ft 7in long (Platform brace) You’ll need 2 more of these braces (3 in all) if you’re wanting a live actor to stand on the top platform instead of a dummy)
- Six 2x3s at 4ft long
- Nine 2x3s at 2ft 8in long
- Four 2x3s at 4ft 8in long
- Old scrap pieces of wood for decorating platform to make it look old and dilapidated
- Three eyebolts (For securing dummy)
Tools:
- Chop saw (For cutting 2x3s)
- Skill Saw (For cutting plywood and 2×6)
- Hand drill with bits
- Hack saw (For cutting decorative skull for door)
Step 1-The Gate

Screw together the frames for the left and right side panels with the 3in screws
Now screw together the frames for the left and right doors.

Add the braces

For each door, screw on the 1x4s to the fronts of your door frames with the 1 1/4in screws. My wood came from an old fence. If you don’t have access to old wood, you can use new wood and make it look old with my easy, cheap DIY stain. You could even go a quick step further and do some dry-brushing with a paintbrush and a little grey or white paint here and there…the sky is the limit!

Now for the skulls. Cut each one in half with a hacksaw, leaving them flat on the back to fit against doors

For attaching skulls to doors, attach a small block of wood by drilling down through top back of skull into the wood. Cover screw up with some silicone and then a little paint
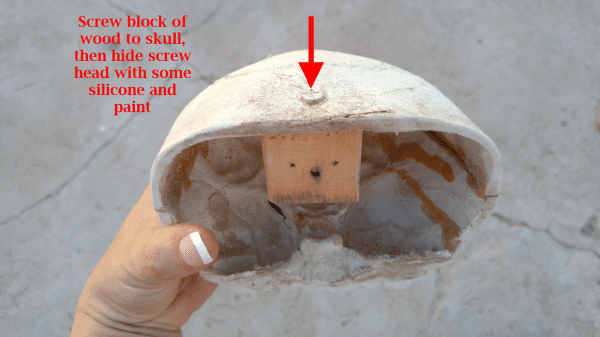
Mount skull to door by drilling a screw through the back of door into the front of the door and into the small block of wood that you just attached to the skull

Ta-Da!

Attach jaw bone handles by drilling screws through sides of jaws into doors. Cover screw heads with silicone and paint

For each side panel, screw on twenty-four 2ft 8in long 1x4s.

I slapped on some fake window shudders made from 3 leftover boards, two scraps of skinny wood, and a few screws

Now to assemble the whole gate. Lay out your two side panels face down with the top beam and bottom metal strap. Drill holes in metal strap so you will be able to screw it to the bottom of the side panels. Make sure holes are big enough for the shaft of the screw to fit through, but smaller than the head of the screw.

Screw metal strap onto bottom of side panels with the 1 1/4in screws


Now line up top beam to top of panels and screw in

Screw both 6ft 6 1/2in 2x3s down onto frame. These will be where you will later attach the stabilizing walls to which enables the whole gate to stand on it’s own

Flip the whole thing over to the front side. For looks, I added a long skinny piece of old-looking wood along the top of the beam, but you’ll want to do this after attaching the doors to see if you will have room as you may want your door to sit higher than mine.

Place your door where you want it and attach it to the side panel with hinges. I wanted my door to sit lower but you can hang it higher if you like. Just be sure to leave at least a 2-3in gap between the bottom of the door and the metal strap so that the door won’t drag on the ground when opened

Attach other door. I used cheap silver door hinges and gave them a spritz of black spray paint after mounting, to make them blend in

Step 2-Stabilizing Walls
Screw the two stabilizing wall frames together, then add the two sheets of 4ft x 7ft plywood

Step 3-Top Platform
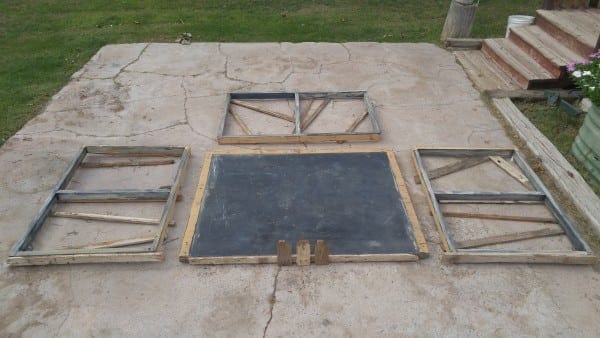
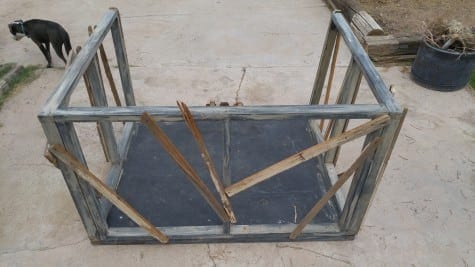
Lay the 2x3s flat down flat and screw them together with the 3in screws to form the frame of the platform.

Screw on the 3ft 7in brace. Remember to add your extra two braces if you are going to have a live actor stand on the platform instead of a dummy…it will make it stronger.

Screw together the railing frames by laying the 2x3s upright on the ground

Screw on the plywood with the 1 1/4in screws
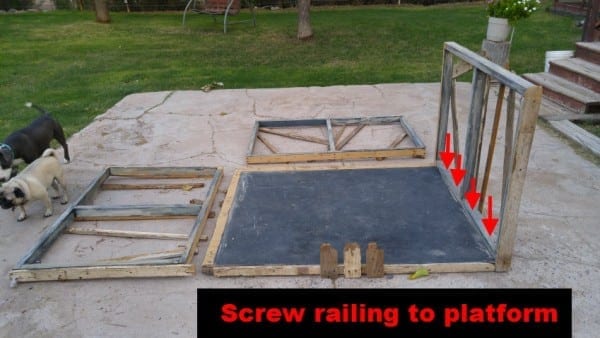
Assemble and screw railings and platform together with the 3in screws

I painted the new wood on my platform black and then dry brushed some white over it which gave it an old greyish look. If you don’t want such a grey look, you can use my DIY weathered wood stain and then lightly dry-brush the wood with some white paint. Add some dilapidated pieces of wood to make it look even more decrepit

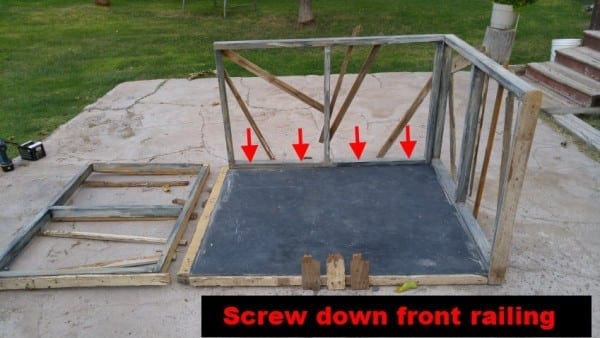
Here is some more scrap wood that I added to the front railing..
To safely secure my ghoul that stands on the platform, I attached 3 eye-bolts so I could tie him to it


Step 4-Setting up
Have a helper hold the gate structure upright

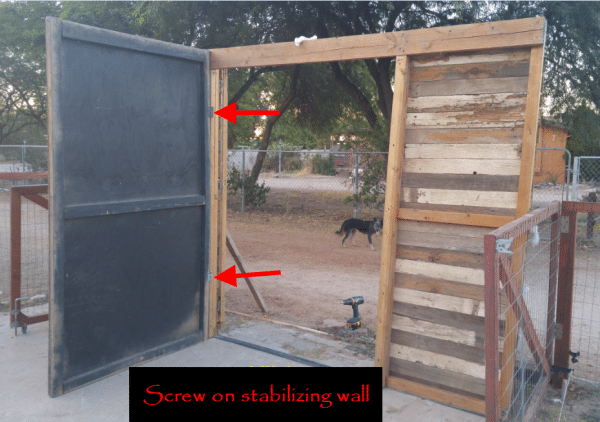
Screw on the stabilizing wall to the gate structure with two or three door hinges. The stabilizing walls will allow everything to stand on it’s own

Attach the second stabilizing wall
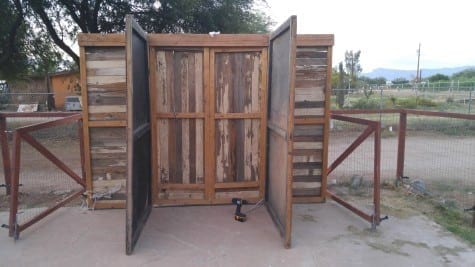
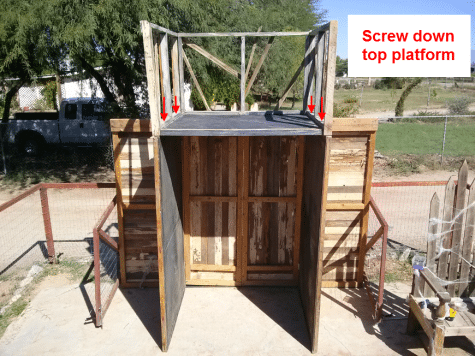
Set top platform onto stabilizing walls and screw down
Add the springs so that the doors will close automatically when opened

I used eye-bolts bent open into hooks to attach the springs

After a couple years of use, one of my gates started to sag a little and drag on the ground. I slapped on a turnbuckle with some cheap cable wire and it was an instant fix! As you tighten the turnbuckle, the gate rises, Brilliant! (I’m amused by small things) Just make sure to place the upper wire on the hinge side of the gate, or else it won’t work.
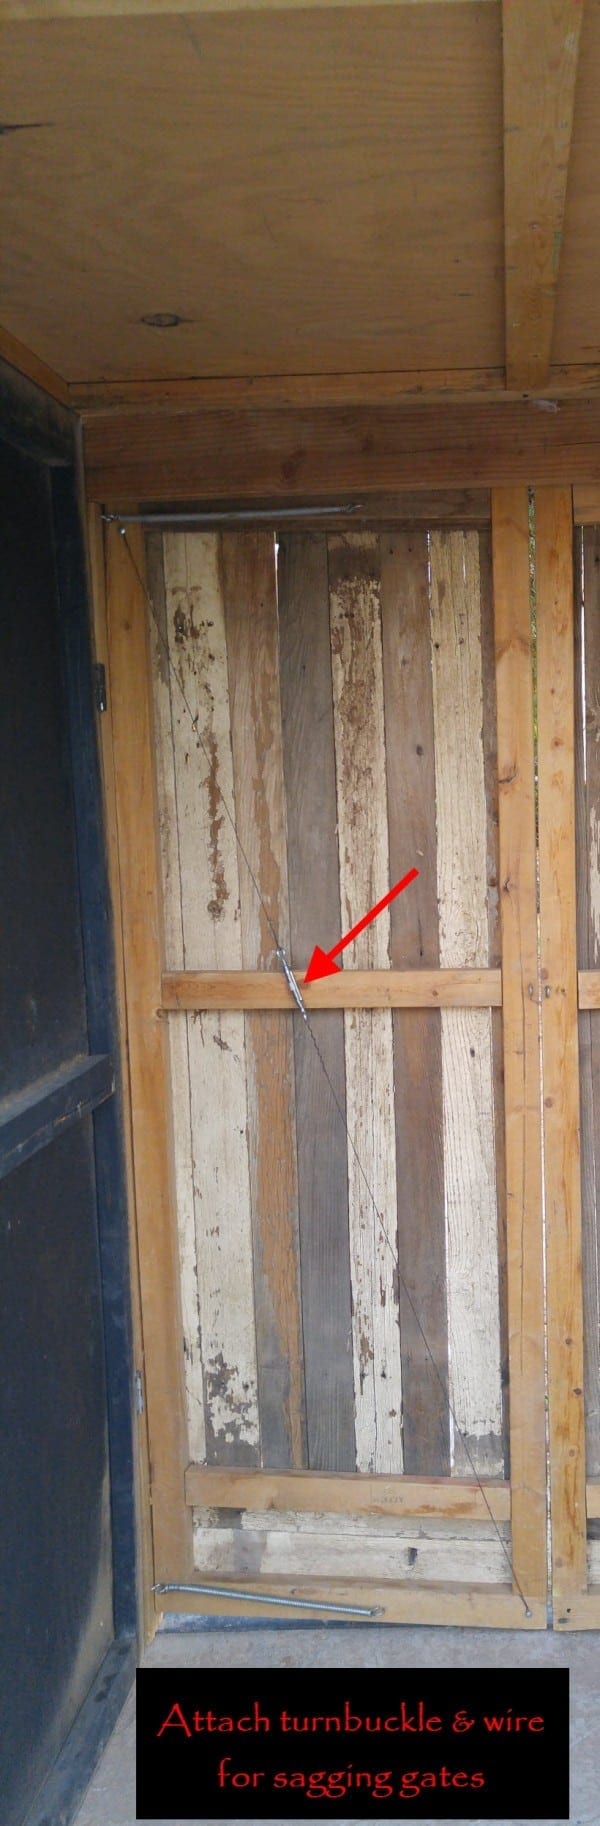

I used a simple washer head screw to screw on the wire

Now the gate is ready for a ghoul to stand on the top platform!


I strategically place a red light shining up on my ghoul and also one shining straight down on my gate at night…this gives it a very eerie look!

That’s it! You’ll be the hit of the neighborhood!


Jan
I love it
Tee
Glad you enjoyed the post Jan!
Clay
Does it have to be a metal strap?
Tee
Hi Clay,
The metal strap is the only thing I have found that is thin enough not to trip over, yet strong enough to hold the whole door structure together.