

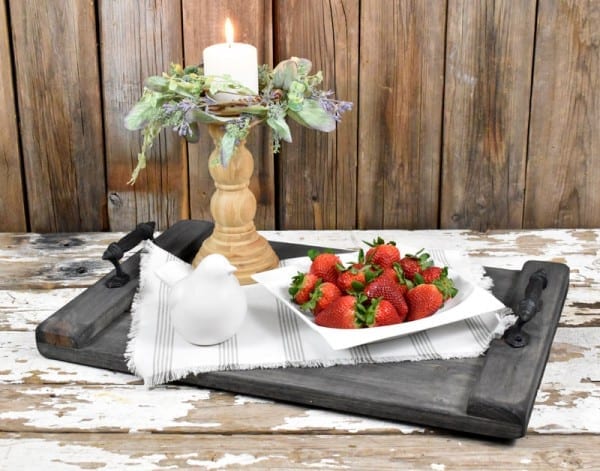
DIY Rustic Wooden Serving Tray
I absolutely love trays, don’t you? I just made a super cute DIY rustic wooden serving tray that I think you might like.

This cute little number would look great with any style of décor to make fabulous looking vignettes.

It also makes an awesome serving tray to display and present your food at parties and gatherings. Don’t you agree this adorable tray makes everything look just a little bit more spectacular?

Did I mention it is super fast and easy to make?

I love the rustic color with the black handles on this tray. You could paint it white or even stain it for a completely different color and style.
If you would like to make one just like this, scroll down and you will find my complete tutorial below.

DIY Rustic Wooden Serving Tray – Tutorial
Supplies:
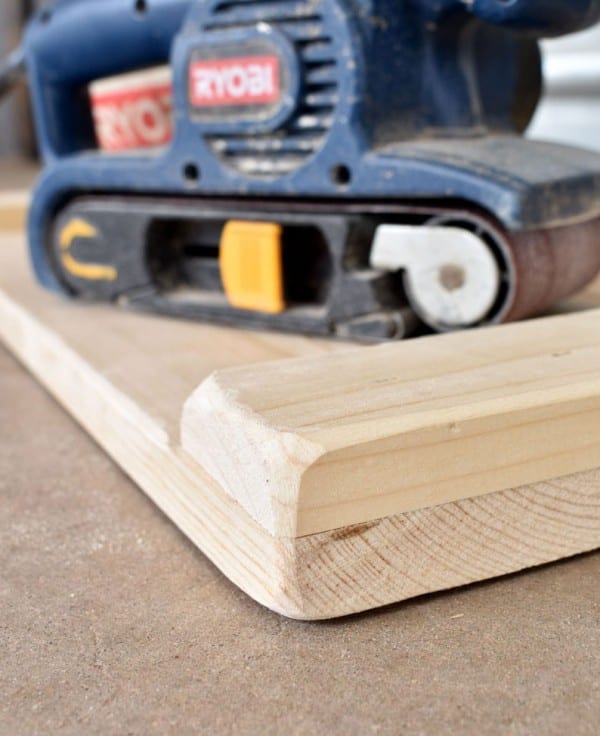
- Belt Sander
- Nail gun with 1 1/4in nails (you can use 1 1/4in screws and a hand drill if you don’t have a nail gun)
- Two 1x4s & two 1x5s at 24in in length
- Two 1x3s at 16in in length’
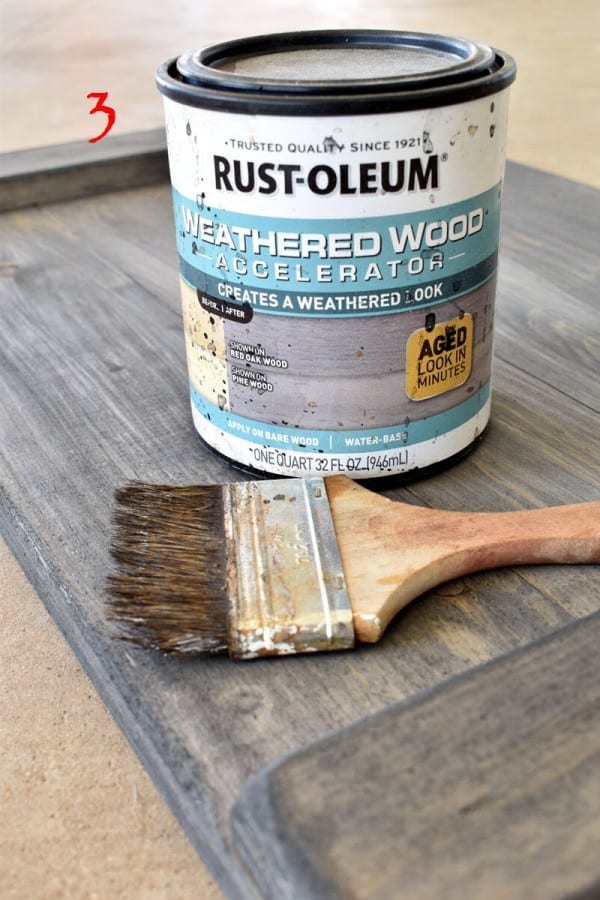
- Weathered wood stain (I used a grey old wood stain for this project)
- Two old-looking handles (I bought mine at Hobby Lobby HERE)
- Four 1 1/4in wood screws (to screw handles to tray) I get black screws to match the handles
- Matte or satin clear coat
Pictures of Supplies Corresponding to Numbers above:


Assembly:
Place the 1x4s & 1x5s together

Nail the 1x3s onto the sides

I made sure to add 2 nails per board so that the boards won’t shift


Finishing:
To give a more worn look, I rounded off the edges with a belt sander.
Add one or two coats of stain to the wood to give an old look. You could even paint it white or the color of your choice, then sand the edges to weather it.


Spray on a couple coats of clear coat to protect the wood

Adding Hardware:
Screw on the handles of your choice. I wanted a rustic look so I chose these black handles from Hobby Lobby.


Finished! Now it’s time to add some pretty things! Doesn’t it look fabulous?!!

If you like this, I would love to hear from you in the comments below!
DIY Rustic Wooden Serving Tray
Sharing at these great link parties:
Busy Monday. Inspire Me Tuesday. The Hearth & Soul. Metamorphosis Monday. All About Home. Follow the Yellow Brick Home. You’re the Star. Inspire Me Monday. Inspire Me Monday. Wonderful Wednesday. Creative Muster Party. Wow Me Wednesday. Your Whims Wednesday. Tuesday Turn About. Homestead Blog Hop. Wonderful Wednesday. Creative Crafts. Simple Homestead Blog Hop. Share Your Style. To Grandma’s House We Go. Centerpiece Wednesday. Vintage Charm Party.
More great link parties I’m sharing at:
Thinking Out Loud Thursday. Party in Your PJs. Thursday Favorite Things. Encouraging Hearts and Home. Celebrate Your Story. Funtastic Friday. Friday Favorites. Farmhouse Friday. Happy Pink Saturday. Friday With Friends. Dare to Share. Saturday Sparks. Create, Bake, Grow & Gather. A Morning Cup of Joe! Happiness is Homemade. Inspire Me Monday. Love Your Creativity. Sundays on Silverado.
Cindy
Oh I love this wooden tray. I love trays anyway. So versatile. Thanks for sharing. Hugs and blessings, Cindy
Tee
Thank you Cindy! It is so easy to make, I wish I had made one sooner! Yes, they are really versatile. I plan on styling it for every holiday.
Ann
This is so cute and I just luv how you styled it! I’d luv for you to share it with us at Wall to Wall DIY Wednesday! Have a great day!
https://www.dabblinganddecorating.com/single-post/2018/06/20/Wall-to-Wall-DIY-Wednesday
Tee
Thank you Ann, for your sweet comments!
Chas Greener
I have been wanting to make one of these trays for a long time. Love the tutorial! Great job and thanks for sharing on To Grandma’s House We Go – I’ll be featuring you next week!
Tee
Thank you Chas, for visiting! I’m so happy to be featured!
Cecilia
This is lovely! Thanks for sharing at Vintage Charm! Pinned!
Tee
Thank you so much for featuring me, Cecilia! I’m glad you like it!
Michelle
Well done! Love the look and simplicity of construction.
Tee
Thank you Michelle!
Donna @ Modern on Monticello
Beautiful tray. I made my first DIY tray last year out of a cabinet door and just fell in love with them. This is a gorgeous project. Thanks for sharing at #HomeMattersParty
Tee
Thank you Donna! I love trays too and this one is so easy to make!
Kristi Dominguez
This is such a fun piece, Tiffany! I love the style and stain you chose! Thank you bunches for linking up and sharing with us!
Tee
Thank you Kristi!
Rhonda Gales
I love how the tray turned out. I love the candle too. Thanks for sharing on Sunday’s Best.
Tee
Thank you Rhonda! I appreciate your kind comments!
William Jessie
I really like this tray and I just want to say that your tutorial has very detailed instructions. I will make sure to be reading your blog more.
Tee
Thank you, William! I’m glad you stopped by!
Linda
What is the actual serving space? I’m trying to figure out adjustments to make it large enough for a coffee and tea bar.
Tee
Hi Linda!
The outer dimensions are 24×16 and the inside dimensions (the actual serving space for dishes and things to sit) is 18 3/4 x 16. Hope that helps!
Root
It is so easy to make, I wish I had made one sooner! Yes, they are really versatile. I plan on styling it for every holiday.
Tee
I’m glad you tried it! Post some pics of yours on here! I would love to see how it turned out. Thank you for your nice comments too!
Dee | Grammy's Grid
Looks nice, I like it! Thanks so much for linking up with me at the Unlimited Link Party 26. Pinned!
Tee
Thank you Dee!
Karins Kottage
Great tutorial! I love how it turned out. So perfect for outdoor entertaining and this would make a great gift too!
Please come link this up to Centerpiece Wednesday on my blog this just needs to be shared 🙂 https://karinskottage.com/2021/05/welcome-to-centerpiece-wednesday-linky-party-223.html
Hugs,
Karin
Tee
Thank you, Karin for the nice comments! I’m glad you like it!
Michele Morin
Looks SO serviceable!
Tee
Thank you, Michele! I use mine all the time! It has become a part of my everyday decor!
Beth
Fabulous step by step tutorial and I love your staging with the yummy strawberries!
I’d love for you to join us over at the Creative Crafts Linky Party every Wednesday through Sunday
https://creativelybeth.com/creative-crafts-linky-party-42/
Followed and Pinned! 🙂
Creatively, Beth
Tee
I’m glad you like it, Beth! Thanks for visiting today!
Sarita
So charming!Thanks for sharing at The Homestead Blog Hop!
Tee
Thank you, Sarita!
Rachelle
really cute Tee, along with the you tube video it looks like a fun project.
Thanks for adding it the the FWF party.
Tee
Thank you, Rachelle! It was fast and easy to make!! I love how you related it to a flag birthday cake and will think of that every time I put it up now. 😉 Thanks for visiting!
Barbara Chapman
Love your tray, Tee! Isn’t it amazing what can be made with some leftover wood and a nail gun?!! I’ve just been re-glueing part of the armoire in our bedroom this week (need to take the four clamps off today) which has needed it for a while. Still need to pop the door off and add back some pieces that came off (holds the mirror inside the door frame)…
I love how your new tray turned out and happily I was able to feature your post at last night’s Share Your Style #305 for you! <3 Great job!!! And I love the ageing stain/product you used.
Happy summer,
Barb 🙂
Tee
Thank you, Barb! I’m so glad you like it! That is a cute Patriotic placemat, by the way!