
DIY Patriotic Picket Fence Bunting – Video
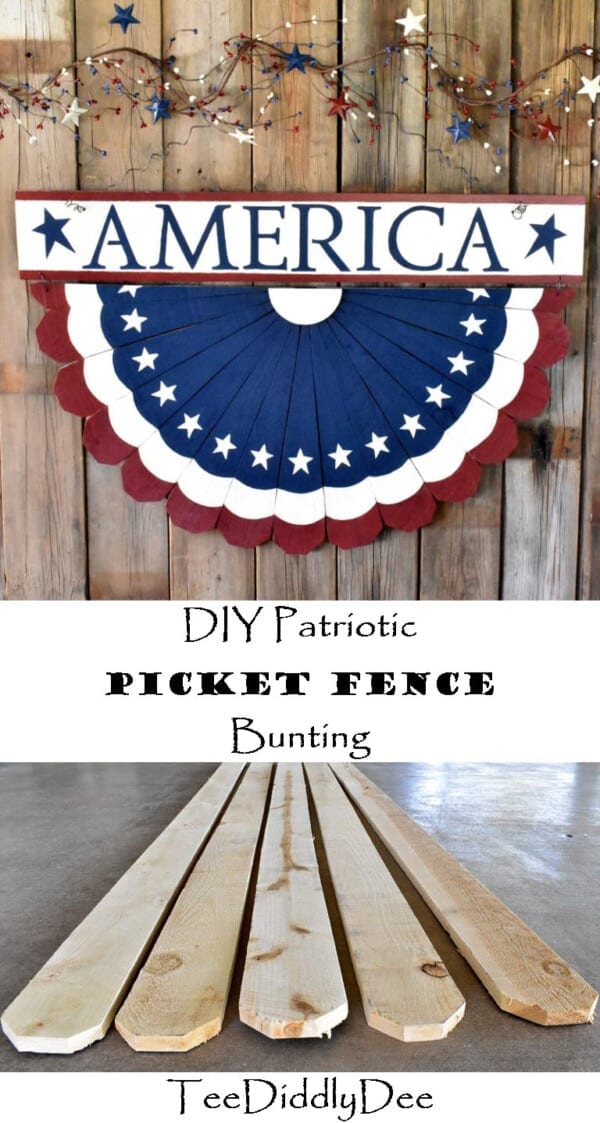
DIY Patriotic Picket Fence Bunting
I sure do LOVE America! Do you love it too?
This year, I wanted to make something special I could put up each year that encompasses all the patriotic, feel good, goose bumpy, feelings I associate with the the stars and stripes and with America as a whole.
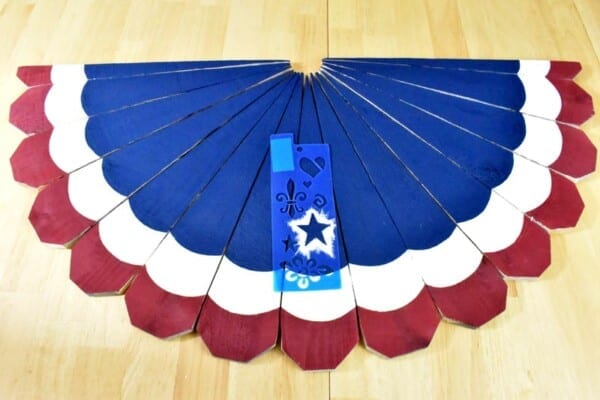
So, here it is! What do you think of my Patriotic Picket Fence Bunting? Do you think it represents a star-spangled banner? I love how it turned out!

This wooden banner is going to look great on my front porch and is reminiscent of the red, white and blue buntings that we frequently see draped from the ceilings of country porches all over rural America.
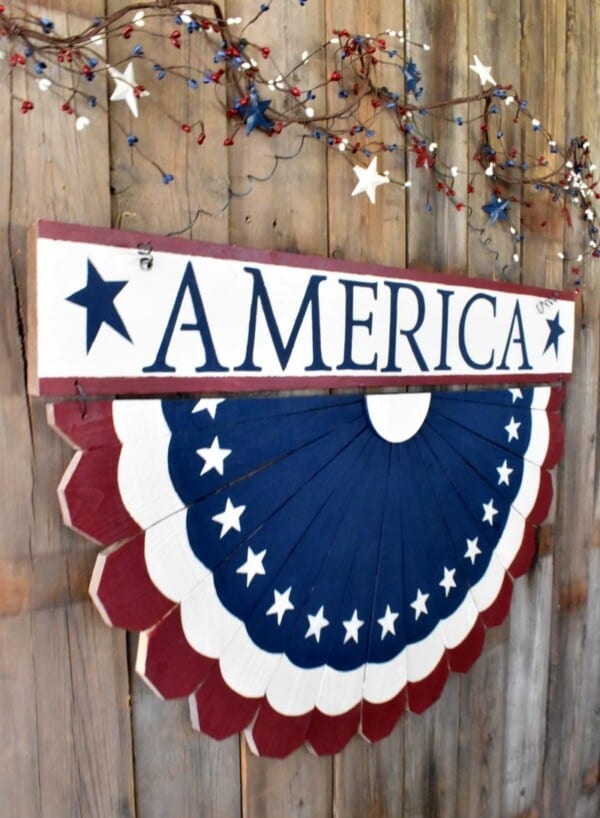
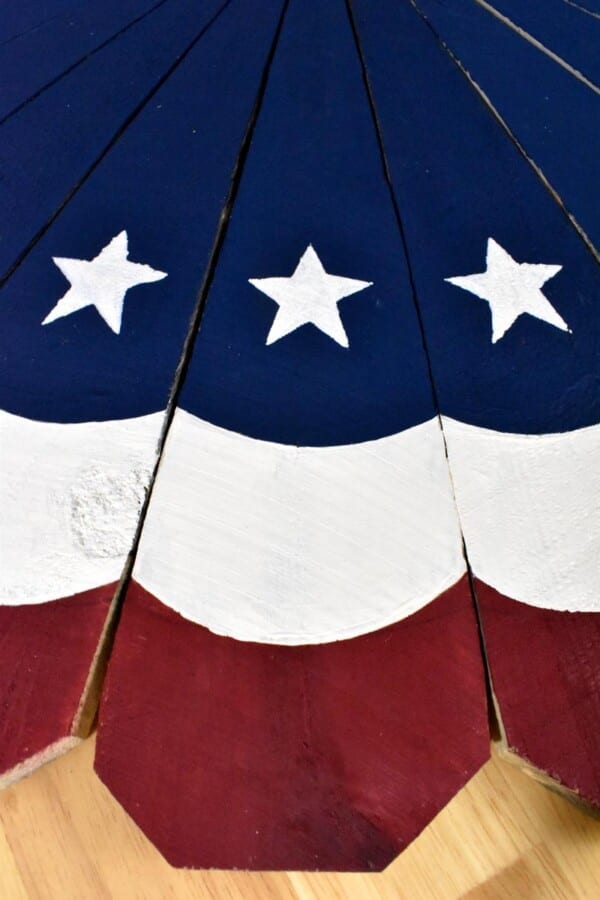
I love the red and white combined with the crisp white stars shining boldly on the royal blue background!

It seems fitting to have “America” boldly stenciled across the top of the bunting, flanked by two blue stars.

I truly LOVE America, a nation created from the ultimate sacrifices of many, so we could be free!

America the Beautiful! Land of the Free! Home of the Brave!
We will never forget those who have sacrificed so much!

Would you like to make a DIY Patriotic Picket Fence Bunting like this one? If so, check out my complete tutorial on how to make one just like it below!
DIY Patriotic Picket Fence Bunting – Tutorial
Supplies:
Lumber:
- (5) Dog-Ear Fence Pickets at 5/8 inches thick x 3-1/2 inches wide x 6 feet long
- (1) 1 x 6 board at approx. 35 inches long (I recommend waiting to cut this board so it can be cut to fit when you get to this point in the build.)
- (1) piece of craft plywood at 12in x 24in x 1/4 inch thick (found at Joannes)
- (1) half circle approx. 4.5 to 5 inches in diameter and 1/4 inch thick (I bought my circle HERE, cut it in half, and discarded the remaining half)
Tools:
- Miter Saw
- Pliers
- Wire (I used 16 gauge rebar tie wire found HERE at Home Depot)
- Box of 18 gauge 5/8in wire brads found HERE at Home Depot (You can also use a nail gun if you prefer)
- Hammer
- Pin nail gun with 23 gauge pin nails at 3/4inches in length (I used this for the white half circle in the middle of the bunting as I didn’t want such large holes showing when I nailed it on. If you don’t have a pin nail gun you could probably use a regular nail gun or hammer and brads and just paint over the holes)
- Hand drill with bits
Paint and Stencil Supplies:
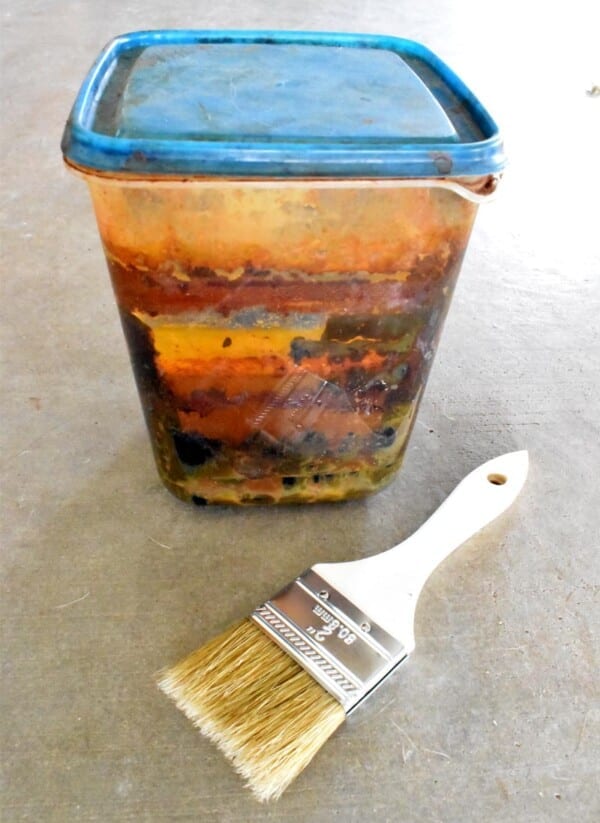
- Old weathered wood stain and a paint brush (click HERE to see my tutorial on how to make it for free!)
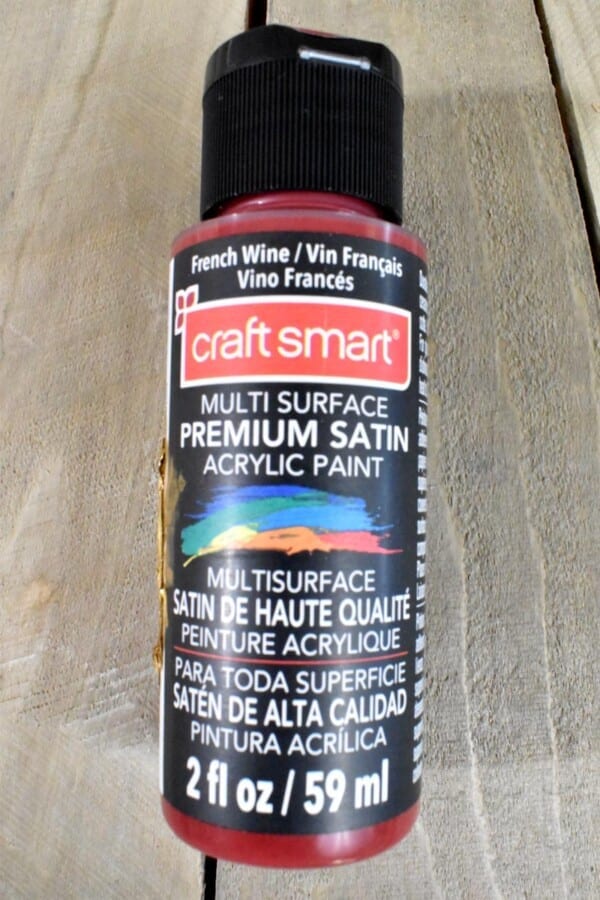
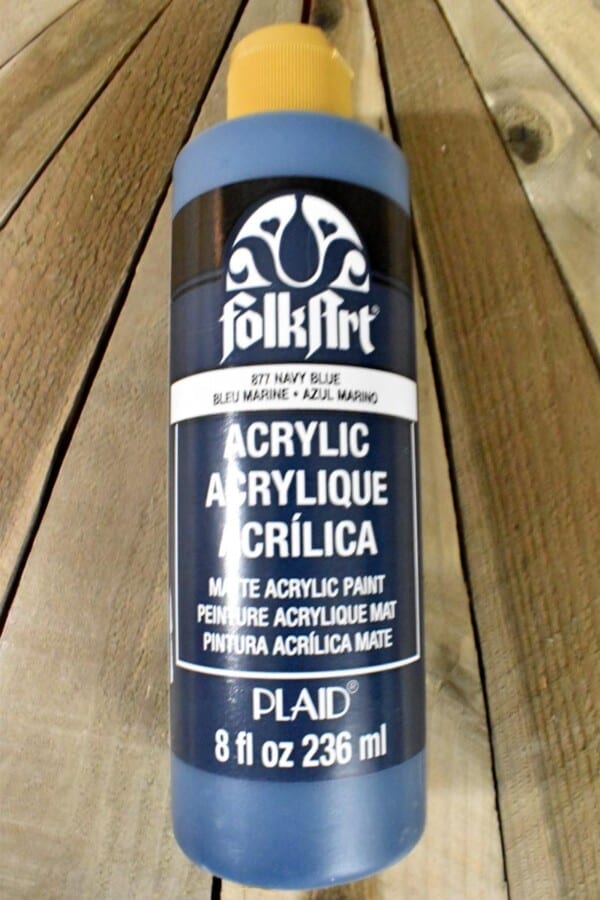
- Acrylic paint in patriotic colors. For an old look, I used navy blue, antique white, and French wine red (all found at Micheal’s)
- (1) Sponge paint applicator
- Small paint brushes
- Alphabet Stencils at about 4 inches tall (I found mine HERE at Hobby Lobby)
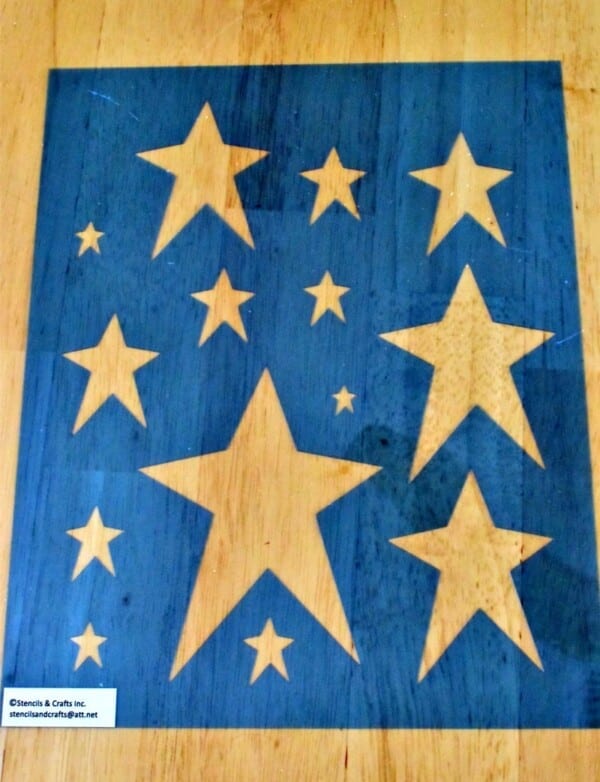
- Small Star stencil at approx. 1-3/4 inches tall (I bought mine at Walmart but you can get some this size just about anywhere)
- Large Star stencils at approx. 3-1/2 inches tall. (I used primitive-looking stars bought HERE)
- Masking Tape
- Round Plastic Lid or Container – about 4-5 inches in diameter
- Pencil
Lumber Supplies Pictures:
1. (5) Dog Eared Fence Pickets

2. (1) 1×6 at 36 inches long

3. (1) 12 inch x 24 inch x 1/4 inch thick Craft Plywood

4. (1) One half of a wooden circle, 4.5 to 5 inches in diameter and 1/4 inch thick.

Tools – Pictures
1. Miter Saw

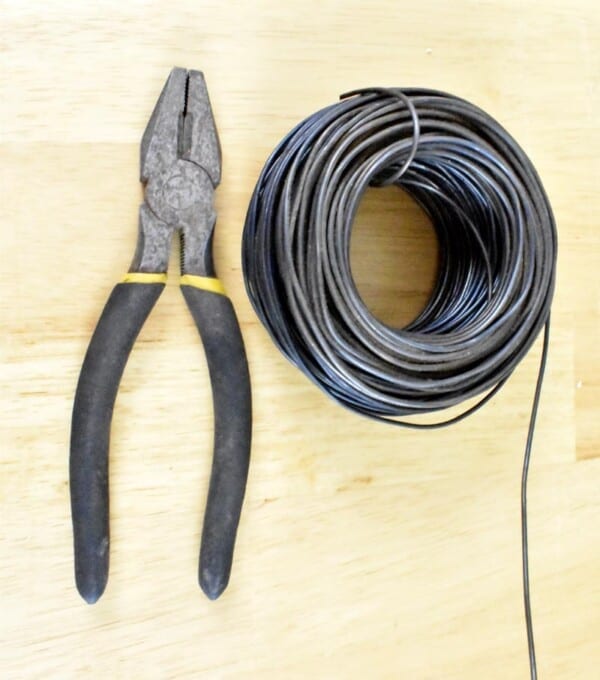
2. Pliers
3. Wire – 16-gauge Rebar Tie Wire is what I used just because I already had it.
4. Box of 18 gauge 5/8in wire brads (below) found HERE at Home Depot (You can also use a nail gun if you prefer)
5. Hammer

6. Pin nail gun with 23 gauge pin nails at 3/4inches in length

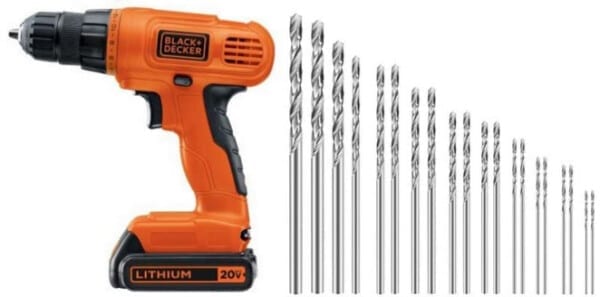
7. Hand drill with bits
Paint Supplies Pictures
1. Old Weathered Wood Stain and paintbrush
(I know this concoction looks weird, but it works great and I use it all the time!)

2. Acrylic paint in patriotic colors. I used Folk Art paints (Michaels) for the Navy Blue and Vintage White. For the red, I used Craftsmart (Michaels) in French Wine.

3. Paint Sponge Applicator

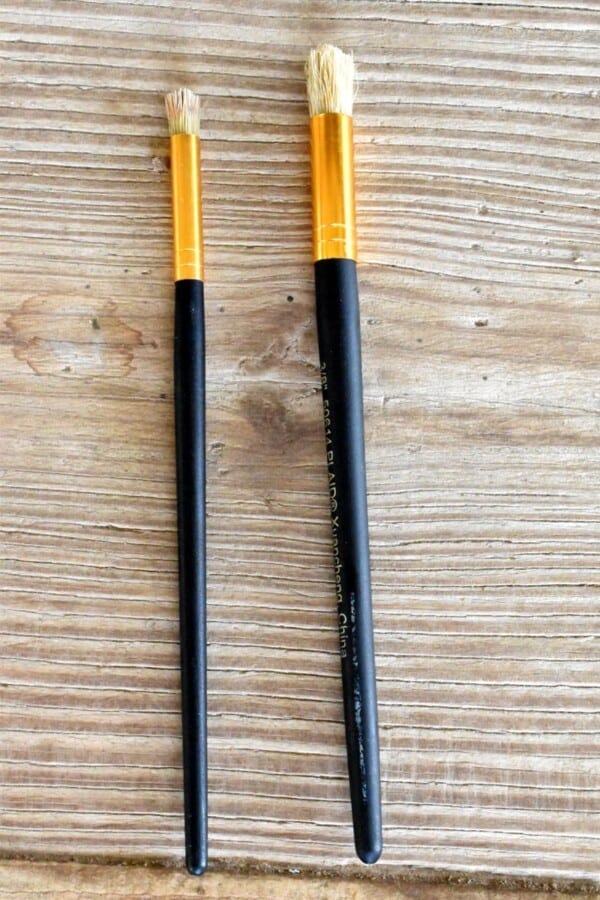
4. Small Paint Brushes
Not shown is a fine line brush.
5. Alphabet Stencils at about 4 inches tall

6. Small Star Stencil at approx. 1-3/4 inches tall

7. Large Star Stencils at Approx. 3-1/2 inches tall
8. Masking Tape

9. Wood Glue – Not pictured
10. Round Plastic Lid or Container – Not Pictured
11. Pencil – Not Pictured
DIY Patriotic Picket Fence Bunting – Instructions
Cut 14 Dog-Eared Fence Pickets:
First, gather the 5 fence pickets.
Next, cut the ends off of each picket so it measures 16 inches long, keeping the dog ear in tact.
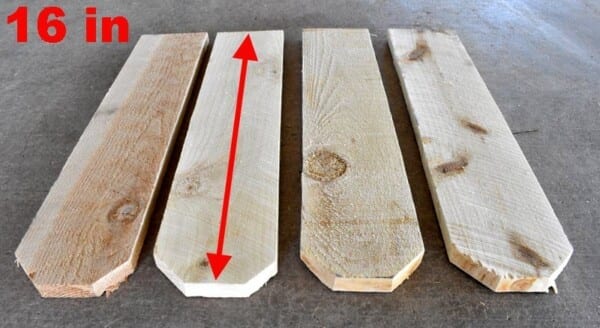
Now, you will need to cut 14 more of these 16-inch picket fence shapes from the left over lengths of wood.

To do this, I used the smaller cut pieces as templates and traced them onto the leftover lengths you just cut off.
Here I am tracing the top of the picket’s dog-eared shape onto the new board.

In the picture below, I am tracing the bottom of each picket onto the new boards.

When you are finished, you should have fourteen (14) small dog-eared fence pickets each measuring 16 inches long.

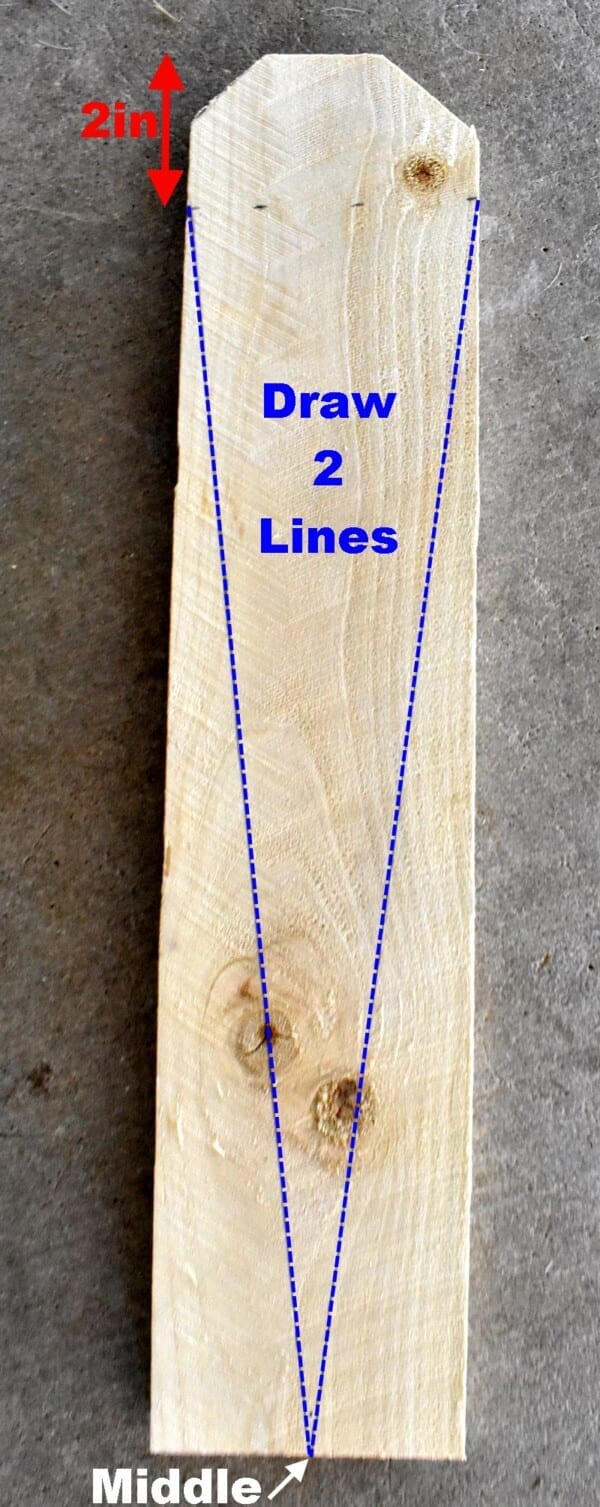
Cutting Dog-Eared Pickets into Points:
First, gather one of the dog-eared pickets. Measure down two inches from the top (tallest part) of the picket and mark both sides. Next, find the center of the bottom of the picket and mark. Now, draw two lines (one from each side) down to the bottom- center point of the picket as shown below.
Now, using the miter saw, cut along the lines and discard the side pieces.
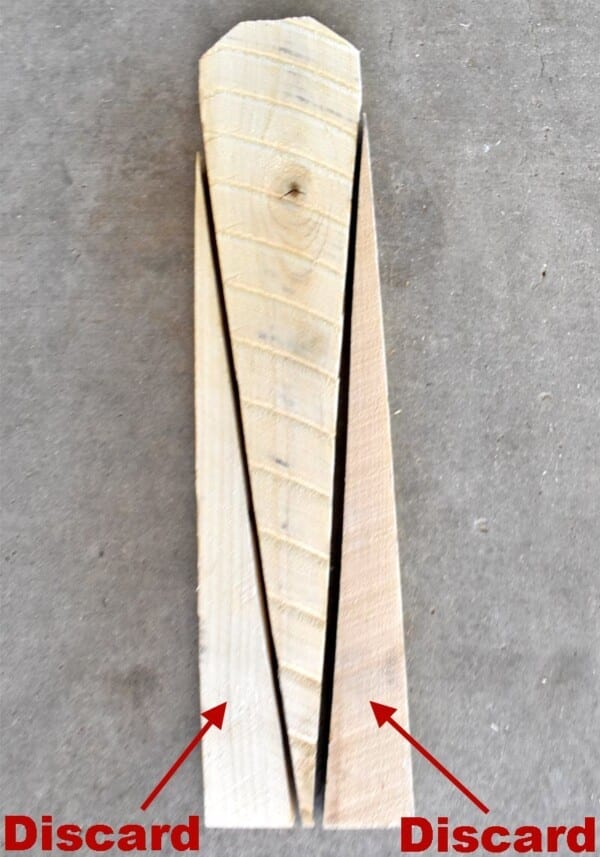
You’ll be using this piece as a template.

Next, trace your template onto thirteen of the other small fence pickets, and cut them all out the same way.

Last Picket for Ends:
You should have one fence picket left. Find the top- center point of the picket and mark with a pencil. Next, draw two lines to the bottom corners as shown.

Cut along the lines and discard the middle piece. These two end pieces will be used as the two top pieces that run across the top of the bunting.

Assembly of Bunting:
First, assemble all the pieces as shown below, placing the two, smaller end pieces on the top of each side as shown below. Push all the pieces together tight enough to form a straight line across the top.

Next, gather the 12in x 24in x 1/4 inch piece of thick craft plywood and measure 3 inches up and 3 inches across from both corners. Cut these ends off as shown below.

Your craft plywood should look like this when finished.

Using the navy blue paint and a paintbrush, paint one entire side of the board.

Your board should now look like this.

Next, gather the hammer and wire brads (small nails).

Flip the painted side of the craft plywood over and nail it to the fence pickets as shown, using the small brads. I tried to nail several nails into the center of each picket, trying to miss the edges. Do not attempt to nail the pointed parts of the pickets down or the nails will show through to the other side.

Cutting the “America” Sign:
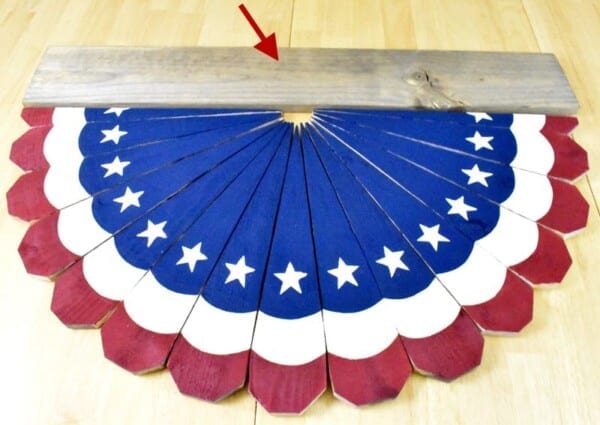
First, flip over the nailed bunting part of the sign. Next, lay out the 1×6 board across the top of the bunting, making it even with the left side. Now, using a pencil, mark a line where the bunting ends on the right side and cut it to the same length as the fence pickets are wide.
Note: You’ll notice that the lower bunting part is already stained but I suggest staining everything at once (Next step).

Staining the Bunting and Sign:
First, gather the DIY old weathered wood stain and the chip brush.
Next, stain the bunting and the “America” Sign on the top and all sides as well. You may need several coats to get the desired darkness you like. Let dry in-between coats.

Painting the Bunting:
First, you will need to gather the red paint (French Wine), the small brushes and a round lid or container measuring about 4.5 inches across.
Using a pencil, make a mark 2 inches down from center of each fence picket.
Using the plastic lid or container as a template, place the curved edge on the pencil mark and draw a half circle on each fence picket. Make sure to start each new half circle where the last half circle ended so there is one continuous scallop going across the bunting.
Now, paint the tips of the fence pickets above the curved line.

I found it was faster to hold the container with one hand while I painted with the other.
Note: Do not paint the sides of the pickets. Only paint the top surfaces.

When finished, your bunting should look like this below. Let dry.

Now, gather the white paint (Vintage White).

Take the pencil and trace 2 more inches down from the bottom of the white row and make another row of scallops.
Paint this row Vintage White in the same manner as before.

You can see me using the container as a guide to speed things up.

When finished, your bunting should have 2 rows of scallops like the picture below.
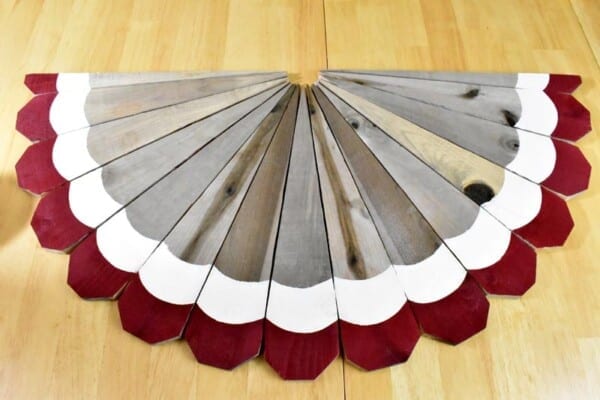
Next, gather the Navy Blue paint and fill in the rest of the unpainted surface of the pickets, below both of the red and white scallops.
When finished, your bunting should look like this. The top surface should all be painted, and all the sides of the pickets remain unpainted.

Stenciling the Stars on Bunting:
First, gather the paint sponge applicator and the small star stencil.

Next, place the stencil in the center of a fence picket, just a little above where the white scallop ends and directly onto the blue area.
Now, dip your sponge applicator into the paint, dab it off into a paper towel 3 or 4 times to make sure there is just barely a little paint on it, then dab the sponge up and down above the star, holding the stencil down with your other hand. You may have to reload your sponge and repeat the process a few times to fully cover the stencil.
Note: It is important that you don’t have too much paint on the paint applicator or brush to prevent the paint from seeping underneath the stencil.

Repeat this process on each fence picket until all of them are painted. You can see where some of the paint seeped under the stencil, but I will touch them up and fix that after all the stars are painted.
I painted a half star on the end pickets in the same fashion as above.

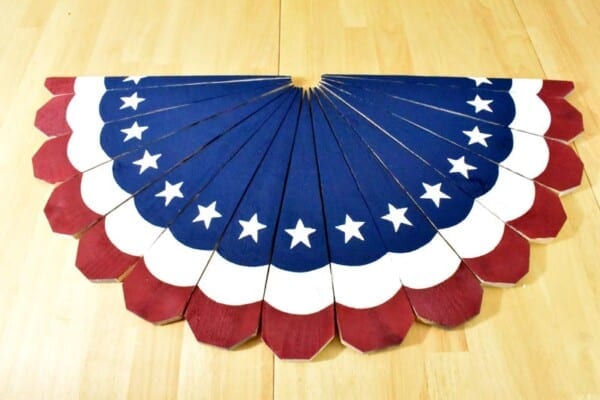
Your bunting should look like this now. (Don’t worry about the center. It will be covered later).
Here is where I went back and touched up any places that needed it. Let dry.
DIY Patriotic Picket Fence Bunting
Painting the “America” Sign:
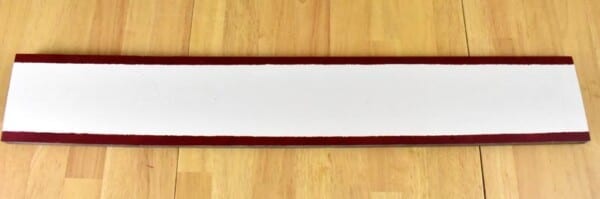
First, gather the 1×6 board that you had cut to fit the bunting earlier.
Next, paint the top surface only of the 1×6 board with the Vintage White paint. Leave the sides unpainted.

Now, using the masking tape, tape off a 1/2-inch line along the top and another 1/2-inch line along the bottom length of the board.

Paint the the exposed top and bottom edges with red paint. Repeat, if necessary. Now, remove the tape.

Your board should look like the pic below.
Stenciling the Letters on the “America” Sign:
First, gather the lettered stencils.

Next, place them on the board and arrange them as straight as you can.

Stencil the letters with the blue paint, using the sponge applicator and the stenciling method explained above when you stenciling the stars.

If you use the exact stencils that I did, you’ll notice that the ‘R’ hangs lower than the red line on the perimeter of the board.

I simply stuck a piece of masking tape over the top of the red line, even with the bottom of the other letters, then painted the ‘R’ omitting the lower part of the ‘R’ like the picture shows below.

You can see how it looks after it is painted, but before the tape is removed.

When I peeled off the tape, it was perfectly in line with the other letters.

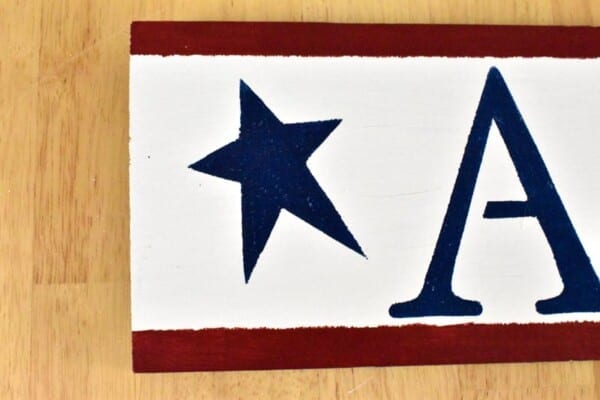
Your sign should look like this now. 🙂

Stenciling the Large Stars on the “America” Sign:
First, gather the large star stencil and the Navy Blue paint.

Center the stencil between the end of the sign and the “A,” using the Navy Blue paint.

It should look like this pic below:
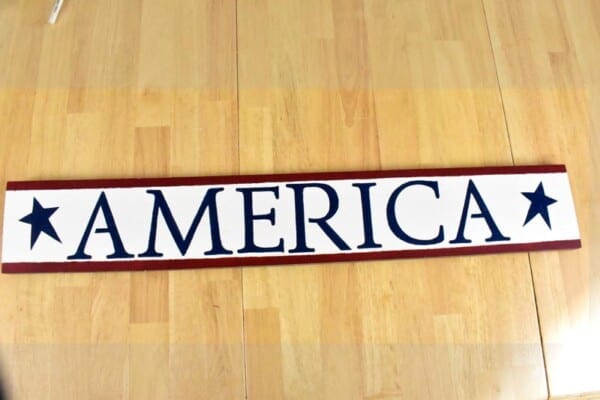
Now, stencil another large star on the other end of the board. You can now go back and touch up any areas that need it. Let dry.
Attaching the “America” Sign to the Bunting:
First, gather the drill, a drill bit, and the wire.
You are going to drill two holes into the 1×6 and fence pickets on each end with the hand drill and bits, as shown below.
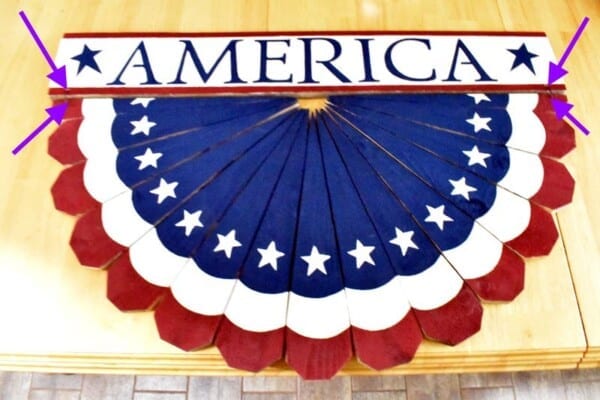
First, drill a hole about 1 inch from the edge and another hole straight up where the “America” Sign would meet as shown below:

Gather the pliers and the wire and cut a piece of the wire about 5 inches long.

Bend the wire like this.

Now thread the wire through the top of both pieces of wood and pull it through.

I used a pencil as a spacer while twisting the wire together.

Using the pliers, pull the wire tight (still keeping the pencil in-between the 2 pieces of wood), and twist to secure.

Cut the excess ends off of the wire and fold the wire over flat against the wood.

Repeat this process on the other side.

Now your bunting should look like this:

Painting the Half Circle:
First, gather the Vintage White paint and the half circle. Paint the half circle, top and sides, with the Vintage White paint. Let dry and give another coat, if necessary.

Next, center the half circle over the center hole in the bunting, then nail it around the outside curve directly to the bunting using the pin nail gun. Try to nail into the center of each picket. It’s important to keep the flat part of the circle even with the flat sides of the top pickets going across the top of the bunting.
Note: Although I did not do this, you may want to apply some wood glue to the bottom of the half circle before nailing it on to make sure it stays put.
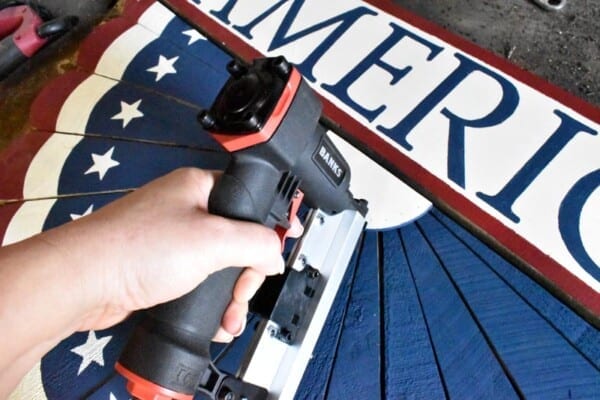
Now, dab some white paint over each of the nail holes to minimize them after nailing the half circle on.

Attaching a wire to hang the Bunting:
Using your pencil, mark a hole on each side of the bunting about an inch down from the top, in-between the star and the letter “A.”

Drill two holes where you made the pencil marks.

Measure out some wire by running it through the holes from the back to the front, leaving some excess in the middle and ends as shown below. It is better to have too much wire than too little. You can always cut it down to size later.

Pull the wire back out of the hole on one side. Now wrap the wire around something long and a bit thicker than a pencil (like a paintbrush ), scrunching it a bit, then pulling it off gently. The wire should make a spiral as shown.
Note: Leave about 6 inches uncurled on both ends.

Thread the left side back through the hole, entering from the back of the board and coming out the front. I used a pencil to wrap the ends of the wire in the front, as I wanted smaller spirals at the ends. You can scrunch them together some, if desired. The spirals will prevent the wire from slipping back through the holes and will also give the piece a rustic, vintage look.

This is how I did mine.

Here, you can see the spiral continuing in the back.

Last, spray your bunting with a matte clear coat to protect it from the elements.

Yay, you’re now officially finished! Doesn’t it look wonderful?!!
Happy 4th of July!!
(Don’t forget to pin the picture below and save it to your Pinterest files!)

Let me know in the comments how you like my DIY Patriotic Picket Fence Bunting! I LOVE to hear from you!
Be sure to check out my other Patriotic DIYs Here!
DIY Patriotic Picket Fence Bunting
Sharing at these great link parties:
Busy Monday. Inspire Me Tuesday. The Hearth & Soul. Metamorphosis Monday. All About Home. Follow the Yellow Brick Home. You’re the Star. Inspire Me Monday. Inspire Me Monday. Wonderful Wednesday. Creative Muster Party. Wow Me Wednesday. Your Whims Wednesday. Tuesday Turn About. Tuesdays with a Twist. Wonderful Wednesday. Creative Crafts. Share Your Style. To Grandma’s House We Go. Centerpiece Wednesday. Vintage Charm Party.
More great link parties I’m sharing at:
Thinking Out Loud Thursday. Homestead Blog Hop. Party in Your PJs. Thursday Favorite Things. Grace at Home. Keep in Touch. Encouraging Hearts and Home. Celebrate Your Story. Funtastic Friday. Friday Favorites. Farmhouse Friday. Happy Pink Saturday. Friday with Friends. Dare to Share. Saturday Sparks. Create, Bake, Grow & Gather. A Morning Cup of Joe! Farmhouse Friday. Happiness is Homemade. Snickerdoodle Create Bake Make. Inspire Me Monday. Love Your Creativity. Sundays on Silverado.
Paula@SweetPea
I love this project! Your tutorial is great and explains perfectly how to make this.
Tee
Thank you so much, Paula, for visiting today and for your sweet comments! <3
Linda
Love your American sign.
Tee
Thank you, Linda! I’m glad you like it!
Dave
Thanks for posting this. I’m glad to see patriotism is alive and well. This can also be displayed for Memorial Day, a very special day. Your directions are complete and easy to follow. This looks like a great project!
Tee
Thank you so much, Dave! I appreciate your kind words and yes, I do love my country!
jj
Very Pretty. A lot of work, but you laid out the steps well and this would last for many years. Do you take orders? Lol. 😀 Thanks for sharing and for loving our country! (I mean, how could you not, right?)
Tee
Thank you, JJ, for your kind thoughts. I don’t take orders but I do give a full tutorial if you find someone that could cut it out for you. 🙂
Michele Morin
I am loving all the red, white and blue decorations!
Tee
Thank you Michele!
Dee | Grammy's Grid
Looks nice, I like it! Thanks so much for linking up with me at the Unlimited Link Party 26. Pinned!
Tee
Thanks Dee!
Beth
Using the fence pickets is BRILLIANT!! I’d love for you to join us over at the Creative Crafts Linky Party every Wednesday through Sunday
https://creativelybeth.com/creative-crafts-linky-party-43/
Followed and Pinned! 🙂
Creatively, Beth
Tee
Thank you, Beth! I’m glad you like it! I appreciate the invite as well! Thanks for visiting today!
Ann
I love this project, Tee. So unique and your tutorial is excellent! Thank you for sharing at Party In Your PJ’s.
Tee
Thanks, Ann! I appreciate your sweet comments!
Joanne
That is beautiful! Thank you so much for sharing with us at Encouraging Hearts and Home. Pinned.
Tee
Thank you so much, Joanne!
Cecilia
Tee, I love your creative spin on patriotic bunting! Thanks for sharing at Vintage Charm–pinned!
Tee
Thank you, Cecilia!
Debbie-Dabble
This is absolutely adorable!! Love it!! Thanks for sharing!! I hope you are having a great Holiday weekend!!
Hugs,
Deb
Tee
You are so kind, Debbie! I’m glad you like it!
Allyson
Your bunting looks wonderful and the tutorial is perfect! You make it look so easy to make with your detailed instructions.
Tee
Thank you so much, Allyson!
Julie Briones
Tee, what an amazing piece of patriotic artwork! Your Americana bunting is perfect for all summer long! Thanks for sharing at Tuesday Turn About! Pinned, and I’m excited to be featuring you tomorrow!
Sarita
Thank you for sharing this detailed tutorial with us at The Homestead Blog Hop!
Kerryanne
What a fun DIY Tee. As an Aussie, I love seeing patriotic projects.
I wish you a happy 4th of July!
Thank you for sharing your DIY picket fence bunting project at Create, Bake, Grow & Gather this week. I’m delighted to be featuring it at tomorrow’s party and pinning too.
Hugs,
Kerryanne
Tee
Thank you so much, Kerryanne, for your kind words! I appreciate the feature!
Laurie
I do love America 🇺🇸!
I think your bunting is cute, and lasts way longer than a fabric one would! This honestly looks like a project that I could put my boys on. Then I could paint…
Glad we could feature your project this week on the Homestead Blog!
Laurie
Tee
Awesome! I love mine! Glad you hear you love America too! <3
Teri Snow
I am getting ready to make this, have everything but stencils right now, but have a question. I bought the little vine like you have pictured above the bunting, it’s not all plastic like I thought, but is paper also. Do you think if I sprayed the entire vine with the matte spray listed, it would hold up outside?
Tee
I would not depend on it lasting if it was made of paper, even if it was sprayed. If you want a vine like mine, I bought it at Michaels and they still had them in the patriotic supplies today when I was in there. Good luck with it all!
Rachelle
Tee, I have a ton of old fence posts in my garage. Thanks for the tutorial and sharing at FWF link party!
Tee
Awesome! You have most of the supplies already! Let me know how yours turns out!
Alexandra
This is awesome! I hadn’t realized when I clicked on it to check it out that it was done with scrap wood. I shared it with my uncle – he loves wood projects. Thank you so much for sharing with us at the Snickerdoodle Create Bake Make Link Party! I always enjoy seeing what you’re up to.
Tee
Thank you so much, Alexandra, for your sweet thoughts! I’m glad you visited today!
Dee | Grammy's Grid
Visiting again to say thanks so much for linking up with me at A Themed Linkup 62 for All Things American and Patriotic. Pinned again!
Tee
Thanks Dee!