
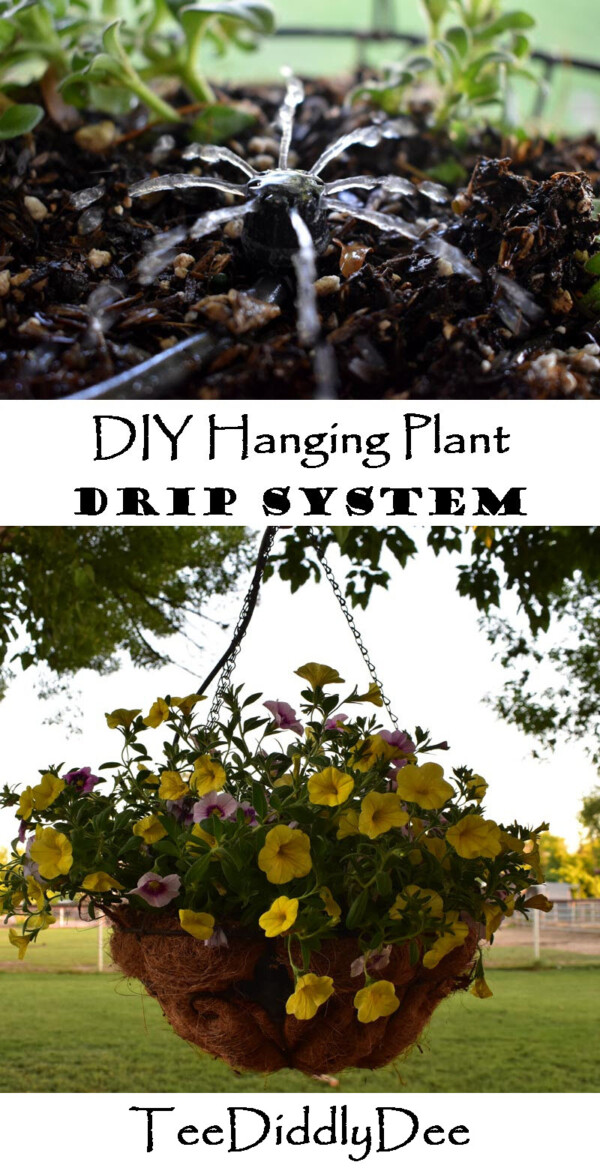
DIY Hanging Plant Drip System
Why You Need a Drip System
Do you plant beautiful flowers in your hanging baskets, but hate the hassle of watering them every day? Does life get in the way and you forget to water your plants only to find them all shriveled up and dead? Do you cringe having to ask your neighbors to water your plants every time you leave town?
If any of these scenarios sound familiar, you need to check out my new DIY Drip System for Hanging Plants! My life, AND, (more importantly), my PLANTS’ LIVES have drastically changed for the better!

- An automatic drip system will keep your plants watered regularly and on time.
- You will never forget to water again.
- Your plants will stay healthier and won’t get stressed or die from lack of water.
- You don’t have to rely on anyone to water your plants when you are gone on vacation!
It is worth the afternoon it will take for you to set it all up!
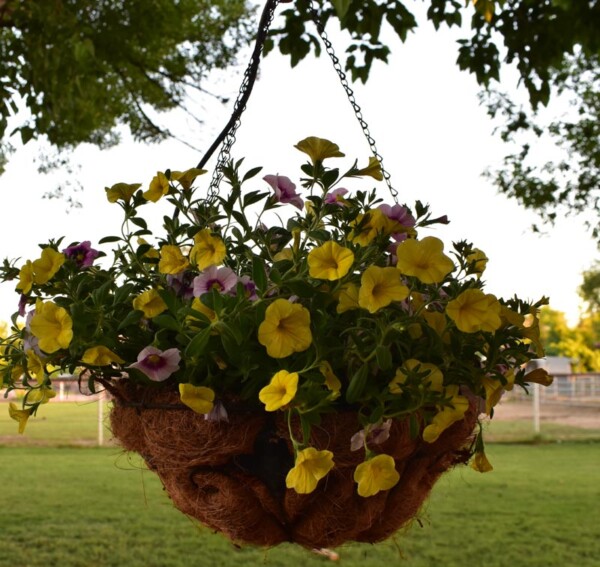
I am so glad I set one up for myself! Now I have gorgeous hanging plants all season long. I simply plant them and forget them!
If you would like to make your own drip system, check out my tutorial below!
DIY Hanging Plant Drip System Tutorial
Tools:
- Scissors
- Hammer
Supplies:
Poly Drip Tubing
- 1/2 inch main line poly drip tubing (There are different variations of ½ inch poly tubing measuring from .620 all the way to .710 (which I think is a little ridiculous because it can be very confusing), so make sure your ½ inch poly tubing is the same measurements as your fittings.) I used .710 so I made sure all of my fittings fit .710.)
- 1/4 inch drip tubing
Adapters, End Caps, Couplings and Elbows
- 3/4 inch hose to 1/2 inch drip tubing adapter (To attach the main line drip hose to your water faucet) There are different variations of ½ inch couplings measuring from .620 all the way to .710 (which I think is a little ridiculous because it can be very confusing), so make sure your ½ inch poly tubing is the same measurements as your fittings.) I used .710 so I made sure all of my fittings fit .710.
- End cap for 1/2 inch (.710″) drip hose -There are different variations of ½ inch couplings measuring from .620 all the way to .710 (which I think is a little ridiculous because it can be very confusing), so make sure your ½ inch poly tubing is the same measurements as your fittings.) I used .710 so I made sure all of my fittings fit .710.
- 1/4 inch barbed drip couplings -There are different variations of ½ inch couplings measuring from .620 all the way to .710 (which I think is a little ridiculous because it can be very confusing), so make sure your ½ inch poly tubing is the same measurements as your fittings.) I used .710 so I made sure all of my fittings fit .710.
- 1/2 inch (.710″) Poly Drip Irrigation Elbows-You’ll need as many as how many turns your main line 1/2 inch poly tubing will make, as you run it along the ceiling to reach your plants. There are different variations of ½ inch couplings measuring from .620 all the way to .710 (which I think is a little ridiculous because it can be very confusing), so make sure your ½ inch poly tubing is the same measurements as your fittings.) I used .710 so I made sure all of my fittings fit .710.
- Tee Coupling – 1/2 inch (.710″) tee coupling-You’ll need as many as how many turns or directions your main line 1/2 inch poly tubing will make, as you run it along the ceiling to reach your plants (I only used elbows, but you may need these if you have a different layout of how you want to run your main line to all of your plants). There are different variations of ½ inch couplings measuring from .620 all the way to .710 (which I think is a little ridiculous because it can be very confusing), so make sure your ½ inch poly tubing is the same measurements as your fittings.) I used .710 so I made sure all of my fittings fit .710.
- 1/2 inch (.710″) coupling-Used to mend two pieces of 1/2 inch main line poly drip tubing together. It’s nice to have a few of these around in case you accidentally cut the tubing in the wrong place, and need to mend it back together. There are different variations of ½ inch couplings measuring from .620 all the way to .710 (which I think is a little ridiculous because it can be very confusing), so make sure your ½ inch poly tubing is the same measurements as your fittings.) I used .710 so I made sure all of my fittings fit .710.
Bubblers with Stakes
- Bubblers with stakes (I purchased the 360 degree ones). I like the ones I used because they’re sort of a sprinkler/bubbler and by twisting the tops, you can adjust how much water flow comes out.
Hole Punches and Plugs for Tubing
- 1/4 inch hole punch (for punching holes into your main line 1/2 inch poly tubing)
- Goof Plugs (These are good to have in case you ‘goof’ and make a hole where you decide you don’t want one)
Pick Up Talons
- 3/4 inch Pick up talon (for hanging larger main line 1/2 inch drip-line)
Water Timer
- Water timer (You will also need two double AA batteries to run the water timer I used)
Pictures of Supplies:
Poly Drip Tubing
1. 1/2 inch main line poly drip tubing -There are different variations of ½ inch poly tubing measuring from .620 all the way to .710 (which I think is a little ridiculous because it can be very confusing), so make sure your ½ inch poly tubing is the same measurements as your fittings.) I used .710 so I made sure all of my fittings fit .710.


Adapters, End Caps, Couplings and Elbows
1. 3/4 inch hose to 1/2 inch drip tubing adapter (To attach the main line drip hose to your water faucet). There are different variations of ½ inch couplings measuring from .620 all the way to .710 (which I think is a little ridiculous because it can be very confusing), so make sure your ½ inch poly tubing is the same measurements as your fittings.) I used .710 so I made sure all of my fittings fit .710.

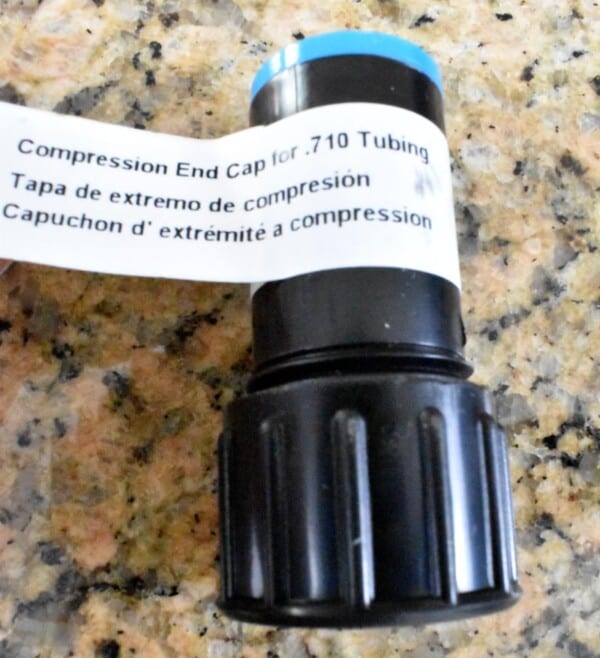
2. End cap for 1/2 inch drip hose -There are different variations of ½ inch couplings measuring from .620 all the way to .710 (which I think is a little ridiculous because it can be very confusing), so make sure your ½ inch poly tubing is the same measurements as your fittings.) I used .710 so I made sure all of my fittings fit .710.
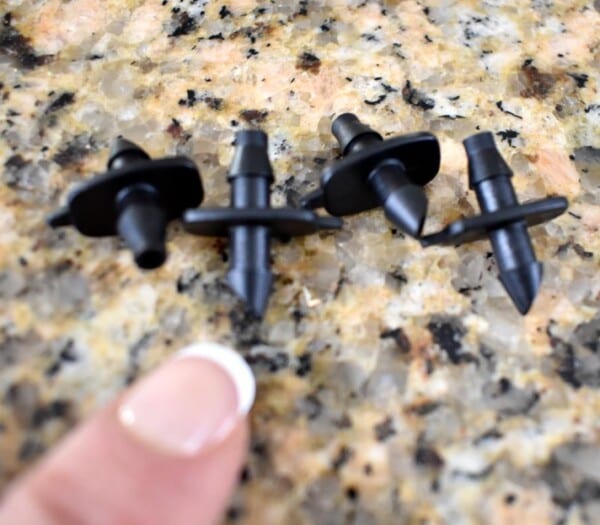
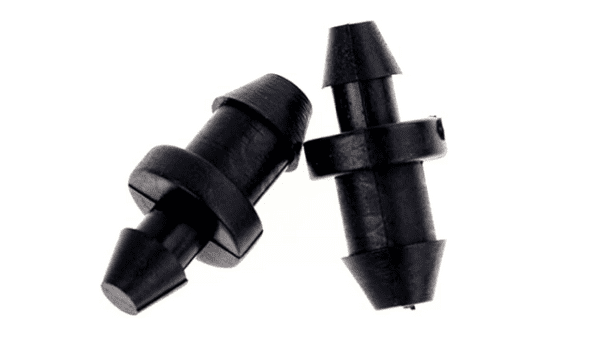
3. 1/4 inch barbed drip couplings – You’ll use these to connect your 1/4 inch drip tubing to the 1/2 inch main line poly tubing.
4. 1/2 inch Poly Drip Irrigation Elbow -As you run your main line (using 1/2 inch poly tubing), along the ceiling to reach your plants, you will need one Poly Drip Irrigation Elbow for each 90 degree turn it makes. (There are different variations of ½ inch couplings measuring from .620 all the way to .710 (which I think is a little ridiculous because it can be very confusing), so make sure your ½ inch poly tubing is the same measurements as your fittings.) I used .710 so I made sure all of my fittings fit .710.)

5. 1/2 inch Poly Drip Irrigation Tee Coupling
Also, on your main line (1/2 inch poly tubing), you may need one or more of these 1/2 inch ( Poly Drip Irrigation) Tee Couplings if your line needs to split into two directions. There are different variations of ½ couplings measuring from .620 all the way to .710 (which I think is a little ridiculous because it can be very confusing), so make sure your ½ inch poly tubing is the same measurements as your fittings.) I used .710 so I made sure all of my fittings fit .710.
Note: I only used elbows, but you may need these if you have a different layout on your main line to all of your plants.

6. 1/2 inch Poly Drip Irrigation Coupling
Used to mend two pieces of 1/2 inch main line poly drip tubing together. It’s nice to have a few of these around in case you accidentally cut the tubing in the wrong place, and need to mend it back together. (There are different variations of ½ inch poly tubing measuring from .620 all the way to .710 (which I think is a little ridiculous because it can be very confusing), so make sure your ½ inch poly tubing is the same measurements as your fittings.) I used .710 so I made sure all of my fittings fit .710.)

Bubblers with Stakes
1. Bubblers with stakes. (I purchased the 360 degree ones).
I like these because they’re sort of a sprinkler/bubbler and by twisting the tops, you can adjust how much water flow comes out.

Hole Punches and Plugs for Tubing
1. 1/4 inch hole punch (for punching holes into your main line 1/2 inch poly tubing)

11. Goof Plugs (These are good to have in case you ‘goof’ and make a hole where you decide you don’t want one)
Pick Up Talons
1. 3/4 inch Pick up talon (for hanging larger main line 1/2 inch drip-line)

Water Timer
1. Water timer
Note: You will also need two double AA batteries to run this water timer.

DIY Hanging Plant Drip System – Instructions
Installing the Timer:
First, place the batteries in your timer and screw it onto the water faucet.

Next, gather your hose-to-drip-line adapter and firmly push one end of the 1/2 inch poly tubing into the hole on the non-threaded side of the adapter. I always try to push the poly tubing into the hole about 1/2 inch to make sure it’ll stay put.
Note: If it’s cold out, the poly tubing will be harder to push into the hole, so I use a hair dryer or heat gun to warm up the end (to make it more pliable) before pushing it into the hole.

Now, screw the adapter firmly onto the timer.

Adding Poly Tubing:
First, you need to decide what direction your 1/2 inch main-line poly tubing will be going. Add a coupling to split your line into two separate directions (only if needed – I didn’t need to do this on my layout). Use elbows each time your main line makes a 90 degree turn. To add a coupling, cut the poly tubing where you want it to turn directions, and then firmly push on the coupling.
Note: Make sure to leave enough poly tubing to push into the hole of the coupling.

Now, continue your poly tubing in the new direction by pushing the end of the remaining tubing into the other end (or ends if using a Tee Coupling) of the elbow.

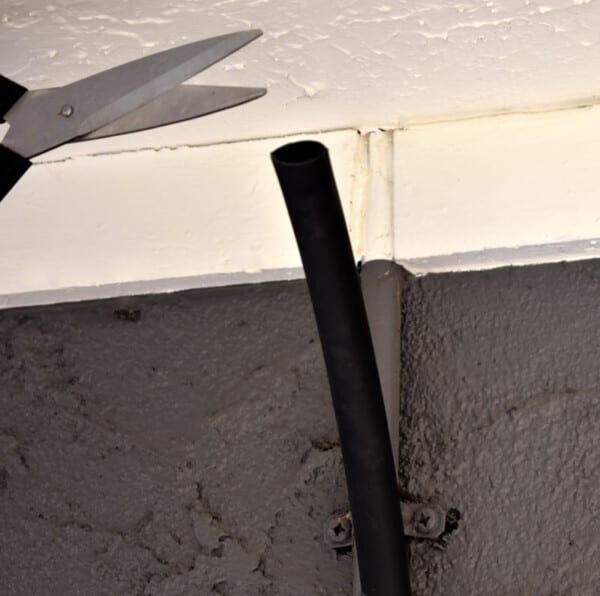
To reach my hanging plants, I ran my poly tubing straight up the wall, and along the under-roof of my patio. Here, you can see where I cut the end of the poly tubing.
Since I am running my line to the left only, I am going to attach a 1/2 inch Elbow.
Note: If I was going to split this into two directions (to the left and to the right) , here is where I would attach the 1/2 inch Tee Coupling.
You can see I have attached the 1/2 inch Elbow in the pic below.
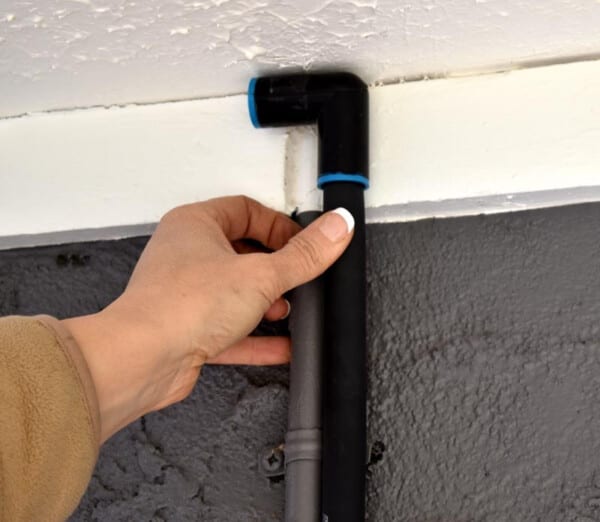
Last, I pushed in the 1/2 inch poly tubing to run my line along the top of the ceiling.

Securing Poly Tubing to the Wall:
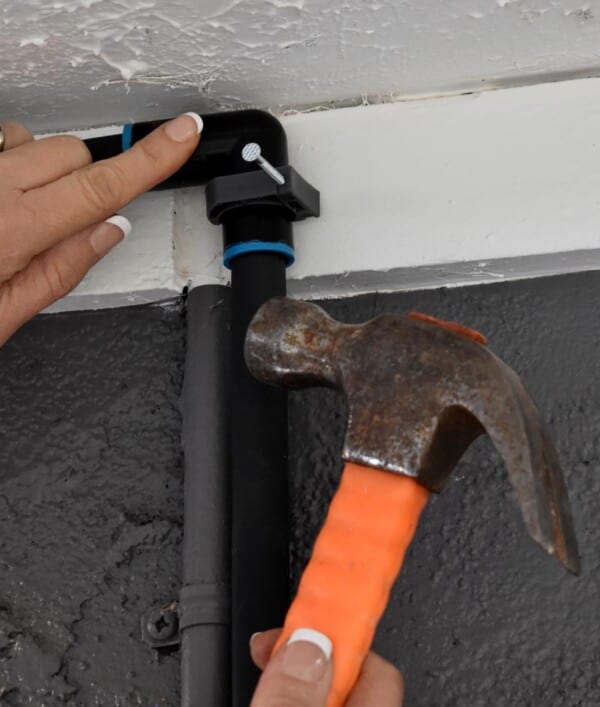
First, gather the pick up talons.
Next, I secured the poly tubing to the wall and roof by nailing the pick up talons to the wall as needed.
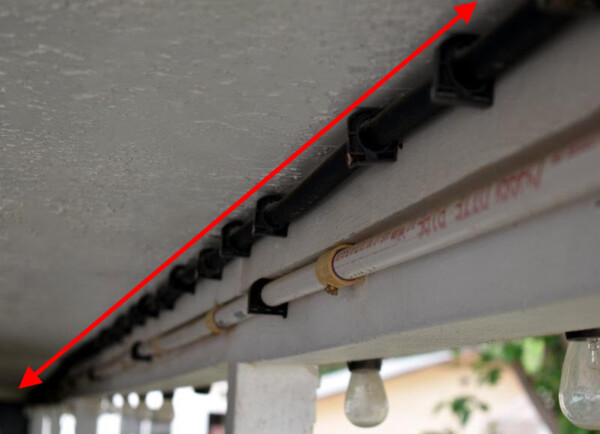
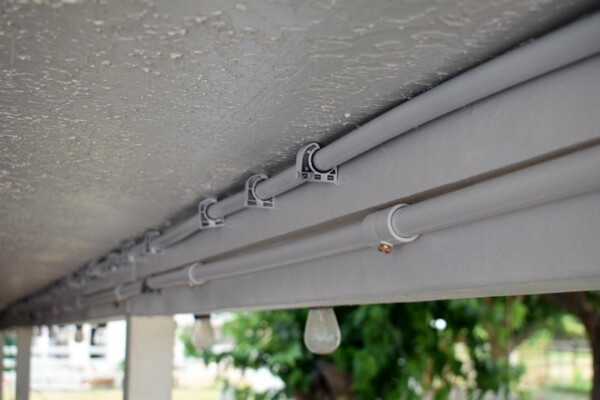
Below, you can see where I ran the 1/2 inch main line poly tubing along my patio ceiling where all of my hanging plants were hung and secured it to the wall as needed with the pick up talons.
When I reached the end of where I wanted my poly tubing to run, I cut off the excess tubing.

Here is where I pushed on the end cap.

Last, I secured it all with another pick up talon.

Adding the 1/4 inch drip tubing:
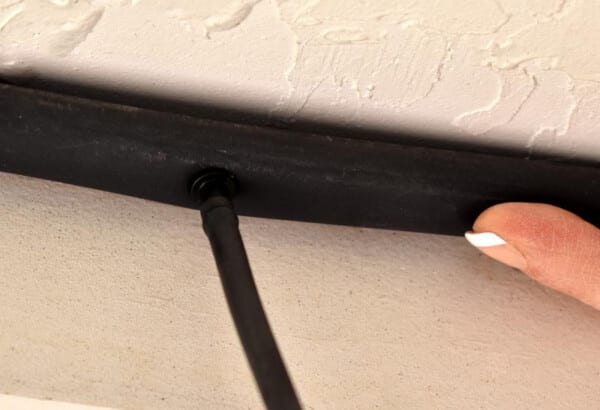
First, gather the hole punch.

Next, punch a hole right above each hanging plant using the 1/4 inch hole punch.

Check out the nice little hole it makes!

Now, gather a barbed drip coupling and the end of the 1/4 inch drip tubing.

Push the barbed drip coupling into the end of the tubing.
Note: (Remember if it’s cold, use a blow dryer or heat gun to warm up the tip of the 1/4 inch drip tubing just like you can with the 1/2 poly tubing).

Next, insert the other end of the barbed drip coupling into the hole you just punched in the 1/2 inch main line poly tubing.

Make sure the barbed drip coupling is pushed in all the way to form a good seal.
The 1/4 inch drip tubing should now be dangling down from the 1/2 inch main line poly tubing.
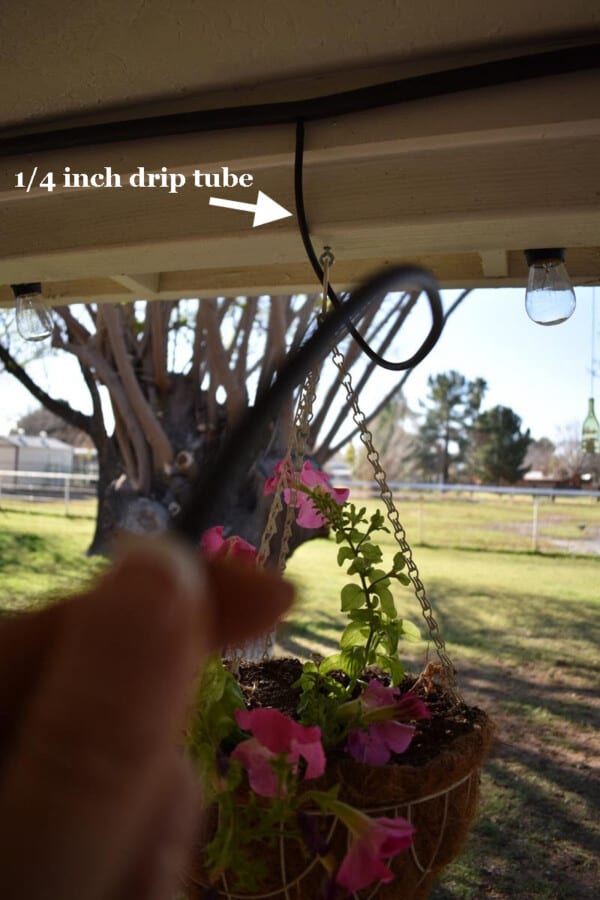
Now, cut off the excess tubing, leaving about 1-1/2 to 2 feet dangling. Now you are ready to add the bubblers.

Adding the Bubblers:
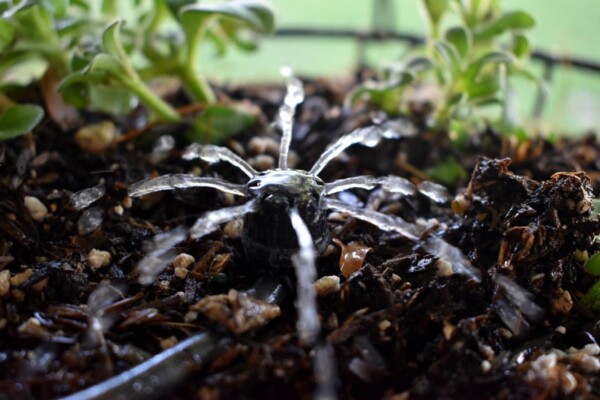
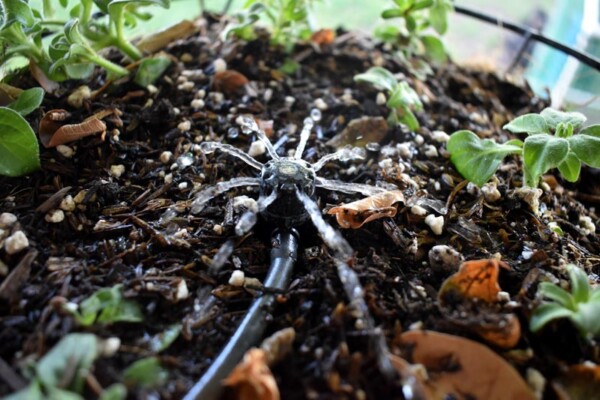
First, gather a bubbler.

Next, push the bubbler into the soil of your hanging plant.

Next, wrap your 1/4 inch tubing once or twice around one of the chains that your plant hangs from.
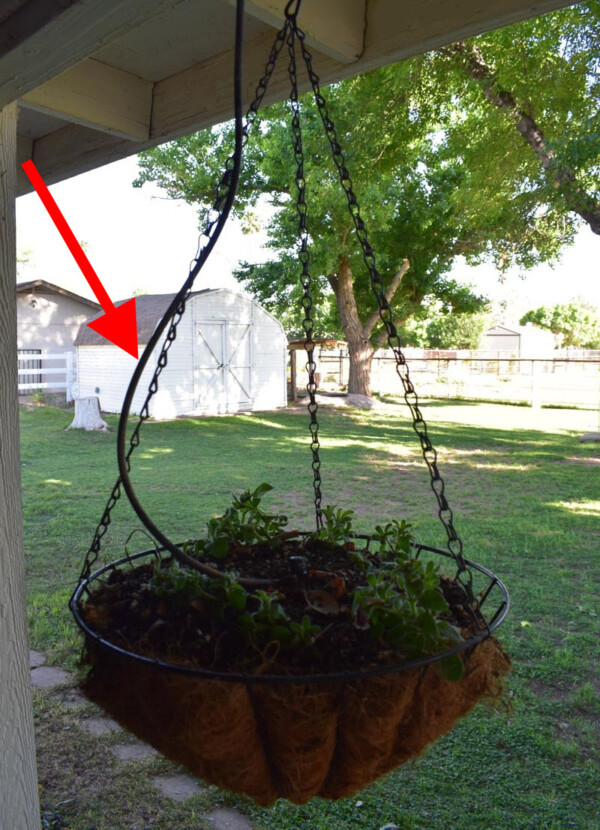
Last, push the free end of your 1/4 inch tubing onto the little spout sticking out the side of the bubbler.

Adjusting your bubblers:
First, turn on your water and adjust the amount of water flow coming out of your bubbler, by twisting the top clockwise or counter clockwise.

Next, just set your water timer and you’re sprinkler should come on.
A side note: Be aware that your plants will probably drip from the bottom if you don’t use a pot that holds the water. If it does drip, make sure your pot isn’t hanging over anything that can be ruined by water.

Also, I spray painted everything white to match the ceiling and wood trim, which gave it a clean look.
Now you are finished! No more having to remember to water your hanging plants!

Happy Planting!!
I would love to hear from you in the comments! Thank you for visiting!
DIY Hanging Plant Drip System
Sharing at these great link parties:
Busy Monday. The Hearth & Soul. Metamorphosis Monday. All About Home. You’re the Star. Inspire Me Monday. Inspire Me Monday. Wonderful Wednesday. Creative Muster Party. Wow Me Wednesday. Your Whims Wednesday. Tuesday Turn About. Homestead Blog Hop. Tuesdays with a Twist. Wonderful Wednesday. To Grandma’s House We Go. Centerpiece Wednesday. Vintage Charm Party.
More great link parties I’m sharing at:
Thinking Out Loud Thursday. Party in Your PJs. Thursday Favorite Things. Grace at Home. Keep in Touch. Encouraging Hearts and Home. Celebrate Your Story. Funtastic Friday. Farmhouse Friday. Happy Pink Saturday. Friday with Friends. Dare to Share. Saturday Sparks. Create, Bake, Grow & Gather. A Morning Cup of Joe! Embrace Your Style. Happiness is Homemade. Snickerdoodle Create Bake Make. Inspire Me Monday. Love Your Creativity.
Dee | Grammy's Grid
What an interesting idea!! I love this! Thanks so much for linking up with me at the Unlimited Link Party 25. Pinned!
Tee
Thank you Dee!
Joanne
This is genius! My plants are always looking a little worse for the wear when I forget to water them. Pinned.
Tee
Thank you, Joanne! Yes, I lost so many plants from just plain forgetfulness! They always look great now! Thanks for the pin!!
Clearissa Coward
What a clever and creative idea. Once installed, it would certainly save time and probably many plants as well. Thanks for sharing at #omhgww. Socialized. See you next week.
Tee
Thank you, Clearissa! Yes, it is a time saver for sure and has saved all my plants from extinction! lol
Cecilia
How clever! Thanks for sharing at Vintage Charm!
Rachelle
Clever girl! What a genius way to water all your potted plants.
Thanks for sharing this tutorial at the FWF link party.
Tee
Thank you, Rachelle, for your kind words! I am so glad you visited today!
Kippi Ohern
What a wonderful idea for watering hanging baskets!
Hugs,
Kippi
Tee
Thank you, Kippi! It sure saves me a lot of time…and my plants love it too!