

DIY Giant Corn Stalker Scarecrow-Video
DIY Giant Corn Stalker Scarecrow
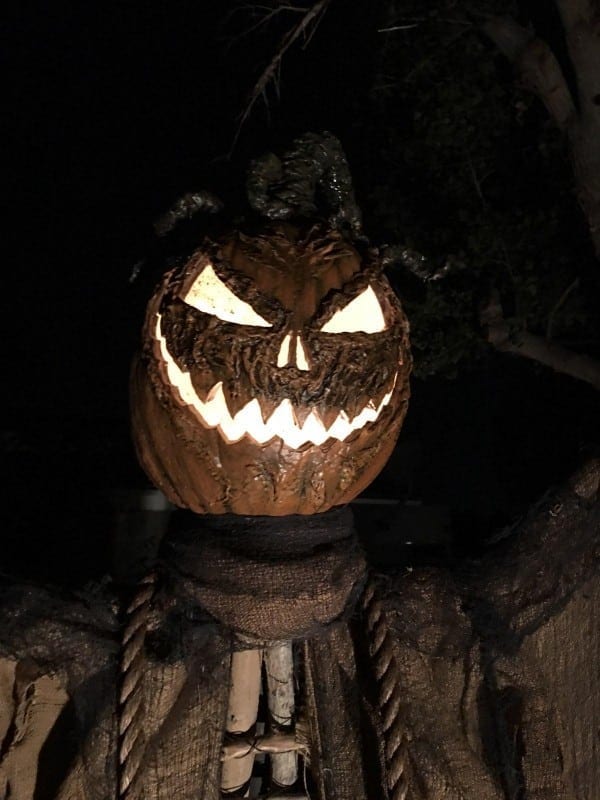
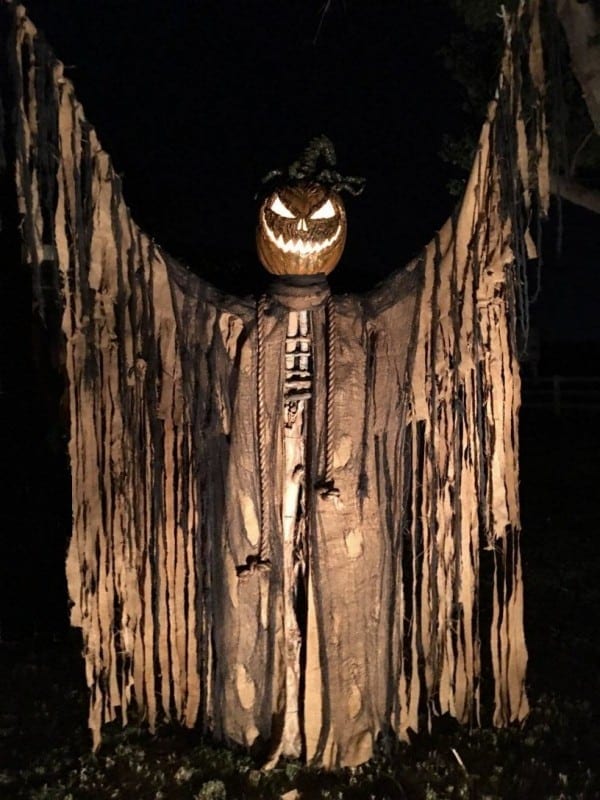
As the darkness enveloped me, I could feel an ominous presence, yet I could not see what was lurking in the silent shadows beyond. My heart was pounding wildly, and I was sure the creature could hear every beat, but I remained still, frozen with fear. Through the ancient primordial trees, a sliver of supernatural light poked through the misty air and flashed upon something unreal. Frightening. Scary. Waiting. I could see the sinister, gnarled wooden fingers reaching for the sky. As the full moon appeared from behind a dark cloud, I could see it clearly now. Its face was shaped liked an evil pumpkin, an unworldly face of wickedness. I wanted to run, but I was afraid to reveal my whereabouts.
Would you like to raise the bar on your Halloween haunt? Are you tired of putting up those fake, cheap looking plastic props that cost a fortune? Then this is the project for you. Keep reading and I’ll give you step-by-step instructions, so you can make you own unworldly scarecrow.
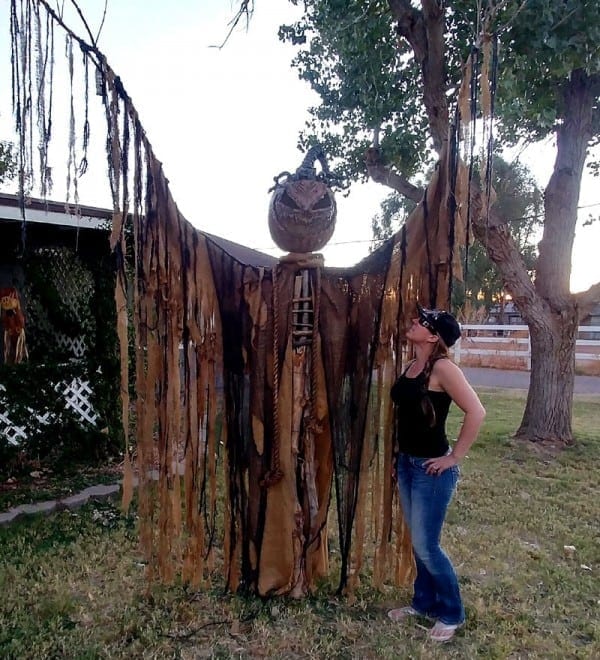
From the ground to the tip of his fingers he stands about 12 ft tall. (My height is 5ft 6in).
DIY Giant Corn Stalker Scarecrow – Tutorial
Want to print out this tutorial without the ads?
Click here to download my DIY Giant Corn Stalker Scarecrow PDF Printable Tutorial for only $5!
Tools & Supplies:
Tools:
- PVC cutter
- Hack saw (to cut conduit)
- Pliers
- Wire cutters
- Scissors
- A knife or something to cut the face out (I used a dremel drill with a carving bit which worked great)
- Tin snips (to cut metal tabs off of light cord)
- A couple of cheap, throw away paint brushs (to apply resin)
- Hand drill with bits
- Box of 1 -inch wood screws
- Hole saw (2in diameter)
- Steel Head Fence Post Driver with Handles (to pound conduit into ground)
Supplies:
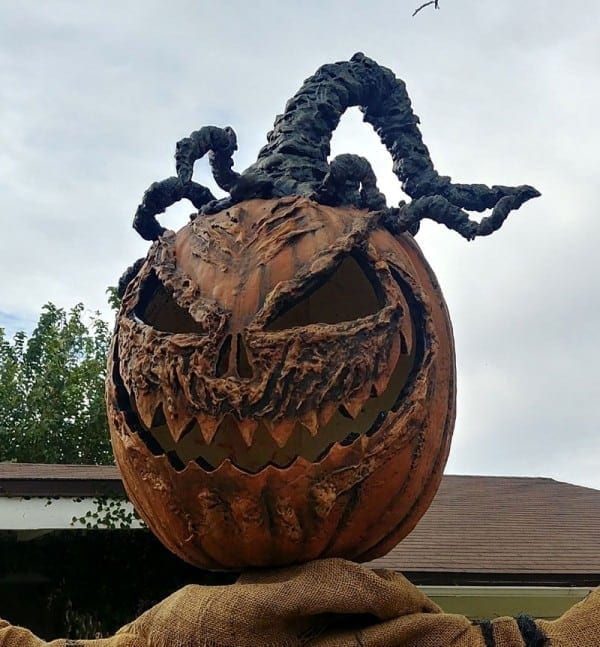
Head
- One very large foam pumpkin with a carved out face. Mine was a ‘Funkin’ at approx 15W x 17H that I found at Hobby Lobby at last year’s ‘end of season’ sale, but you can also buy it at the Funkin site HERE. If you want a variety of shapes and sizes to choose from you can go to the Funkin site HERE). Also, I went a step further and ‘corpsed’ my pumpkin to give it an even spookier look. To do this, see my DIY Corpsed Foam Pumpkin Tutorial.
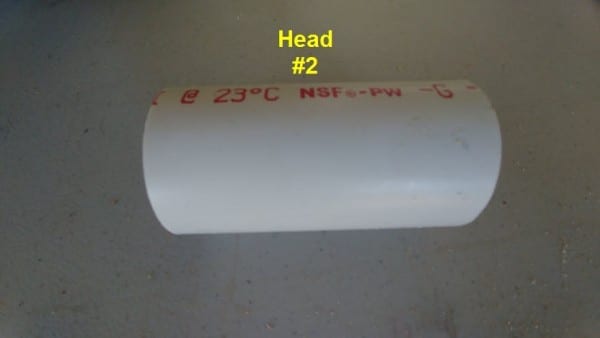
- One 1-1/2 inch diameter PVC at 3 in. long (neck) (Head #2)
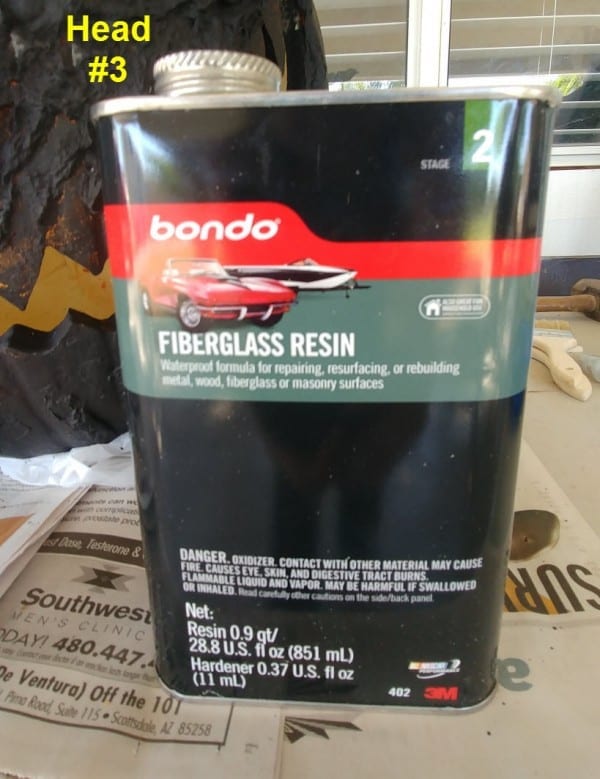
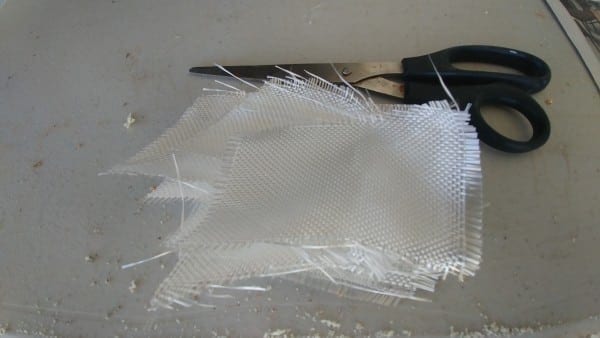
- Bondo fiberglass resin (to attach neck to pumpkin head) You’ll also need hardener drops to mix with the resin (This usually comes with the resin when you buy it) (Head #3)
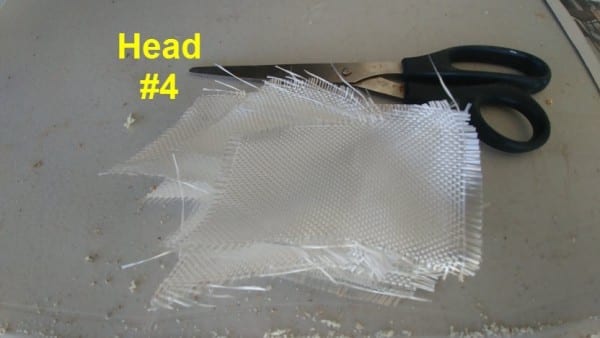
- Fiberglass cloth (to attach neck to pumpkin head) cut 5-6 strips at approx. 2in x 4in (Head #4)
- Paint that matches pumpkin (for touch ups)
Body
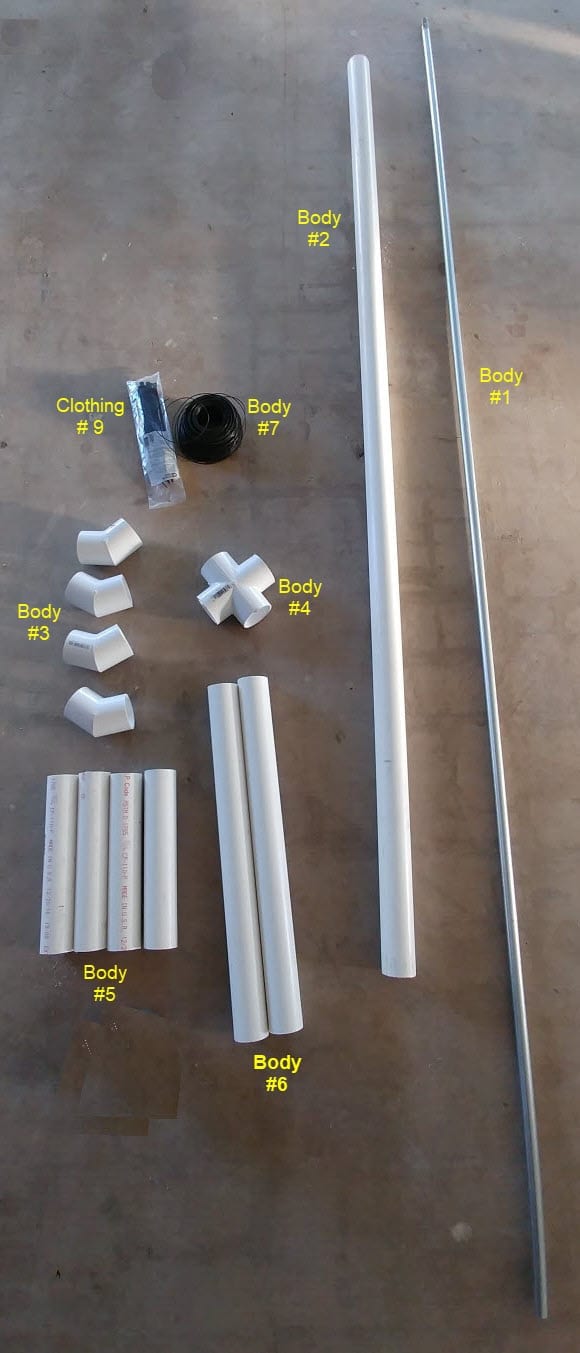
- (One) 1/2 inch diameter conduit at 8ft in length (Body #1)
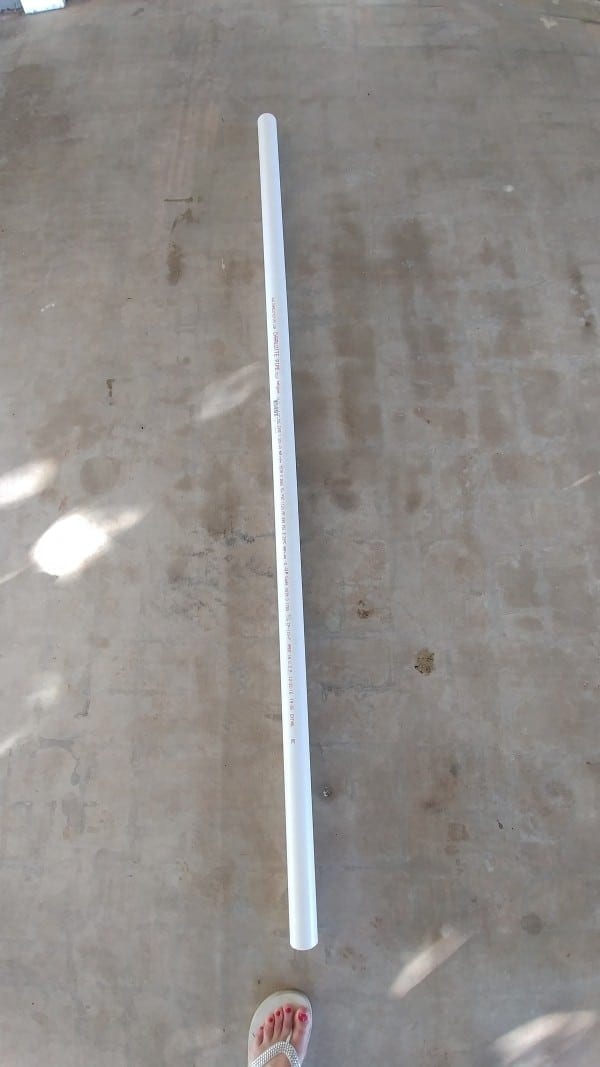
- (One) 1-1/2 inch diameter PVC at 6ft in length (Body #2)
- (Four) 1-1/2 inch diameter 45 degree PVC couplings (for shoulder & lower arm joints) (Body #3)
- (One) 1-1/2 inch diameter PVC cross coupling (connects head and body together) (Body #4)
- (Four) 1-1/2 inch diameter PVC at 1ft. 10in. long (shoulders & lower arms) (Body #5)
- (Two) 1-1/2 inch diameter PVC at 20 in. long (upper arms) (Body #6)
- Roll of Wire (Body #7)
Clothing
- One piece of burlap at 80in x 80in (robe body)
- Two pieces of burlap at 45in x 50in (arms)
- 15 or 20 strips of burlap at approx. 5 or 6ft long (tatters to hang from the PVC arms)
- 10 or 15 strips of burlap at approx. 3 or 4ft long (tatters to hang from arm branches)
- A strip of burlap to wrap around the neck to cover it (the size of a very large scarf
- Old-looking tattered fabric (to hang from and drape over scarecrow)
- One old-looking rope (to hang around his neck)
- Needle and thread (to sew burlap together) I used a needle and thread since the stitches were large and only took about 10 minutes to sew together)
- Bag of Zip Ties (I used these on the arms to keep the sleeves from sliding down if a wind came) (Clothing #9)
Lighting
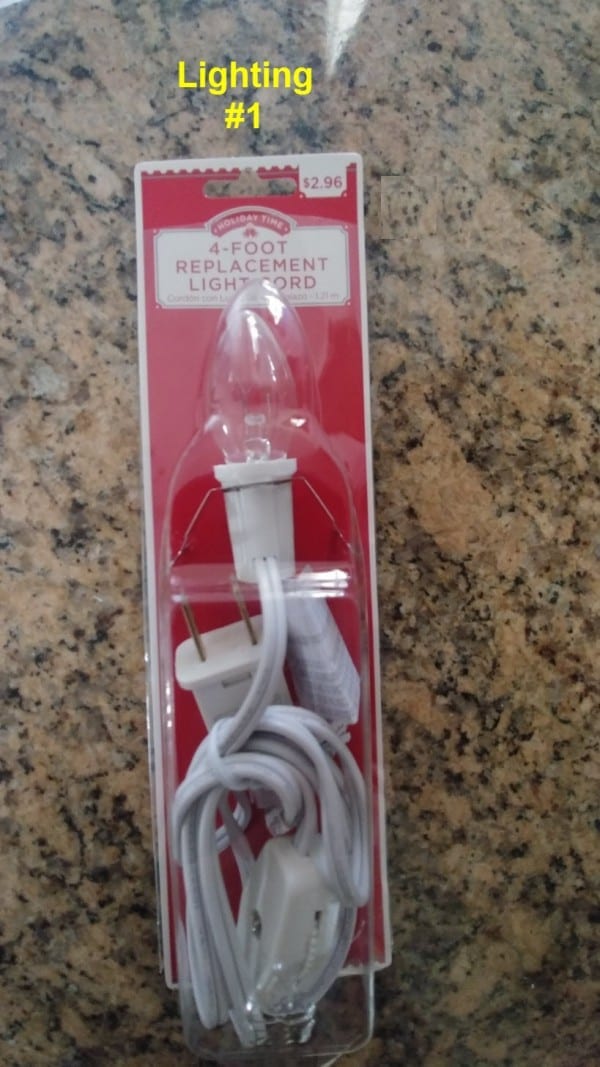
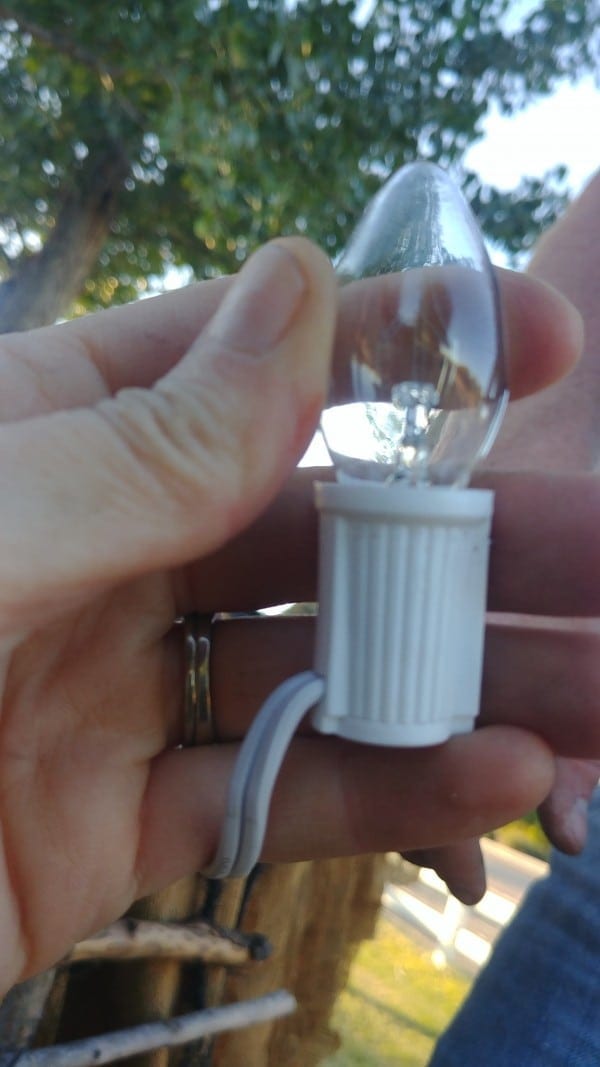
- One replacement light cord, usually found in Christmas village sets (To light up pumpkin head) (Lighting #1)
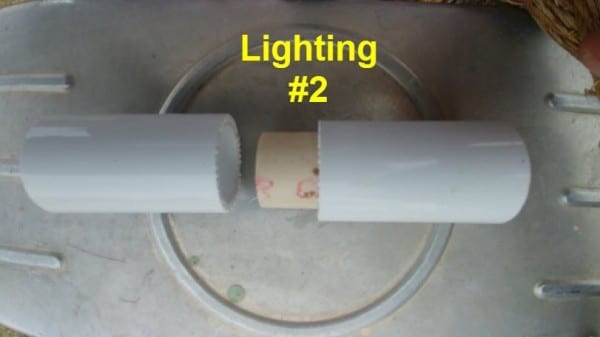
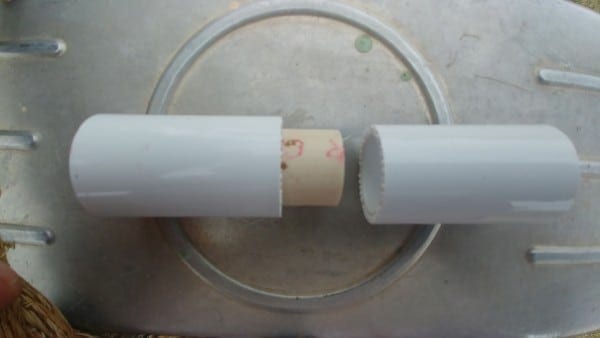
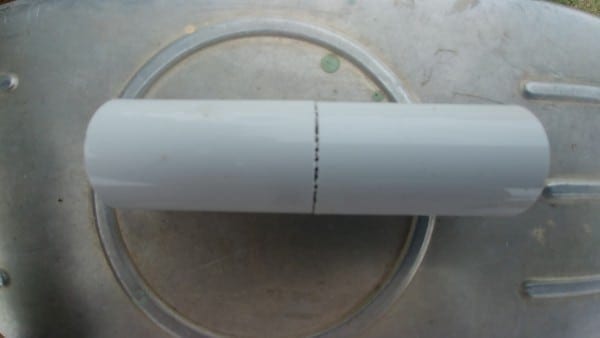
- Two 1/2 inch diameter couplings attached together with a piece of 1/2in diameter PVC (this will serve as the pumpkin light fixture that sits inside the head) (Lighting #2)
Picture of supplies:
Note: These are just repeated supplies (found above) but shown in pictures below to show you what they look like. The yellow notations will tell you where to find it above.
Directions:
Making the body:
First, gather the PVC pipe. (Body #2)
Next, attach the PVC cross coupling (Body #4) to one end of the pipe.
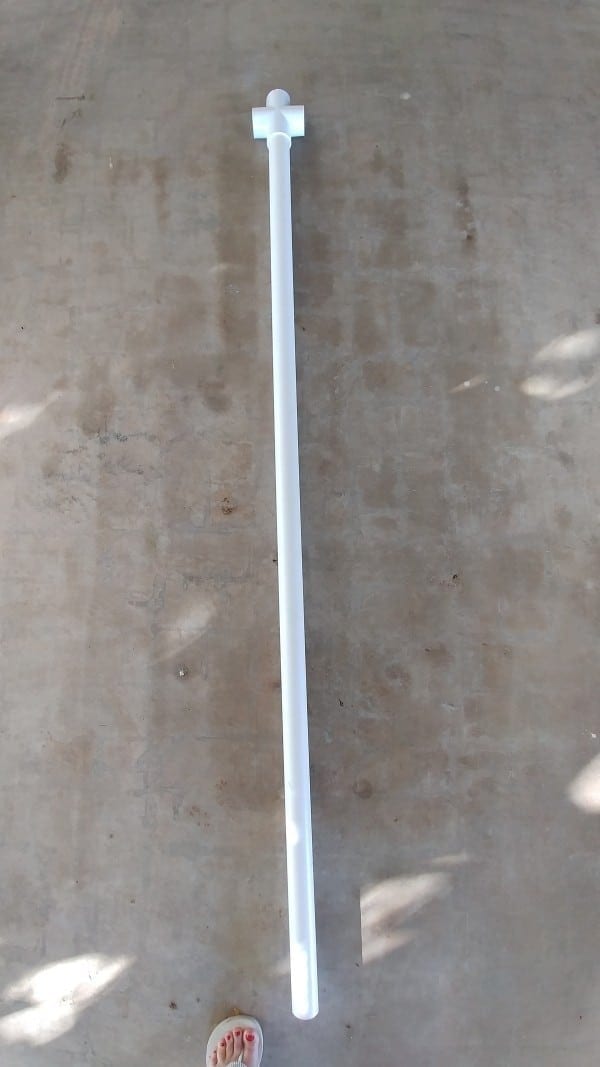
Add 2 of the shoulder pipes (Body #5) to both sides of the tee coupling as shown.
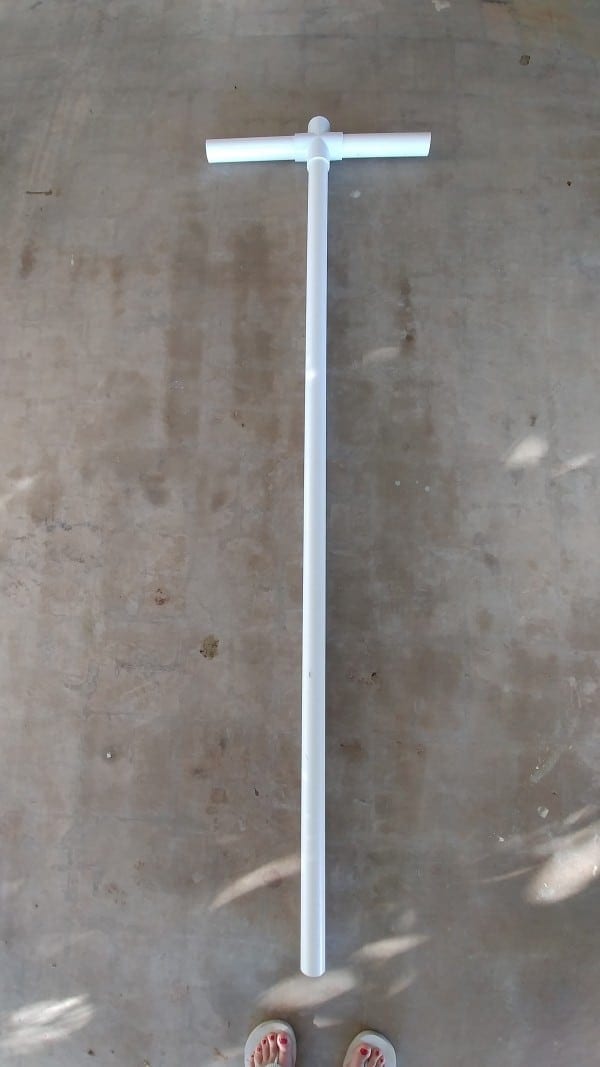
Now, add two PVC couplings (Body #3) as shown below.

Attaching the arms:
To attach the arms, push both the (Body # 6) pipes into both the 45 degree couplings.
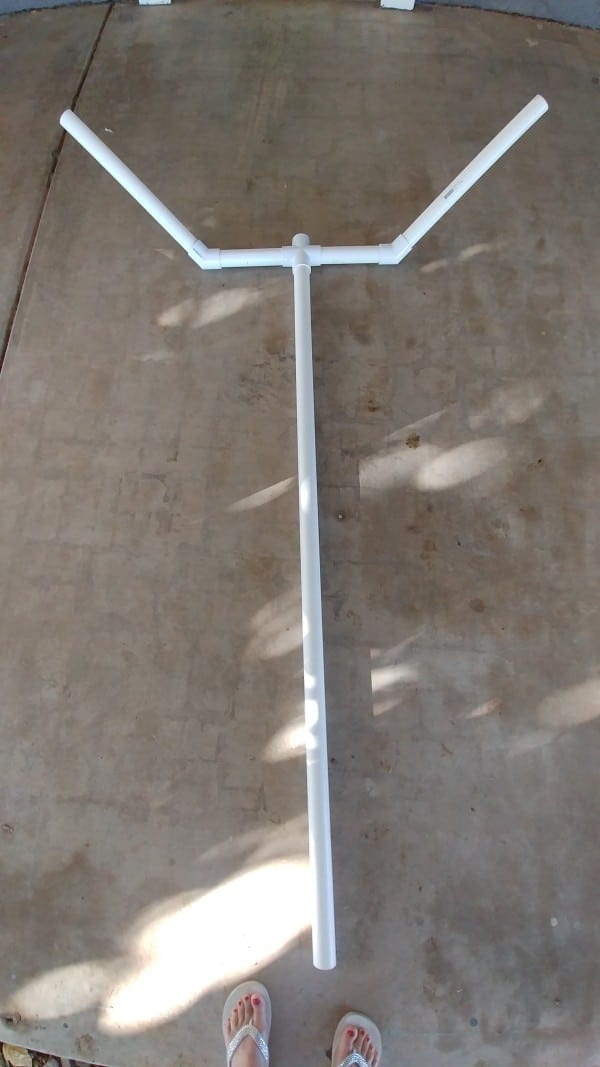
Next, add the other two (Body # 5) pipes. This is what the body of the scarecrow should look like. Be sure to position how you want the arms to be.
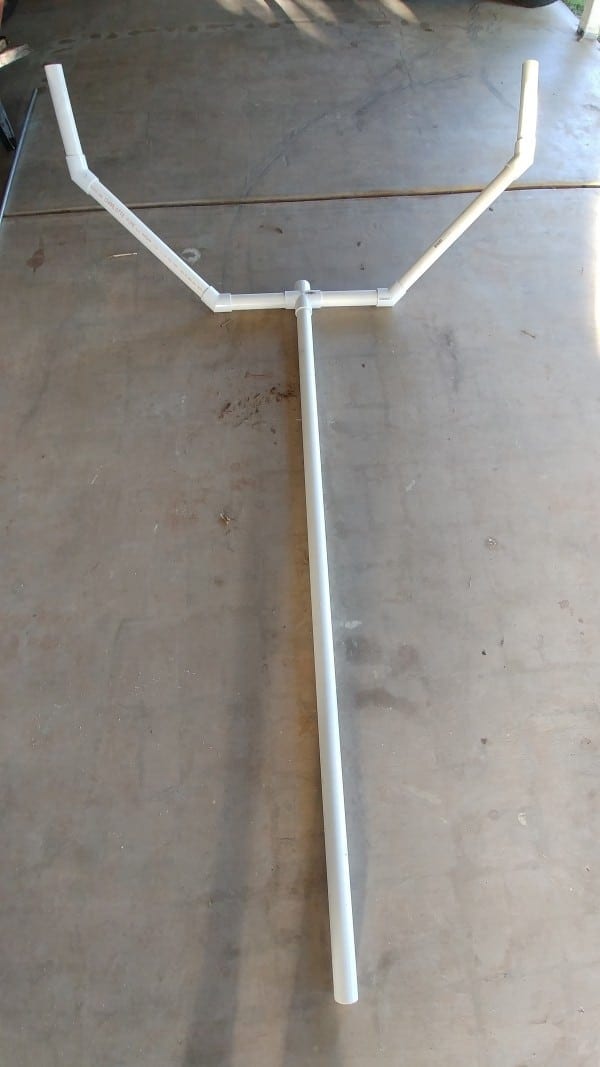
Securing with Screws:
When you are finished assembling the shoulders and arms, and you have them adjusted where you want them to stay, drill a screw into each coupling to hold that position and also for sturdiness.

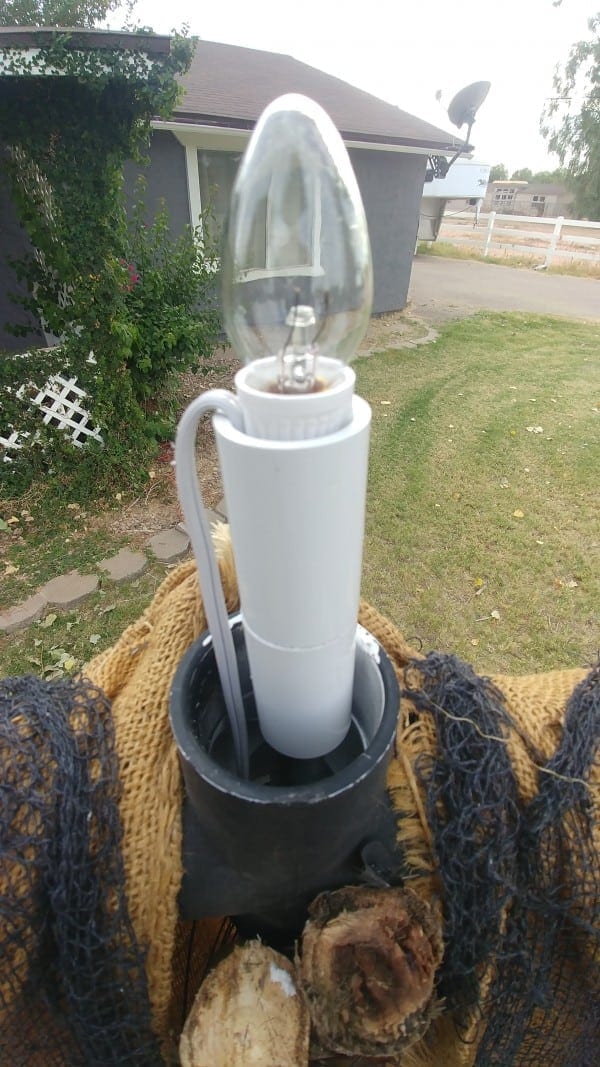
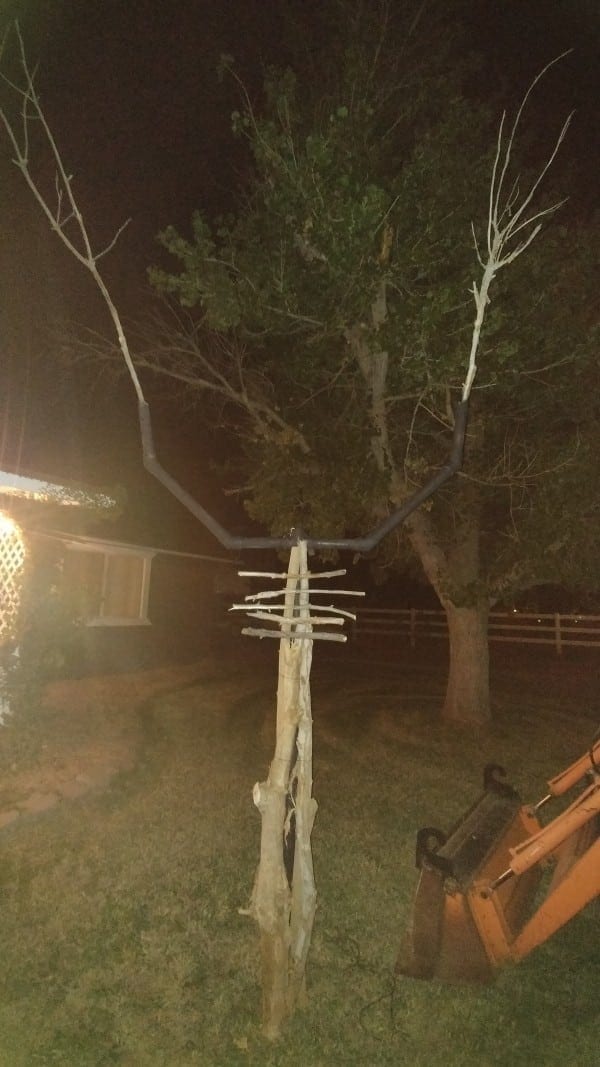
Making a strong support:
Using a tee post driver, pound the conduit (Body #1) two feet into the ground. This will leave the exposed conduit at 6ft tall.

Now, slide the long middle PVC pipe over the conduit.

The top of conduit should be flush with the top of the PVC pipe.

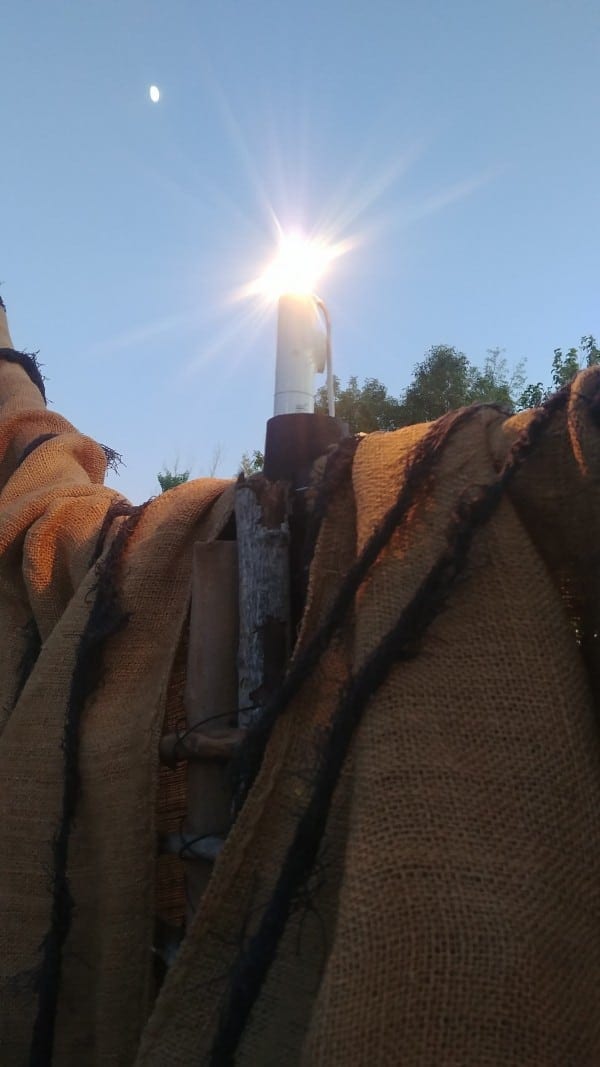
Here’s a top view of what it all should look like. The conduit is flush with the top of the PVC pipe that slides over it. The conduit will be holding the light that illuminates the pumpkin head.
Note: Although I waited until my corn stalker was dressed before attaching the light, it’s easier if you do it now.
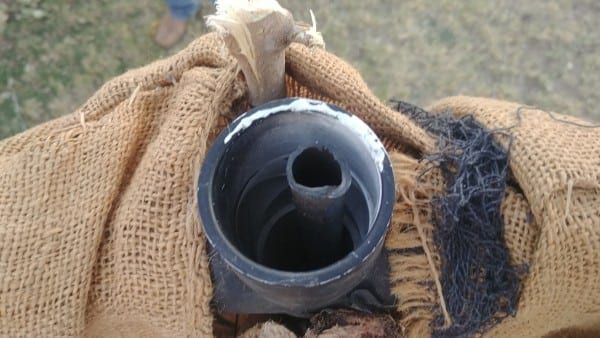
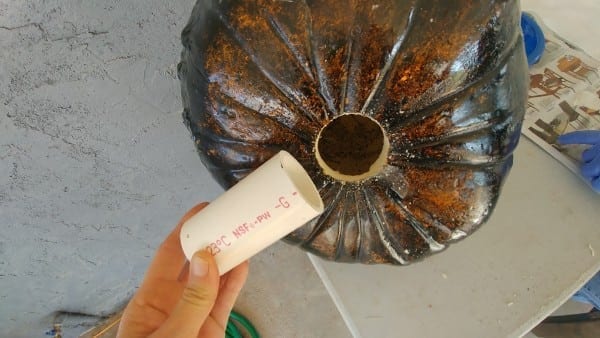
Lighting for Head:
Gather the replacement light cord (Lighting #1). There may be two metal tabs attached to the bulb. If so, make sure to clip them off (tin snips work great for this)
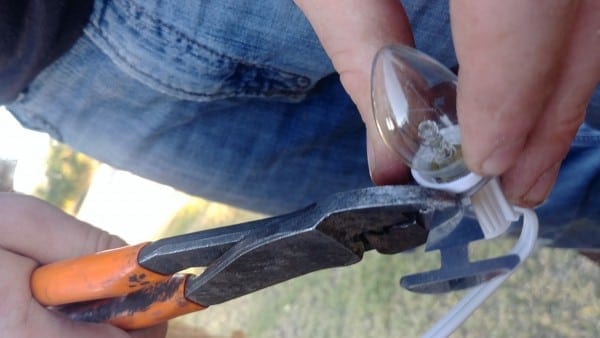
Now, gather the (Lighting #2) couplings, making sure they are pushed together.
Next, slide the light bulb inside.
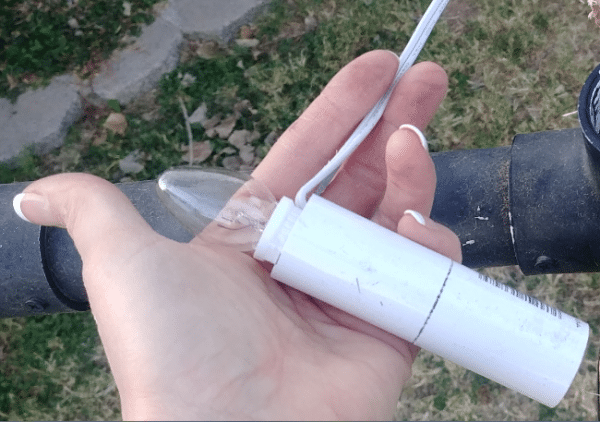
Now, push the light onto the conduit, and string the cord and plug down the PVC pipe.
Finally, drill a hole where you want the light plug to exit the PVC.
Now, just plug ‘er in! (You may have to lift the PVC pipe off of the conduit in order to string the cord down and out of the hole).
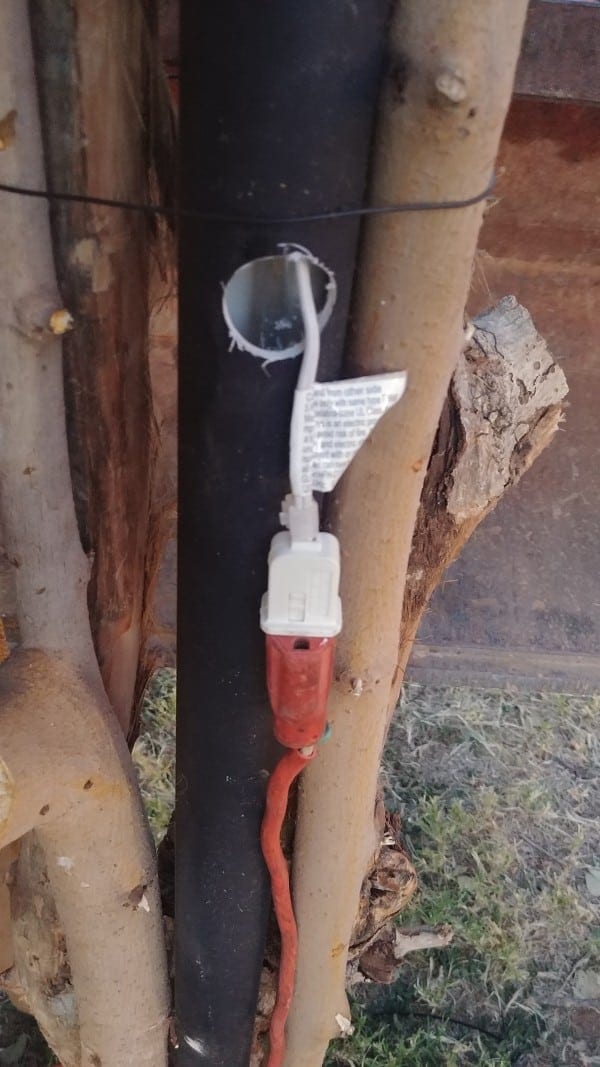
The light should work!
Inserting Branches for Arms and Hands:
Find two branches that resemble hands and slide them into the arm holes of the PVC pipe.
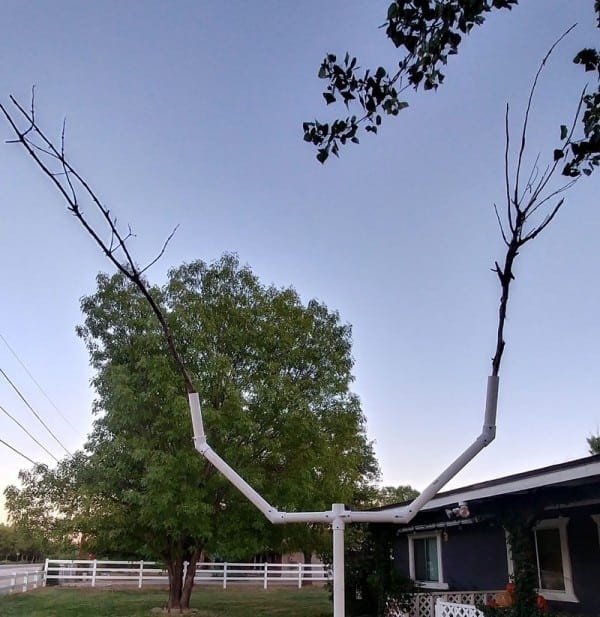
Next, paint the PVC black with spray paint.
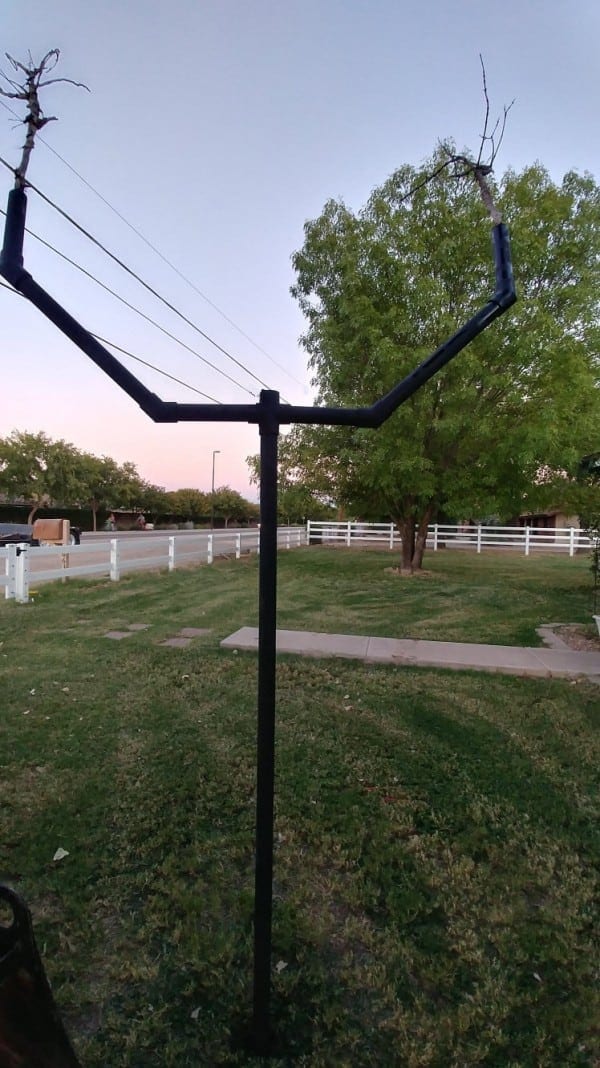
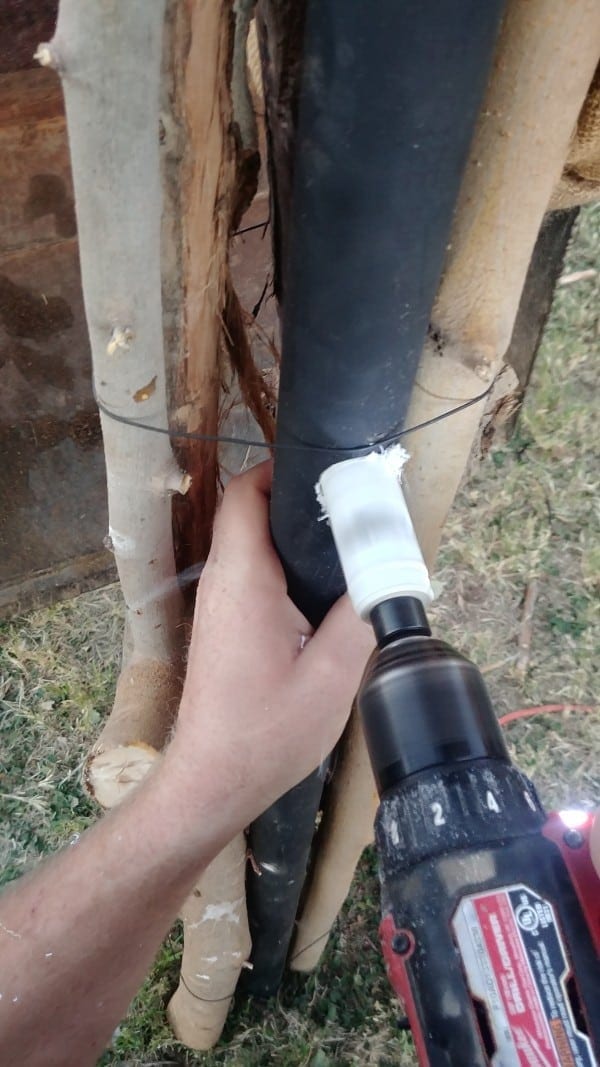
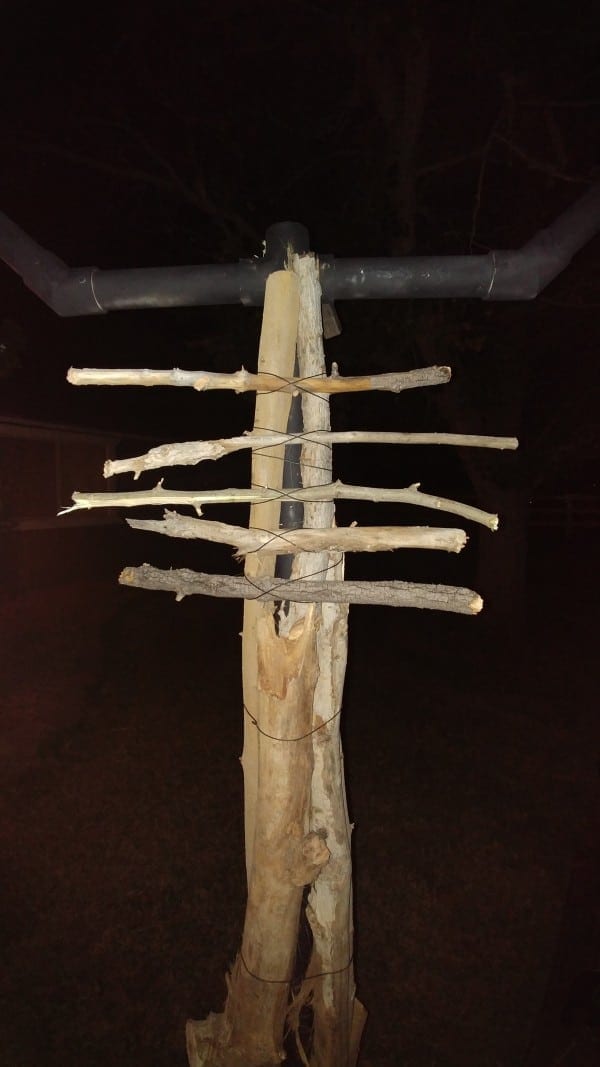
Adding Branches to Trunk for Organic Look:
First, find 2 or 3 large branches the same height as the body of the PVC and wire them on (basically just wrapped the wire around the PVC & branches and twisted tight with pliers). Having them attached makes it easy for next year when I put it all up again as I won’t have to rewire them on.
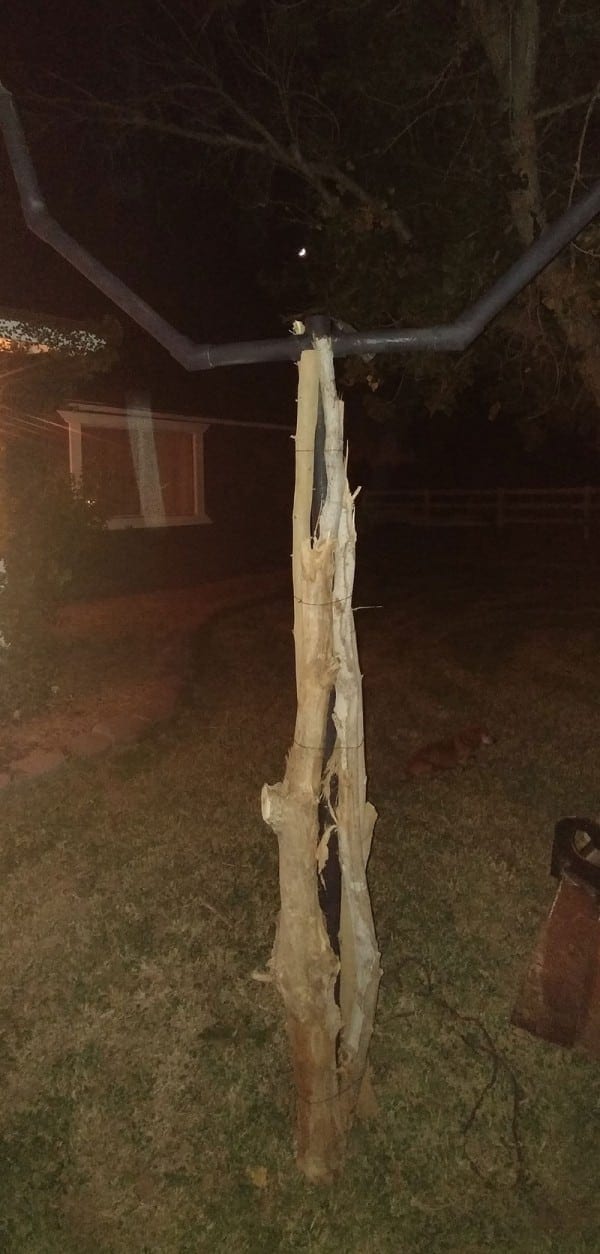
Next, wire some smaller sticks onto the post assembly to make ribs.
Making the Robe:
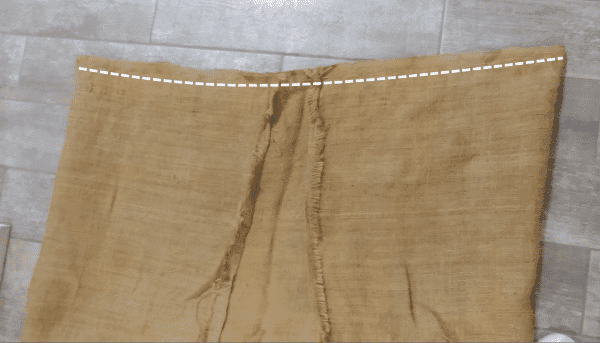
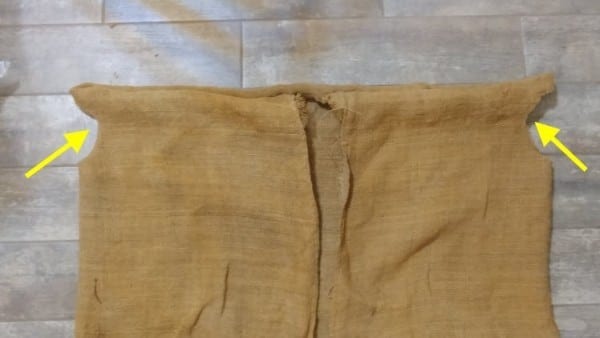
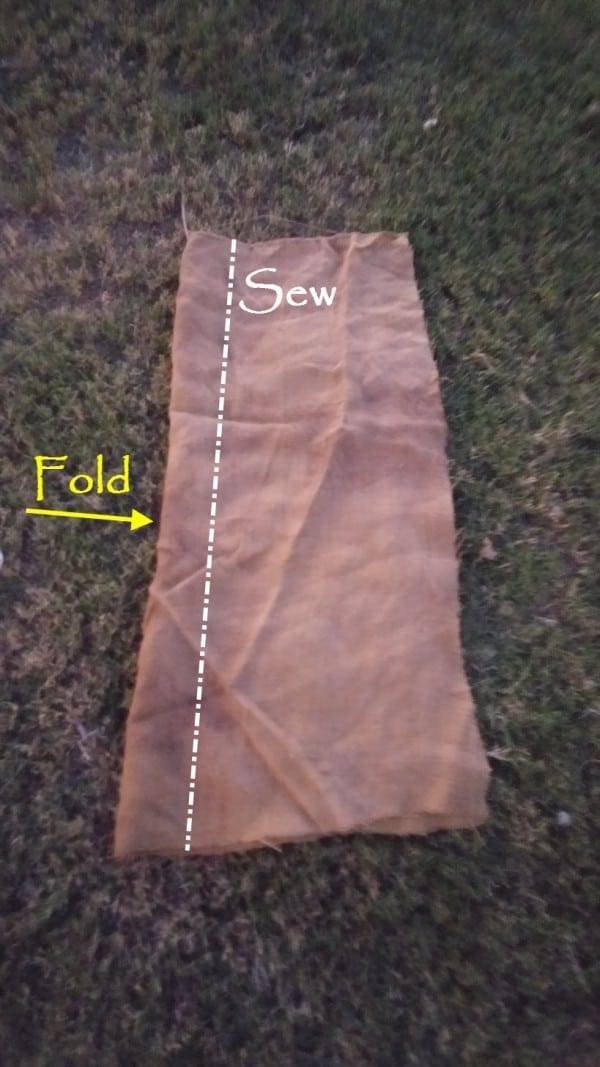
With the larger burlap piece (Clothing #1), you must first, bring the ends together at the top.
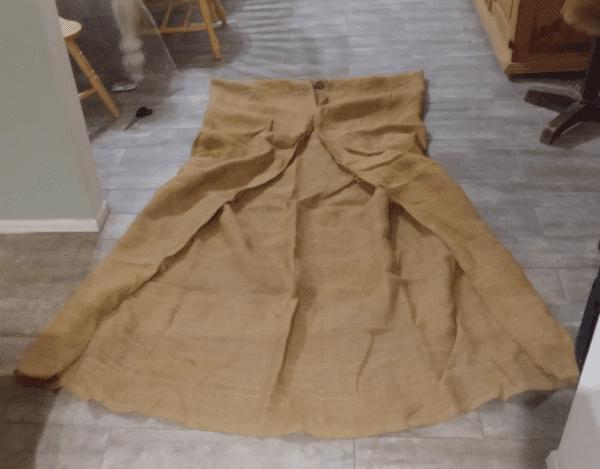
Next, sew along the whole top with a needle and thread (Clothing #8), with large stitches (each stitch should be about 1/2in long each, nothing fancy).
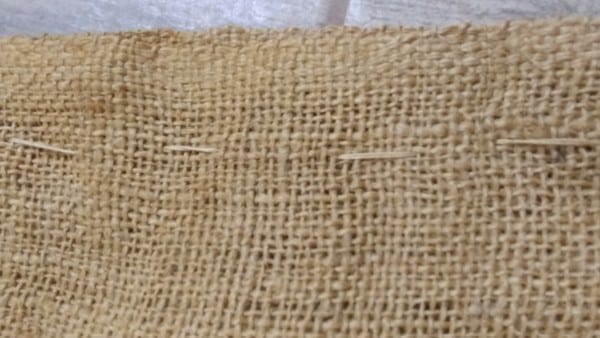
Then, turn the whole thing inside out and cut armholes (below the stitching) large enough for the 1in diameter PVC pipe ‘arms’ to run through
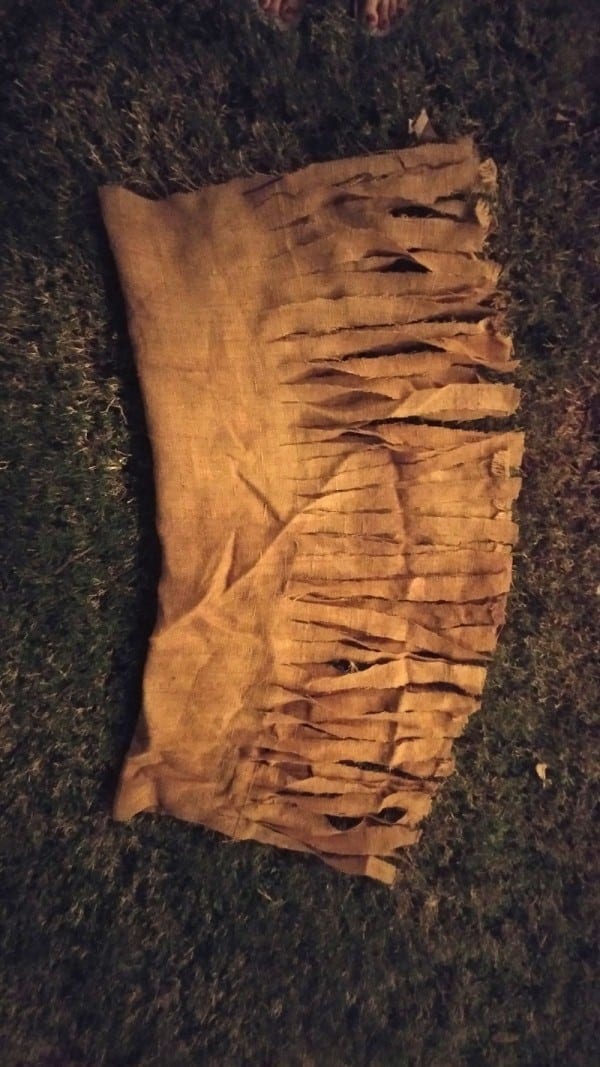
Now lets make the sleeves. Lay out the other two (Clothing #2) pieces.
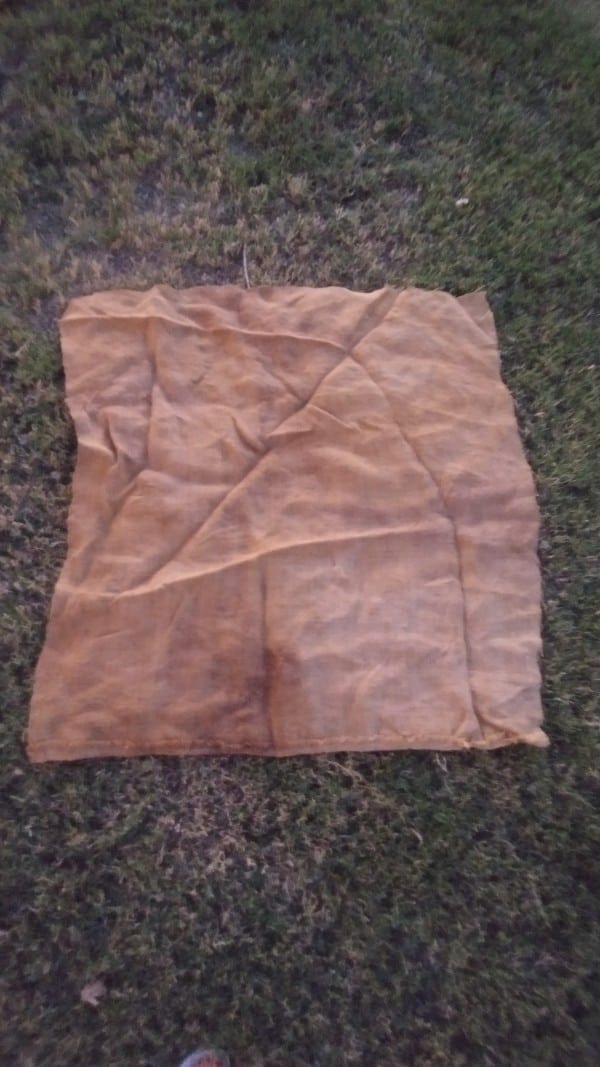
Next, fold them longways.
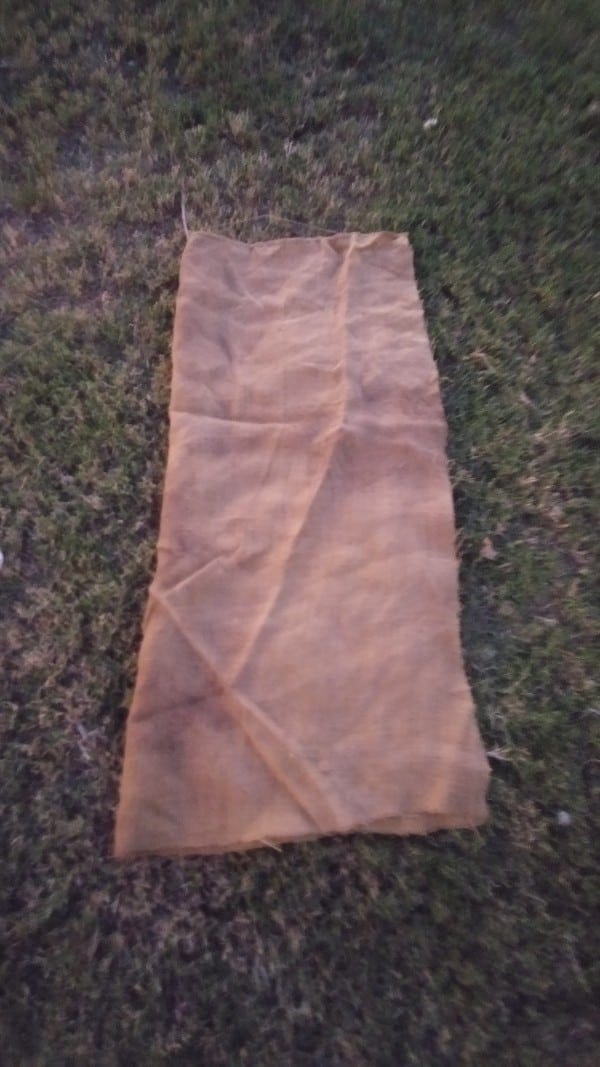
After folding, sew down 6 inches from the fold. I hand sewed this loosely.
When you are finished sewing, shred the ends up to the stitch but do not cut into the stitches.
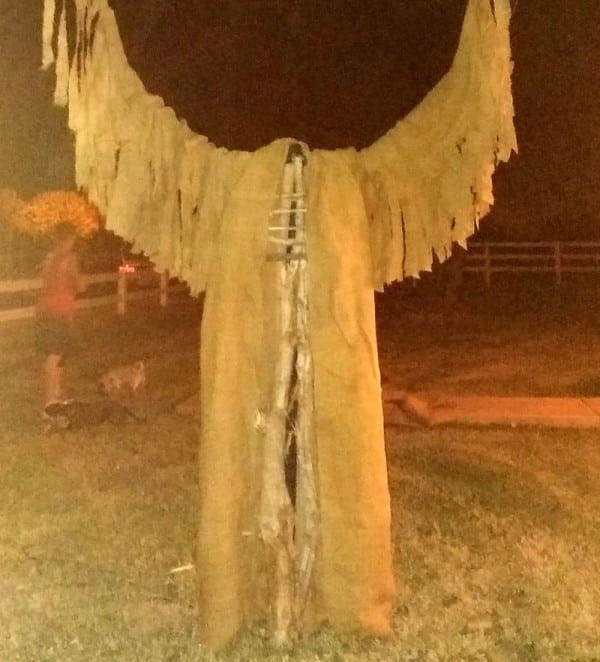
Dressing your Corn-stalker:
Time to dress him! You’ll have to take the arms off to put everything on. I used a couple of zip ties to secure the ends of the sleeves to the ends of the PVC arms so they wouldn’t slide back down.
Add more burlap and gauze for more dimension and color contrast:
Continue to tie more long strips of burlap (Clothing #3) to the ends of the short fringed ones that were on the arms to lengthen the tatters. (I didn’t add strips to all of the short fringed ones, only here and there to make the arms of the sleeves look long and tattered).
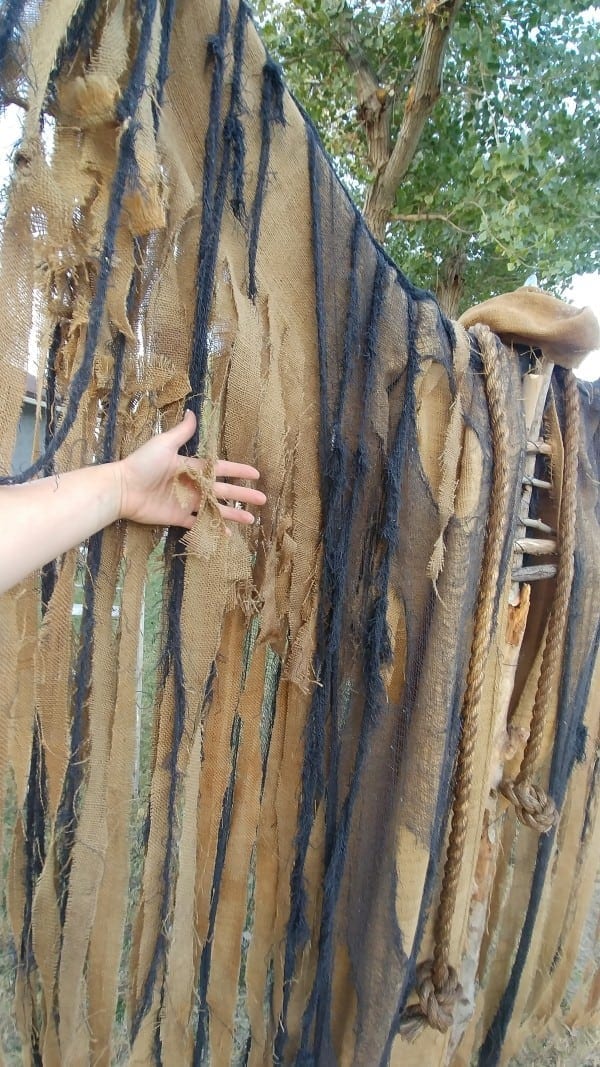
I also draped black gauze (Clothing #6) over the burlap and cut it jagged so it would drape like it was old and frayed.
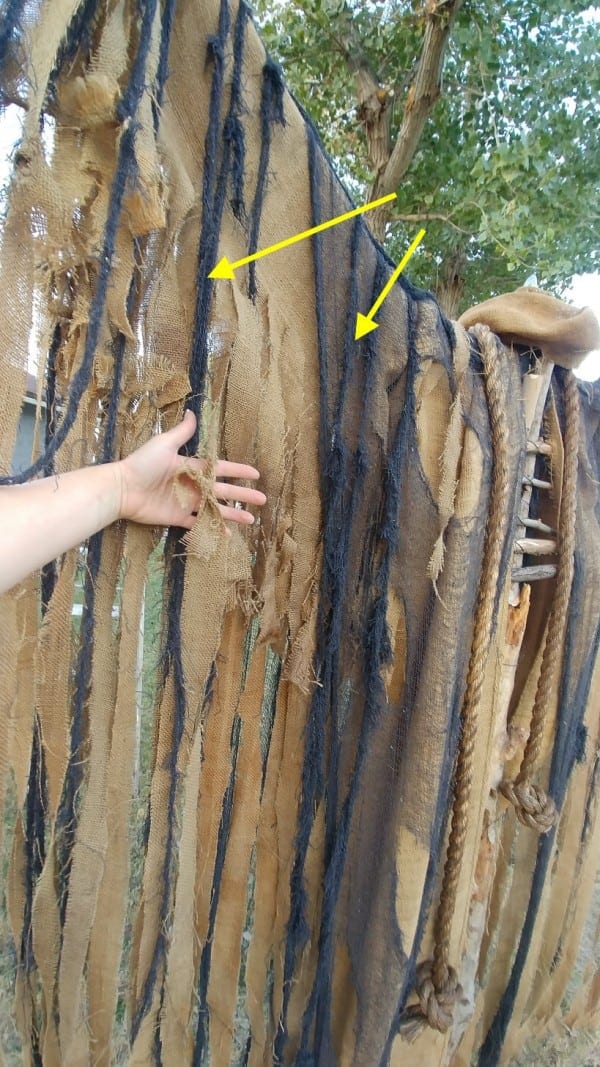
Don’t forget to add a cool old-looking rope (Clothing #7) to drape around the neck.

Next, tie strips of burlap and gauze (Clothing #4 & 6) to the branches that make up the arms.

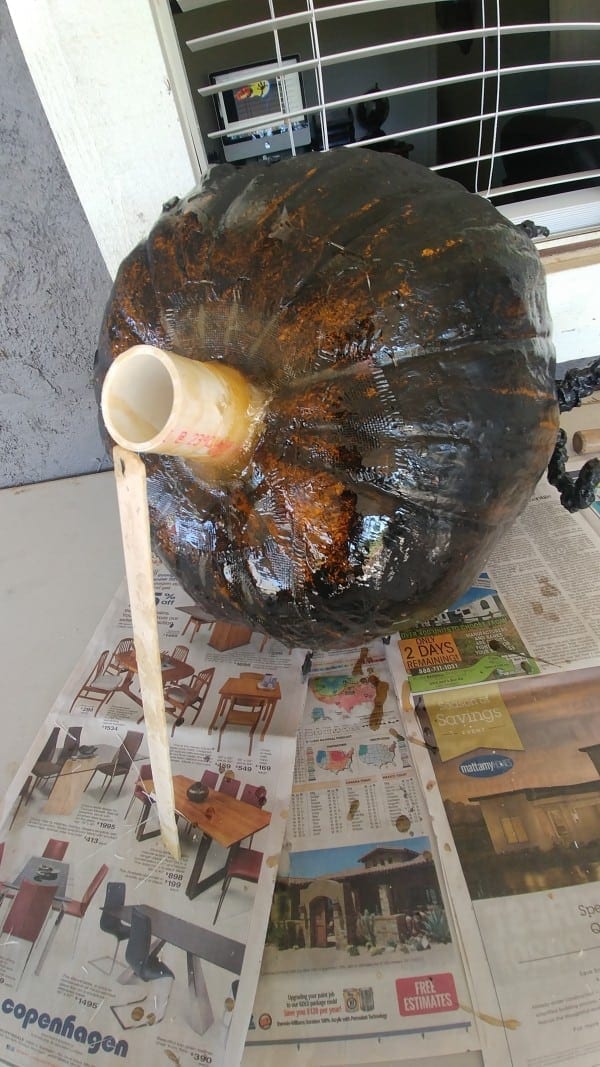
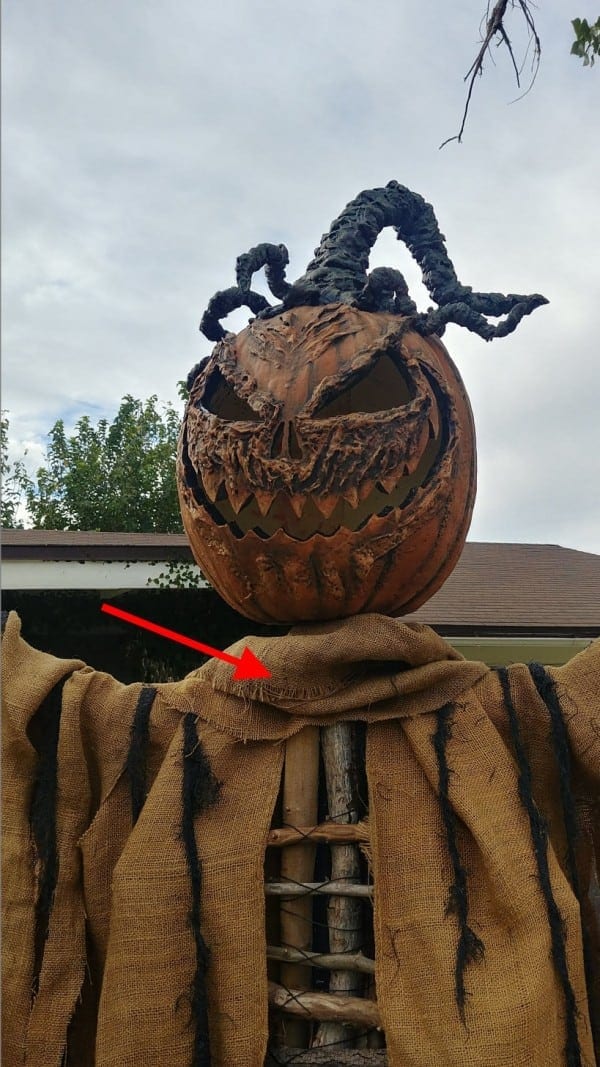
Attaching a Neck to the Pumpkin Head:
(Just a reminder, if you want to ‘Corpse’ your pumpkin head (like I did) before attaching it to the body, see my DIY Corpsed Foam Pumpkin Tutorial.
With the hole saw, you must first drill a hole in the bottom of the pumpkin.

You’ll be attaching the (Head #2) PVC piece to this hole to make a ‘neck’ that will attach to the cross tee coupling on the body.
To attach it, gather together the fiberglass resin (Body #3) and the fiberglass cloth strips. (Body #4)

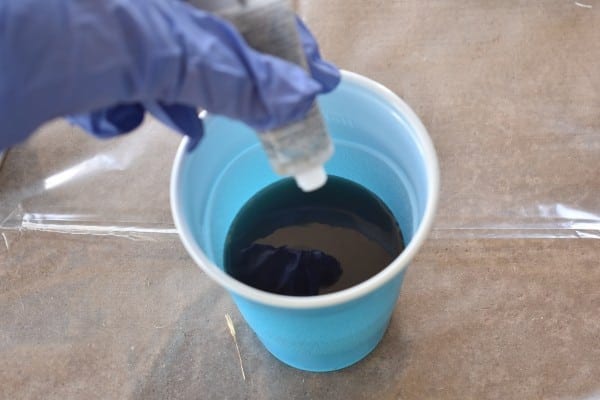
First, pour the resin into a disposable cup (I poured about 1 1/8c).
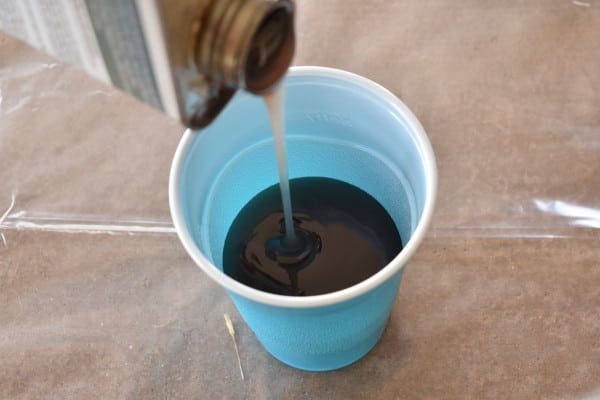
Next, add the hardener. Basically, just follow the directions on the can of resin of how many drops you’ll need for. Honestly, I just added about 40 or 50 drops (which is probably a little more than it needed, but I’m impatient) and it worked just fine. (FYI-The more drops you add, the faster it hardens).
Now, stir it all up with a disposable spoon.
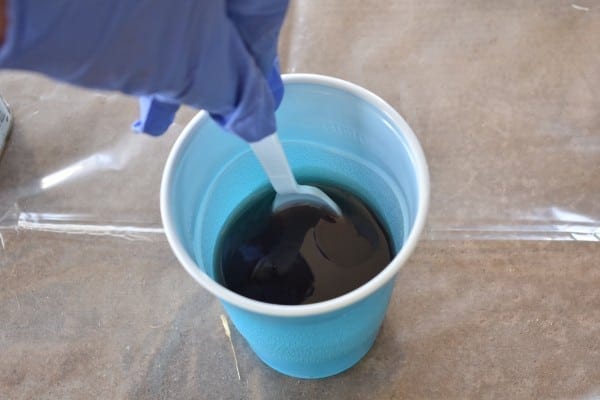
After it is thoroughly stirred, dip the fiberglass strips into the resin, completely saturating them.
Now, squeeze off any excess resin by sliding the strips through your fingers.
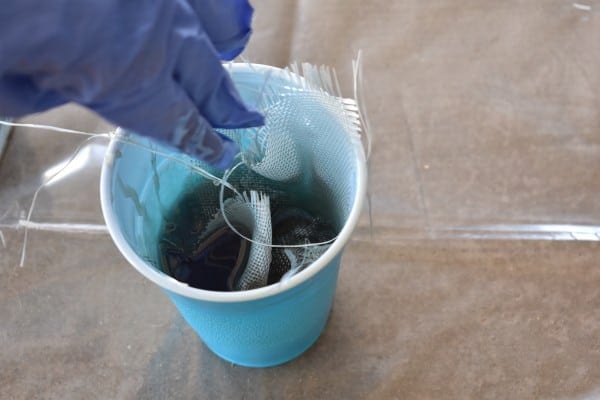
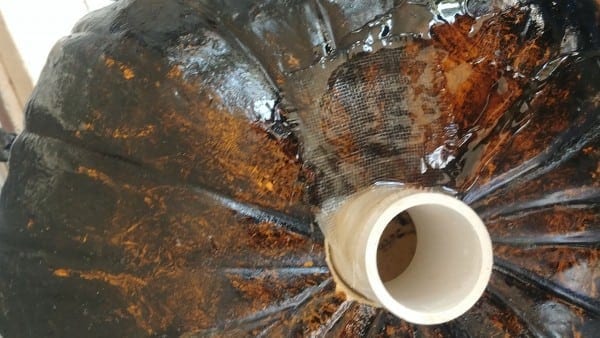
Finally, place PVC neck into the hole of the pumpkin. Then lay the fiberglass strips along the sides of the PVC neck and onto the pumpkin, pressing down into the crack where the neck meets the pumpkin.
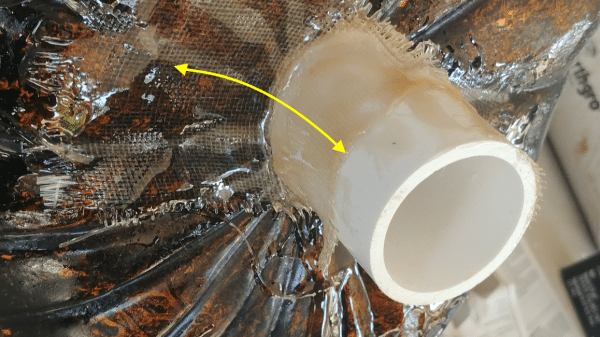
Make sure to leave at least 1 or 1-1/4 inches of the tip of the PVC neck piece clear so that it can slide into the cross connector when attaching the head to the body.

The angle of the PVC neck piece will decide how the head will tilt when attached to the body, so be sure to angle it the way you want it before the resin hardens.
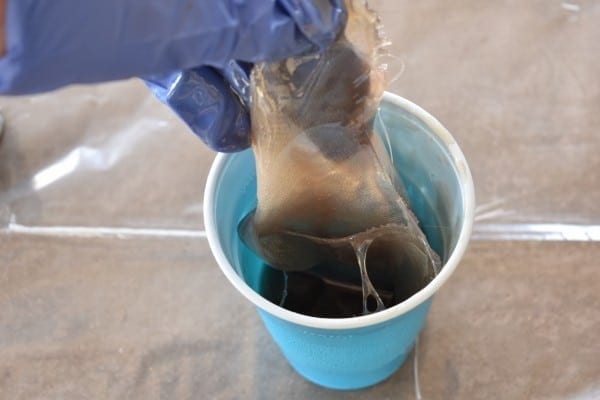
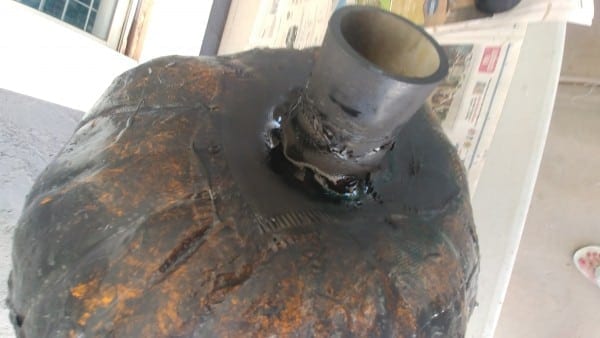
After it hardens, spray paint the neck black and add any touch-ups you need to the pumpkin with paint
Setting the Head onto the Body:
Now it is time to attach the neck to the body. First, push it into the cross connector. If you haven’t done so, make sure the light is attached to the conduit before connecting the head). The light should stick right up through the neck and into the head.
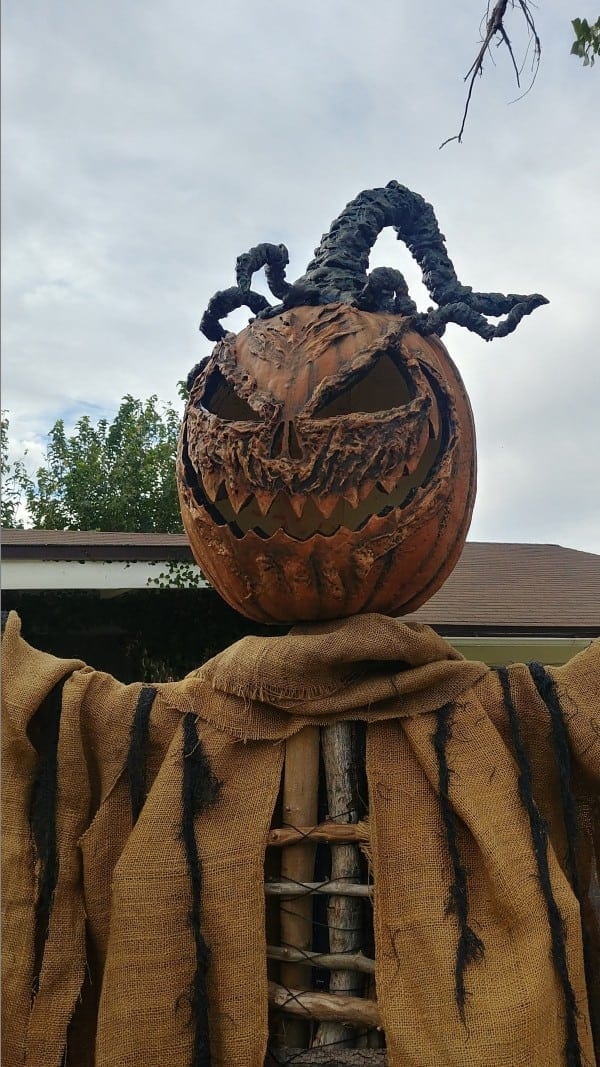
Next, wrap a piece of burlap around the neck (Clothing #5), loosely draped, to hide where the neck fits onto the body.
Last, turn on the light and your corn stalker is ready!
Want to print out this tutorial without the ads?
Click here to download my DIY Giant Corn Stalker Scarecrow PDF Printable Tutorial for only $5!
Dave - Sandric Cemetery
The Bondo is a great idea and much more easier than making my own compounds. Thanks!
Tee
Hi Dave!
I’ll have to agree, it’s always nice having a stash of bondo around when working with Halloween props as it’s so versatile!
Genessa
WOW! This guy is awesome!!! Super scary looking! Great job!
Tee
Thank you so much!
Tom
Whoa! I am impressed! This corn stalker is creepy! Thank you for the instructions. I will be making one this year, for sure!
Tee
Thank you Tom!
Tracy
This is cool!! How much Burlap did you use total? Tyia
Tee
Hi Tracy,
From what I remember, I used approx. 8-10 yards of burlap. Hope that helps!
Kent
Where did you find the cool pumpkin head?
Tee
Hi Kent!
I just had a couple others asking the same thing so I added some links on where you can purchase the pumpkin head in the ‘supplies’ section of the post. Hope that helps!
Nicole
With the strip do I put it all over the pumpkin?
Tee
Hi Nicole!
You only need to put the fiberglass strips along the bottom of the pumpkin.
Cecilia
Wow–I bet he’s even more impressive in person! Thanks for sharing at Vintage Charm!
Tee
He’s definitely an eye opener!
Mark C
Amazing look and great, easy to follow instructions! Thanks
Tee
Thank you, Mark, for your kind comments!
Nadine
Hi Tee,
For lightning #2 step, What is that piece between the two pvc coupling pieces in the photo? Thank you!!!
Nadine
Tee
Hi Nadine!
That is simply just a piece of PVC pipe to connect the two coupling pieces together.
Bree
How do you store this the other 10 months of the year? Do you break him down much before storing?
Tee
Hi Bree!
Yep, I remove the arms and also the head while in storage.