
DIY Clay Horse Flower Pot-Video
DIY Clay Horse Flower Pot
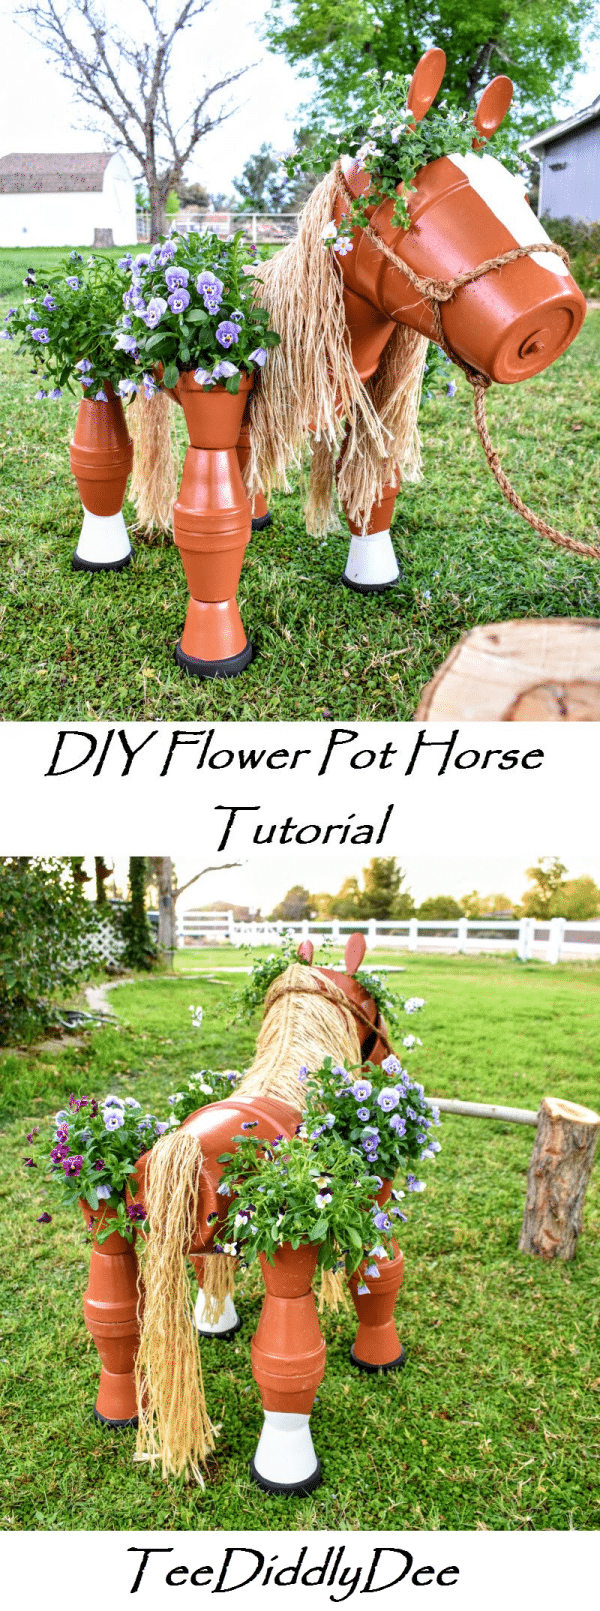
Didn’t this flower pot horse turn out adorable?
…and I get so many compliments from everyone who sees him!!!

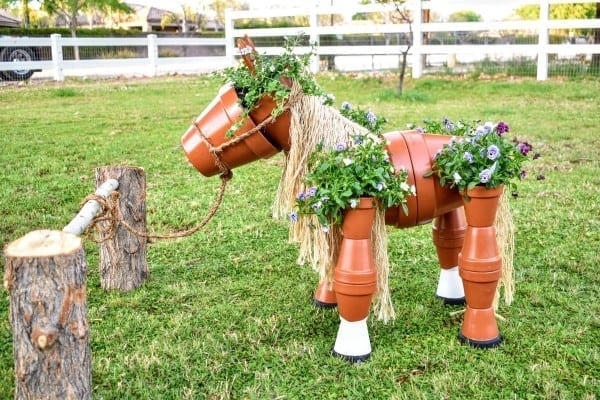
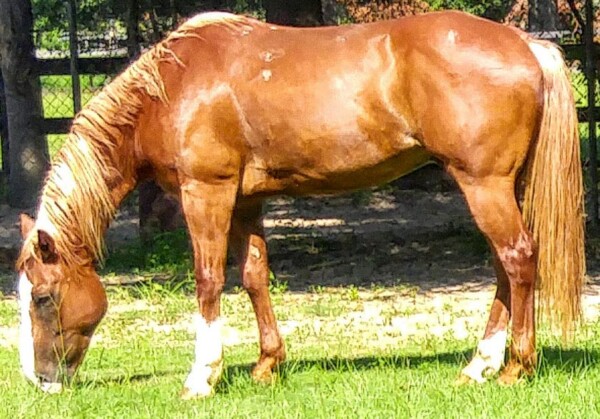
I’ve named my flower pot horse ‘Little Teddy’, as he’s a representation of big “Teddy” (one of our horses). Do you see the resemblance??
This project turned out as cute as can be, and I’m really itching to make one more that resembles another one of our horses!
..but I’ve got to be honest, I wasn’t always this excited about it in the beginning…
When I started, there weren’t any step by step instructions out there on how to make this, and it was a huge headache figuring out the best way to construct my flower pot horse without everything falling apart (let’s just say I wanted to throw it all out the window a time or two before I finally got it figured out!)
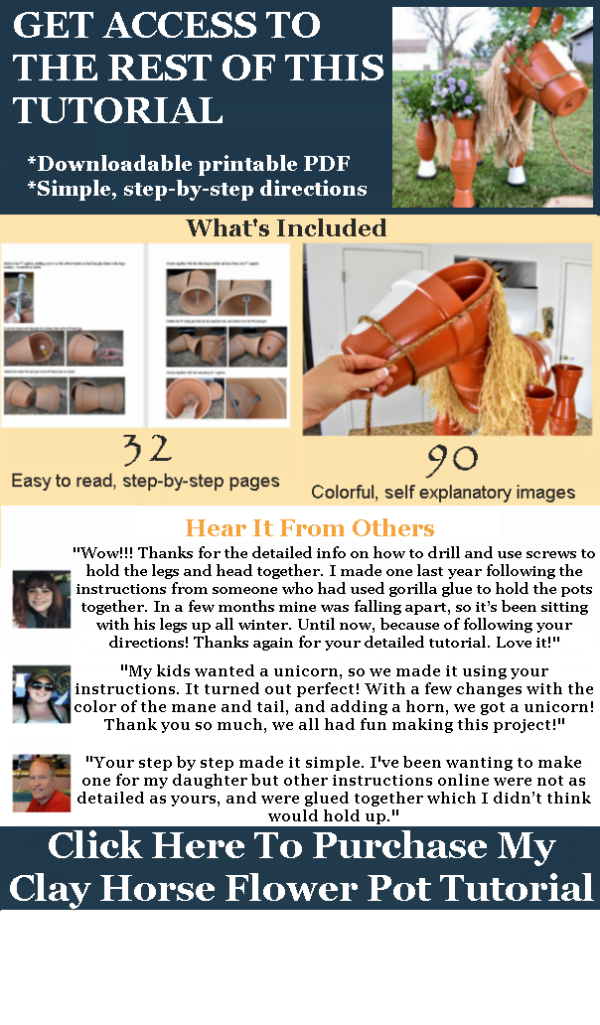
I’ve created a very detailed, step by step tutorial that makes it a lot easier to put together (and you won’t have to go through all the frustrations that I did).
…LUCKY YOU!!!!! 🙂
Here’s how to build it!
DIY Clay Horse Flower Pot – Tutorial
Tools & Supplies:
Tools:
- Hand drill with 5/16 masonry bit (to drill holes into pots)
- Diamond hole saw drill bit (25mm) (to drill tail hole into pot)
- Hack saw or metal chop saw (to cut thread rod)
- Wrench or Ratchet (size 5/16) to tighten nuts onto thread rod
- Scissors
- Hot glue gun with extra strength gorilla hot glue (for gluing on the mane & rubber washers)
Supplies:
- 5/16in thread rod (you’ll need 8ft)
- Large fender washers with an inner diameter of 5/16 and outer diameter of 1 1/2in (you’ll need 13)
- Small flat washer with inner diameter of 5/16 (you’ll need 1)
- 1/2in inner diameter rubber grommets (you’ll need 4)
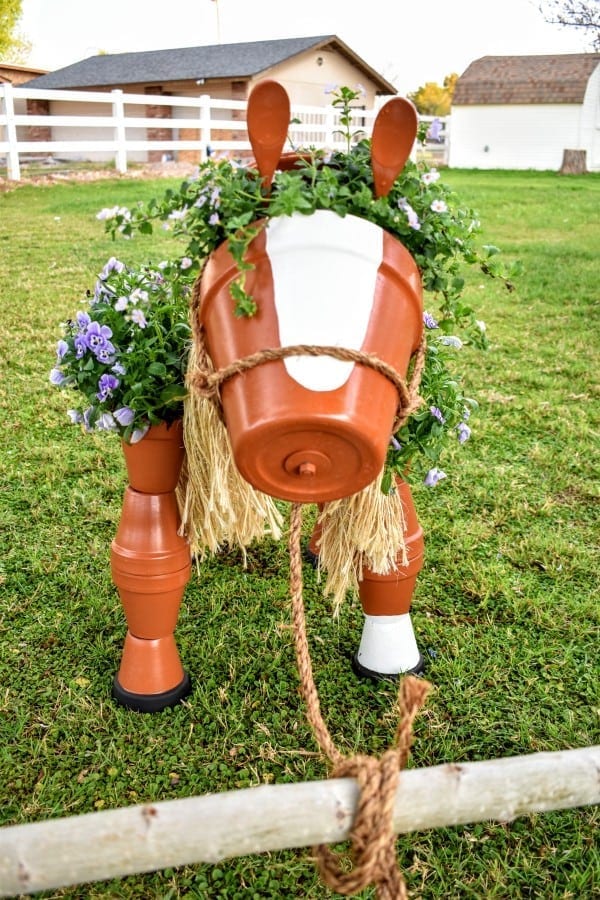
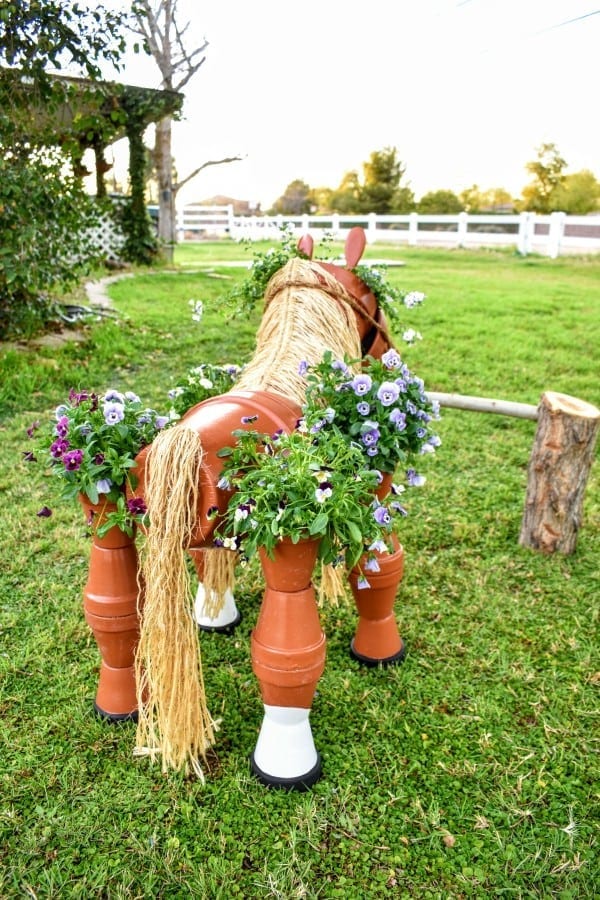
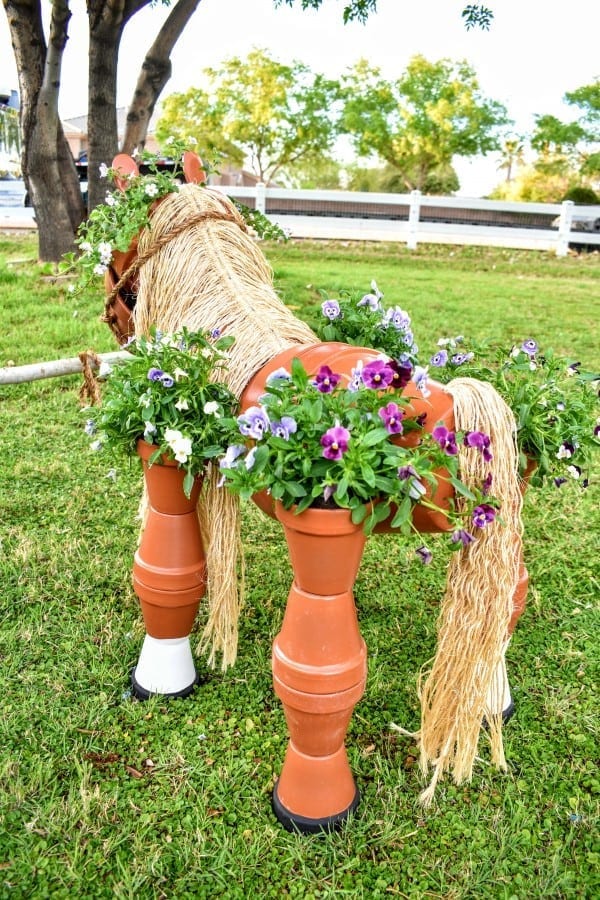
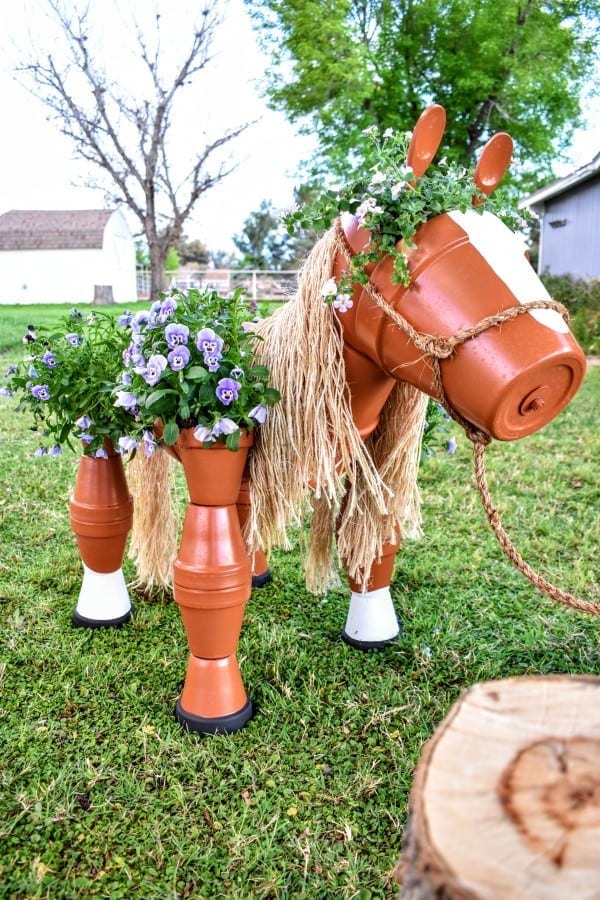
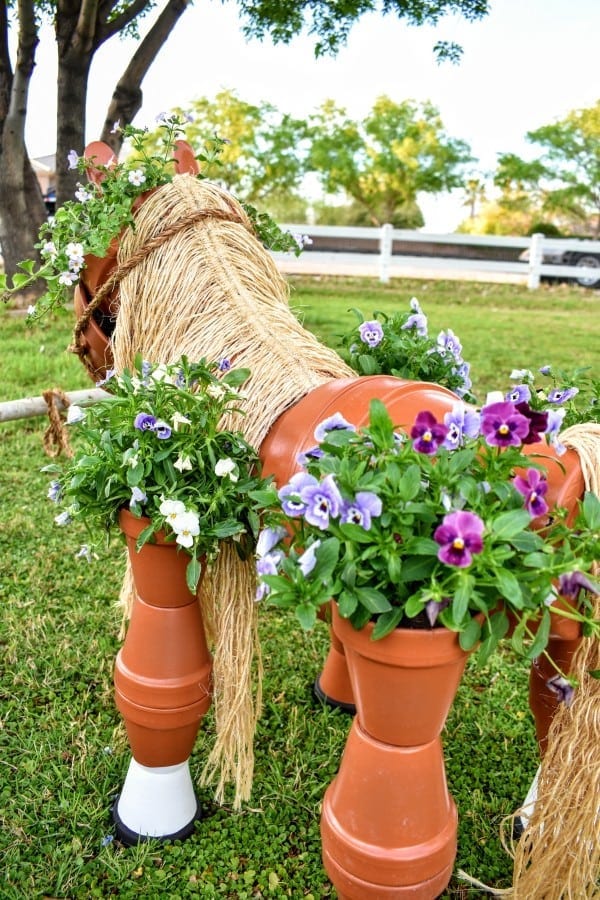
- Sixteen small clay pots with 4.25in wide top & 4in tall (Legs)-Both found at Lowe’s & Home Depot. In-store they are labeled “4 inch standard clay pot”.
- Two large clay pots with 9.75in wide top & 8.75in tall (Body)-Both found at Lowe’s & Home Depot. In-store they are labeled “10 inch standard clay pot”.
- Two clay pots with 8.25in wide top & 5.75in tall (Head and Neck)-Found at Lowe’s. In-store they are labeled “Azalea Pot”
- One clay pot with 8 1/2in wide top & 7 3/4in tall (Nose)-Both found at Lowe’s & Home Depot. In-store they are labeled “8 inch standard clay pot”.
- Garden sisal rope natural light (for the mane and tail) I used about 70ft so I bought the 100ft roll (you can also use yarn, or a mop head dyed to the color you want)
- Garden sisal rope dark (for the halter)
- Two wooden spoons (for the ears)
- Outdoor spray paint (this is the base color-it’s easiest to spray all of the pots before assembling) Remember to also paint those spoons for the ears!
- Paint and paint brush (for the hooves and markings) I used some old outdoor paint that lasts forever in the elements)
- Sand or small sand bags (when I added soil to the head, my horse became ‘front heavy’…adding sand or sand bags inside the back legs fixed this problem)
DIY Clay Horse Flower Pot
KC
I Loooooooove your blog and this little horse is soooooo adorable and how clever you are! I don’t think there is a cuter one on the web anywhere! I love the natural sisal rope you used for the mane, tail and halter too. I want to make one like yours this spring and put it out in the front yard! Great job!!!
Tee
Hi KC,
I’m so glad you enjoyed the tutorial! You’ll have to post pics of your new little pot horse in this comment section when you’re finished…would love to see it!
Tami
Hello Tiffany,
I just love your little clay pot horse. He is cute as a button! I’m going to have to put one in my garden. I have several horses and this would be so cute outside my home.
Tee
Glad you liked the post Tami! You’ll have to attach a photo of your flower pot horse in this comment section when you’re finished!
Vicky Miller
Love the horse and the chick feeder.. You are AWESOME!!!
Tee
Hi Vicky!
Glad you enjoyed! Thanks for stopping by!
Rhonda
I have to make at least two of these horses. One for me, and one for my friend that owns the ranch I ride at. Just wondering if you tried Dollar Tree plastic pots if filled with quick crete for strength?
Tee
Hi Rhonda! You would have to somehow add the concrete after connecting the pots together with the rods. If you could figure that part out then it would probably work. Let me know if you try it and how it turns out!
Tammie
Being we currently own 2 mini’s , 2 full size horse’s & a draft size horse, you know that I have to have one of these.
It’s soooooo adorable???? I can’t wait to start mine!!
Thanks for sharing!
Tee
Thank you for your sweet comments! I LOVE my little horse! He gets so many compliments from everyone! Feel free to post a pic of yours if you make your own!
Deb
I’m having trouble finding the size pots 8×6 for the neck and head. I’ve looked everywhere.
Tee
Maybe they will get them in stock yet. Supplies on everything this past year have been quite limited. Good luck!
Melodee Bonnes
Deb, I found mine finally at Lowes. I am making 2 horses. Taking me longer because of hand surgery but they are coming along great. Good luck. Melodee
Maria
Wow !! Thank you what a great job and thanks for the detailed info on how to drill and use screws to hold the legs and head together. My husband and I made one last year someone who had posted one but we used gorilla glue well in a few months it was falling apart so it’s been with his legs up all winter now that spring is here we’re getting ready to redo the garden and put fresh flowers and I’d like to put my horse back together so hopefully this will help going to try it this weekend thanks again for the info and your horse looks great by the way ???????????????????????? Love it !! Thanks for sharing
Tee
Thank you Maria!
I completely understand! I knew that gluing mine together would never last with our 110 degree summers, so the thread rod was the way to go! You’ll have to post a pic of your horse when you get it all together again!
May Brouhard
Here’s my horse. Not too hard to build until you get to attaching the legs. That part was hard. I broke all 4 shoulder pots the first time around. I had to get my son and grandson to help me the second time around. My horse still seemed a little unstable. You don’t want to move it around too much. Seems better now that I have the flowers in the pots. Very cute.
Tee
You’re horse turned out great May! I’ll have to agree with doing the legs…they can be a little tricky when you’re by yourself. Luckily I had the help of my hubby and once I filled my horse with soil and plants, mine was also a lot more stable. Love it!
Betsy
I’m having a hard time finding the right sized pots for the head & nose. Where did you find the ones you used?
Tee
Hi Betsy!
I found all my pots at Home Depot.
Nicole B
Hi!!! This is so cute! Typically how much does it cost to do this project ?
Tee
Hi Nicole!
From what I remember, after purchasing the pots and hardware, the cost was about $75.
sue
love this clay pot horse. so glad you posted these directions as i’m going to make one and have the pots, but was leery of just using a certain type of glue as i just questioned how well it will hold. this idea with the rods makes it so much more stable. now i just need to purchase the rods and all else to go with this and i will be set to go. also need some paint. did you paint the insides of the pots also to prevent the paint from blistering? i want to paint the horse like mt own horse “Montana”. as i work on this project i maybe popping in on some questions if i get stumped. you have such good step by step instructions. Thank you so much for your post.
Tee
Hi Sue! I did not paint the inside of my pots, but it might be a good idea to do it just in case. Your horse, Montana, is beautiful! You’ll have to post a pic of your pot horse when you’re done!
sue
Hubby made a comment to me last night that your directions are Great and that you took lots of time on the directions for the clay pot horse. need the rods and fixings before i can start to assemble mine. Thank you for your post. sue
Tee
Hi Sue! It did take me FOREVER to make step-by-step instructions with photos, but it was worth it! I wanted to make sure no one else had issues figuring it all out like I did! LOL
Mike
I followed your steps but I was able to countermeasure the top heavy issue. I used 12in all thread for the legs/hoofs and let the excess stick out down in the bottom of the hoof. I then filled the lef upside down filled the Hoof ith concrete and the all thread anchored it in. I only did this to the 2 back legs as a counter weight.
I also used Gorilla CONSTRUCTION glue and it held the pots together and is very strong and also filled the gaps in since the pots aren’t identically made.
Tee
Awesome Mike! Sounds like it worked great for you! Thank you for your comments!
Kitty
Hi Mike, I was thinking about using quick set cement in the bottom hoof pots as well. Glad to hear it works. I’m even more excited now to move forward with my clay pot horse. I plan on placing it near our water feature in our garden area. Love to make one for my brother and sister-in-law for Christmas as well. Wish me luck! Lol. Thank you for sharing your experience.
Jennifer Lucas
https://www.teediddlydee.com/diy-clay-horse_flower-pot-tutorial_/
Hello I have been making my own terra cotta pots creations but it takes me forever to drill through my pots. Idk what im doing wrong? Do you have any advice? Or where do you get your bits. I have a hammer drill so it should be strong enough? Id appreciate your response!
Tee
Hi Jennifer, I used a diamond bit for my drill and I bought them at Home Depot but you can get them anywhere. Many use masonry bits to drill through their pots but I think the diamond bits are stronger and sharper, and your hammer drill should be strong enough. I’m wondering if your pots have a baked glaze on them. Are they shiny? That might make them harder to drill through. I wish you luck!
Ursula
I love this horse project,my husband and I are retired, and this will be a good project for us this spring . Thank you
Tee
Thank you Ursula! I’m glad you like it!
Lisa
Hello, my name is Lisa!! My boyfriend John and I, made one of your projects!!
We put alittle bit of a twist to it, and converted it into a Unicorn for a big Mystical horse fan, and gave it to her for Easter 🐰Sunday…April 12th, 2020!!
We would like to Thank You for the easy instructions, and photos to go with it, which made it very simple to follow!! Thank goodness we only broke one body pot, as We were tightening up the neck to it!! 😊
Tee
Oh, my gosh! This is adorable Lisa! I love the idea of a unicorn! You both did a great job! Thank you for the pics!
Lisa
Another picture
Lisa
Hi Tee, Thank You for your compliments!!
We actually bought a kids Unicorn headband!! 😀 We then cut the ears away from the headband, and glued them to the inside of the wooden spoon ears…then We glued the headband itself, to the inside of the wooden spoon handles, to hold them in place!!
Now everyone We show Our pictures to, wants Us to make them one too!! 😂
Thanks again fot this Wonderful Idea!!
Tee
What a great idea for the unicorn horn and ears! It turned out very cute, as I’m sure lots of readers will appreciate knowing how to did that!
Lisa
Last angle
Tee
Your mane turned out great!
Lisa
The Famous Artists!! LOL
Tee
😉
Sharon
Oh my gosh this was so much fun and I absolutely love mine. You gave great directions. My only hiccup was cutting the rod and getting a nut on the end but a metal file and I was good to go. Thank you so much for the great directions!!!!!
Tee
Oh, my gosh, Sharon! That turned out great! I’m tickled that you made one too. Thank you for sharing your picture. 🙂
Theresa A
My girls wanted a unicorn, so we used your instructions, perfect by the way ,and the wet sand in the back legs works awesome, with a few changes my girls got a unicorn with bright colored yarn ,and a horn. We figure next year if they change their minds it’s a quick little repainting and changing the mane and tail. Flowers where picked by my grandson. Thank you so much, my family had fun making and picking everything out.
Tee
Oh, my goodness! That really turned out colorful and cute! I’m so glad you shared a picture with us! It is fun to see how different they all turn out to be.
Idie
I would to get your instructions please ..thank you
Tee
Hi Idie! I just emailed you the instructions. Enjoy!
Susan Branham
I have broken 3 pots trying to get the legs attached. What is the trick? I am not tightening them down and I have grommets on both sides of the leg pot. I am afraid to keep trying for fear of breaking more.
Tee
Hi Susan!
This is definitely the tricky part as I also broke a pot doing this. Try having a second person hold the body up while you attach the legs, as this makes a huge difference.
dora fabiana hubert
te felicito por la idea ,lo voy a intentar saludos de medanos argentina
Tee
So glad you enjoyed the post Dora, and thanks for stopping by!
Carol
Hi..my granddaughter is a barrel racer and this horse will be the perfect gift for her trainer Lindsey will love it . Thank you.
Tee
I am a barrel racer as well and I think they are cute for equestrians! Thank you for your sweet comments!
Teralind
Oh my goodness. Thank you so much for sharing your talent. I am going to attempt to make this and when I do I will post it.
Tee
Thank you Teralind, for your kind words. I would love to see your finished horse!
Gazza
Just found this, a must-have, thankyou.
Gazza from Dorset England XX
Tee
Thank you, Gazza, for your kind words!
MERCEDES PRIETO
Desde Euskadi, maravilloso trabajo intentare hacerlo para el verano próximo, muchas gracias
Tee
¡Eres muy bienvenido! ¡Gracias por su visita hoy!
CHRISTINE ROPPEL
LOVE this! You could also make it a cow! so fun!
Tee
Hi Christine,
Glad you enjoyed the tutorial! I didn’t even think about making a cow out of it…that would be adorable!!!!
Tim Carothers
Your step by step made it simple. i have been wanting to make one for a year but others online were not as detailed at your instructions were and were glued together which i didn’t think would hold up. I found that starting with a 1/8″ masonry bit and stepping up a few different sizes until i got the 5/16″ made drilling the holes so much easier.
Tim
Tee
Awesome idea! Thanks for sharing!
Melodie
I so want to buy your plans to make the clay pot horse but your payment screen is not working
Tee
Hi Melodie!
I think I fixed the problem! There was an ad covering the place to click to get to the directions. Try it again! 😉