
DIY Glass Bottle Tiki Torch-Video
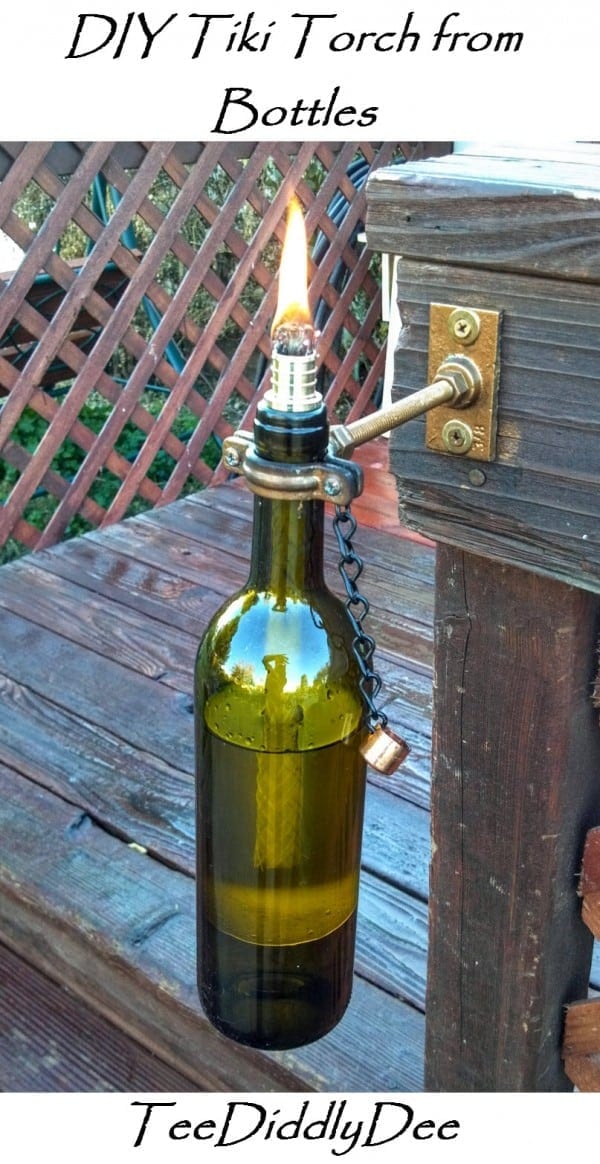
DIY Glass Bottle Tiki Torch
Glass bottle tiki torches are a great way to add some pizazz and ambiance to your outdoor lighting. The best part is that instead of just throwing all those glass bottles away, you can re-purpose them into something useful and eye-catching!
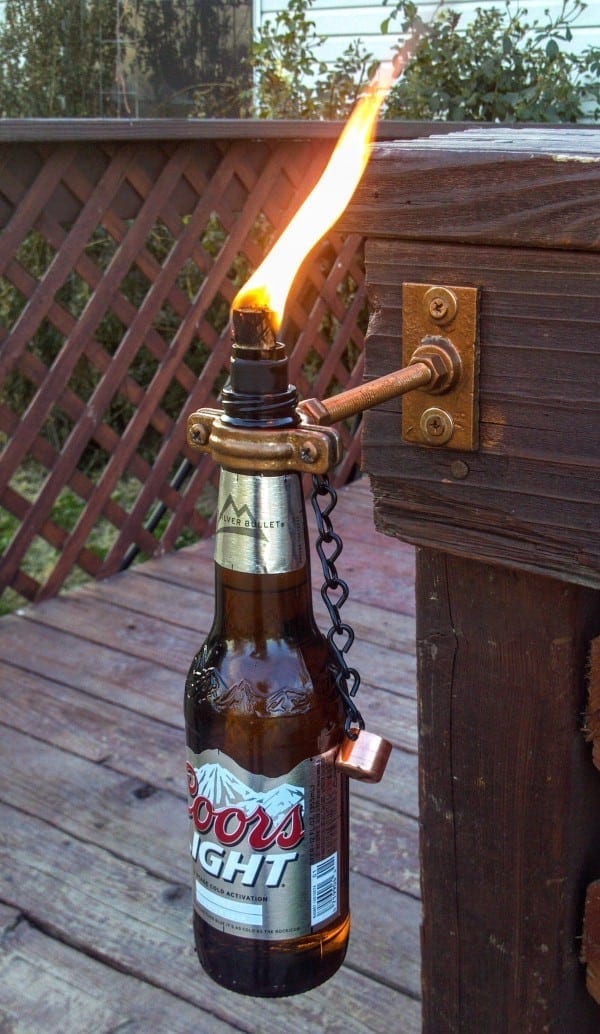
I used old wine and beer bottles, but you can use just about any kind of bottle.
DIY Glass Bottle Tiki Torch Tutorial
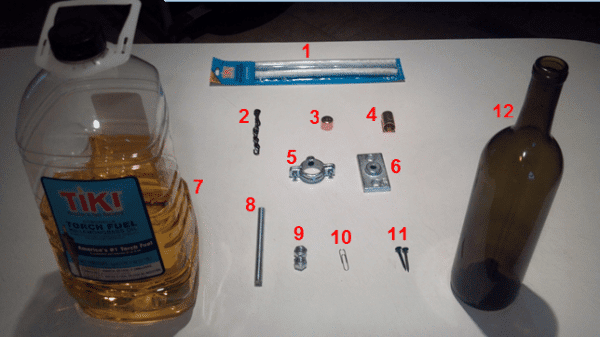
Tools & Supplies:
Tools
- Wire Nippers
- Funnel
- Hand Drill
- Pliers
- Hack saw
Supplies:
(Besides the bottles, I found everything here at Lowe’s)
- One Tiki replacement wick
- One 3/4in x3/4in brass coupling for a PEX pipe (this serves as the wick holder)
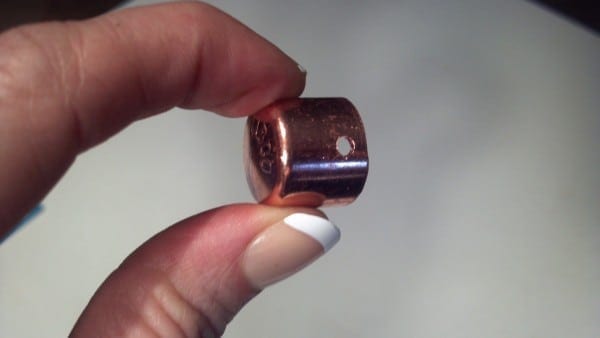
- One 1/2in copper cap
- Two hex nuts (threaded for 3/8in-16 thread rod)
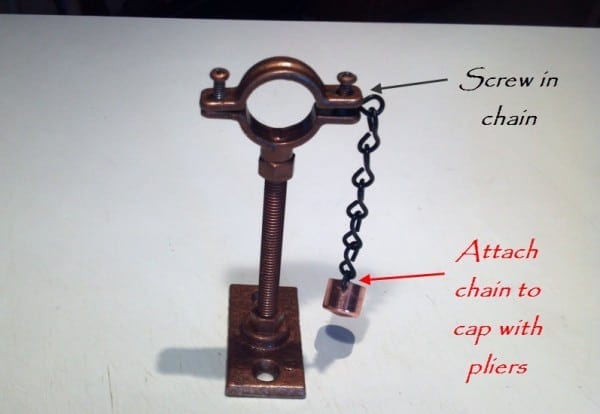
- 4 or 5 inches of small decorative chain
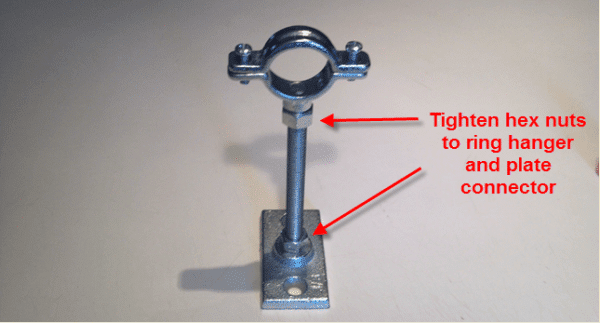
- One 3/4in split ring hanger (threaded for 3/8in-16 thread rod) You can buy them HERE or you can also get these at Lowes. Home depot sells them online but not in-store.. UPDATE: The 3/4″galvanized steel (instead of copper plated) from Lowes, (item 302049) fits perfect. For some reason the 3/4″copper plated one is slightly smaller and doesn’t fit as well.
- Two wood screws
- One Top plate connector (threaded for 3/8 in-16 thread rod)
- One 4 1/2in long, 3/8in diameter-16 zinc plated threaded rod (I bought a 3ft rod and cut into 8 pieces with a hack saw)
- Tiki torch fuel
- One empty glass bottle
DIY Glass Bottle Tiki Torch Instructions
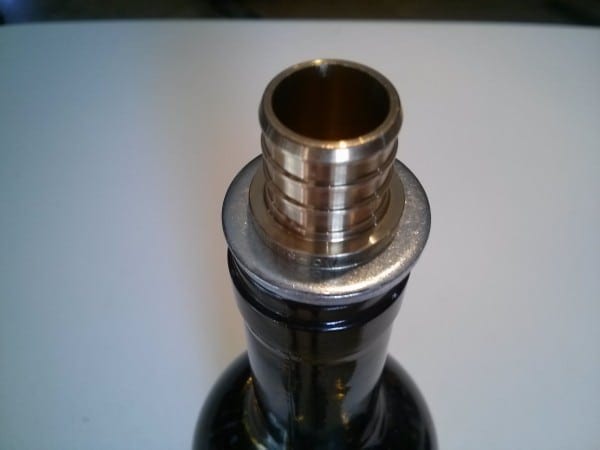
Important: Bottle opening sizes can vary so you may need to also purchase a 16mm flat washer to make sure wick holder fits.
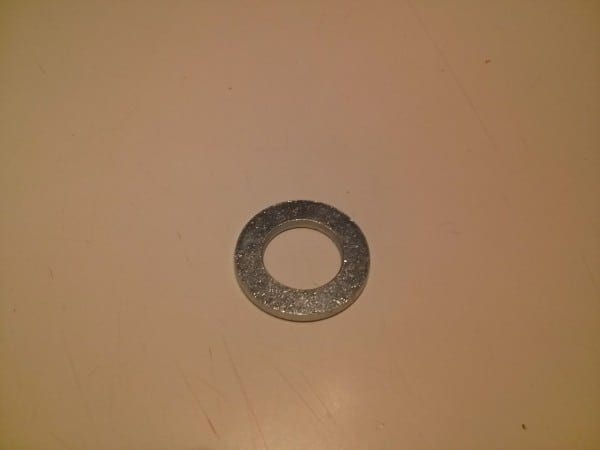
To see if you will need the washer or not, gather the coupling (Supplies #2) and place it right on top of the bottle opening
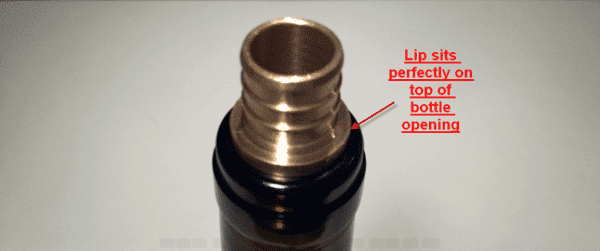
If opening of bottle is too large for the coupling, place the 16mm flat washer between the bottle opening and the coupling
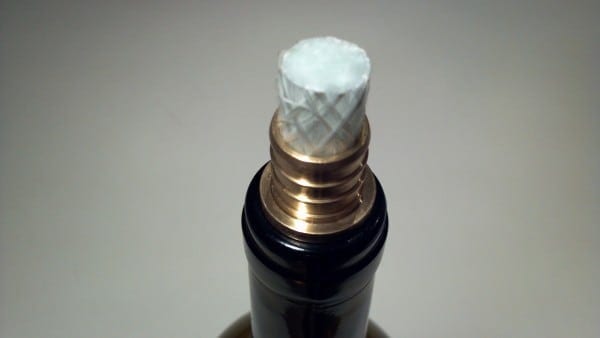
Now slide the wick (Supply #1) into wick the coupling leaving about ¼ -1/2in of the wick sticking out of top
Wall Mount Assembly:
Screw two nuts (Supply #4) onto both ends of the rod (Supply #9).
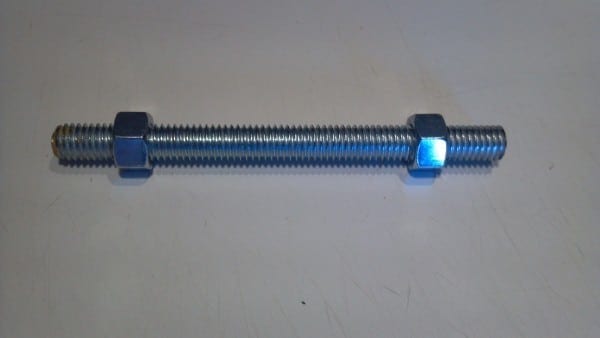
Screw the plate connector (Supply #8) onto one end of the rod.
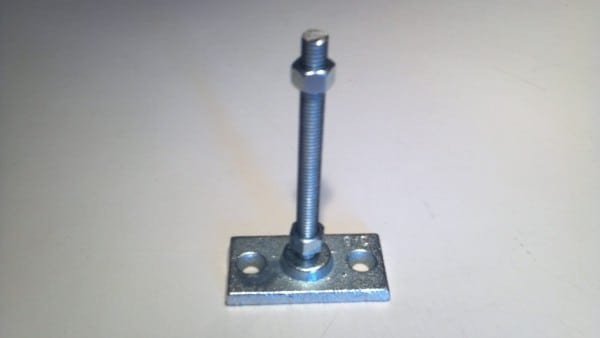
Screw the ring hanger (Supply #6) onto the other end of the rod.

Now tighten everything up.
Drill a small hole into the cap (Supply #3)
Screw in the chain (Supply #5) and attach the other end of the chain to the cap with pliers.
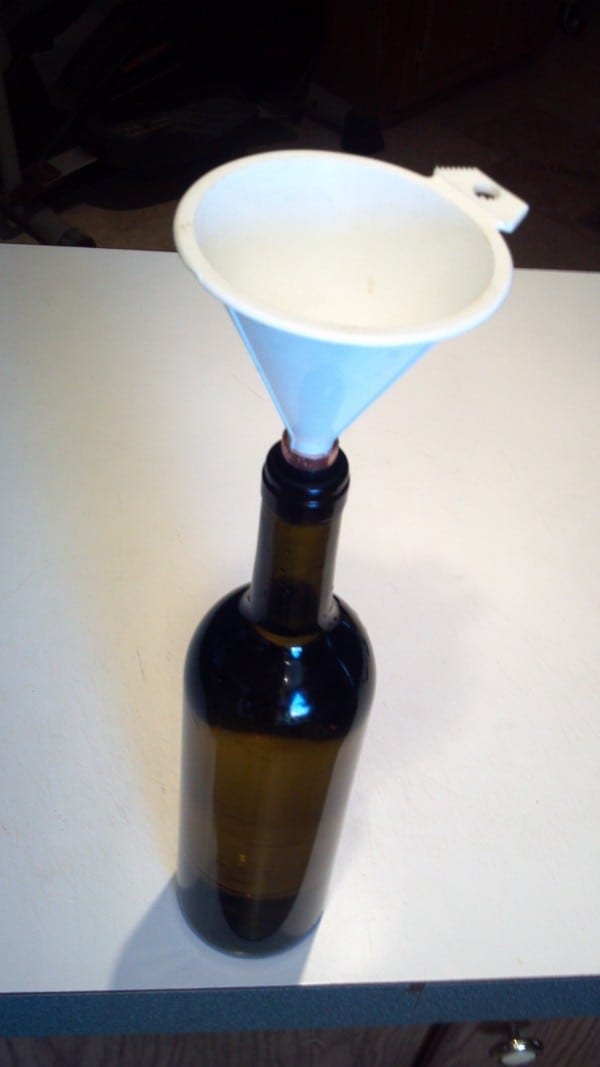
Fill the bottle up to the neck with Tiki torch fuel, and let the wick soak up the fuel before lighting!
(I fill my bottles to the VERY top, right below the wick holder because I like a larger flame)
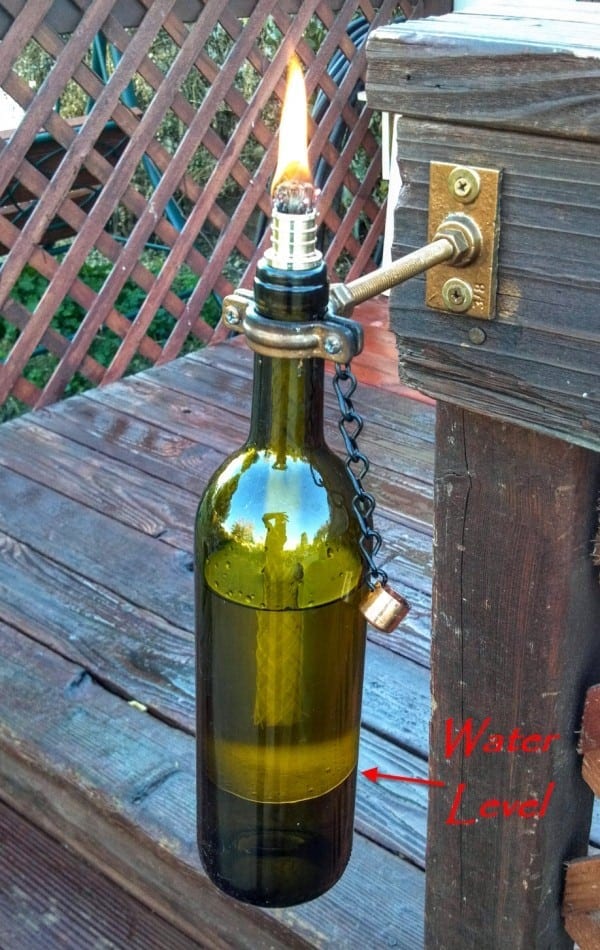
Screw on the wall mount, attach the bottle, and light!
To save fuel in large wine bottles, fill the bottom of the bottle with water. The water level should be a few inches below where the bottom of the wick sits inside bottle. Then fill the rest of the bottle with fuel. Water sinks and oil floats so the wick isn’t affected by the water!
Denise
Very awesome diy idea
Tee
Thank you Denise! This project has been very popular with my readers! 😉
Cynthia Rodriguez
Can’t wait to see your next post.
Tee
I’m glad you enjoyed this project Cynthia! 🙂
Deb
What did u use for the wick holder?
Tee
Hi Deb! I have instructions for my members on what I used and how I made these cute wine bottle tiki torch kits… All you have to do is sign up for free and you will be directed to the tiki torch kit directions. It costs nothing to sign up AND I’m getting ready to hold a drawing for my MEBMERS ONLY for one of these tiki torch kits! So make sure to become a member by scrolling up the page a little and click where it says ‘sign up here’ 😉
Pharmd511
Very nice site!
Tee
Thank you so much! I’m glad you stopped by! 😉
Erija
Would love to know how u made this
Tee
Hi Erija,
I have a whole tutorial on how to make this available to anyone who subscribes to my site. As soon as you subscribe, you will have access to the tutorial 🙂 To subscribe, click HERE.
Jackie
Having trouble finding supplies, the flange and the neck ring
Tee
Hi Jackie!
I just changed the link that takes you to a new place to buy the flange and neck ring, so you’re good to go now!
theo kieti
whats id this tikki oil ur using . any other name for this fuel?
Tee
Good question! I did a little research and found that Kerosene, or paraffin oil is ideal for tiki torch use because of its long burn time and minimal scent. I hope this helps!
Shane T Passey
So the 3/4×3/4 per coupler you mention in your instruction does not hold my wick tight. Does it swell when it saturated with oil. If not my wick will fall into the bottom of the bottle. I have seen where others use crafting stones to let the wick set on but you don’t have those in yours. How are you keeping the wick from falling thru the pen coupler? It does not hold the wick at all
Tee
Hi Shane,
Usually the wicks I use are fat enough for the coupler to hold. I have had a few instances where the wick was a little too skinny and I used a washer that was small enough on the inside to hold the wick tight, and large enough on the outside to sit on top of the coupler. I hope that helps!
Don S
Thank you! Just in time to replace old torches. Your instructions are perfect, best, clearest of any web site.
Tee
Thank you Don!
Dane Kinderlan
Is there a way to make the flame bigger?
Tee
Hi Dane,
I think all of the wicks burn a little different so you can try another one to see if the flame is bigger.
Kara
Help! I purchased all the pieces to assemble this project, but the 3/4″ split ring hanger doesn’t come close to closing around the neck of the wine bottle. I’ve tried it with 8 different wine bottles and none fit. What am I missing?! Thank you!
Tee
Hi Kara!
I remember now…The 3/4″galvanized steel (instead of copper plated) from Lowes, (item 302049) fits perfect. For some reason the 3/4″copper plated one is slightly smaller and doesn’t fit as well. Who would have known that although the copper one is the same size, it’s actually just a smidge smaller than the galvanized steel one. Hope that helps!!!
Mantha WestberryDixon
Where can I purchase the top plate connectors got everything but having trouble finding them
Tee
Hi Mantha,
I used to get mine at Lowe’s but if they don’t have them, you can order one HERE.
Hope that helps!